Ordering prototypes like they were fast food

Has DIY Become Click And Buy?

We are living in great times for DIY, although ironically some of that is because of all the steps that we don’t have to do ourselves. PCBs can be ordered out easily and inexpensively, and the mechanical parts of our projects can be ordered conveniently online, fabricated in quantity one for not much more than a song, or 3D printed at home when plastic will do. Is this really DIY if everything is being farmed out? Yes, no, and maybe.

It all depends on where you think the real value of DIY lies. Is it in the idea, the concept, the design? Or in its realization, the manufacturing? I would claim that most of the value actually lies in the former, as much as I personally enjoy the many processes of physically constructing the individual parts of many projects.

For instance, I designed and built a hot-wire CNC foam cutter recently. Or better, I designed a series of improved versions, because I never get anything right on the first try. All along the way, I 3D printed new and improved versions of the plastic parts, ironing as many of the little glitches out as I had patience for. This took probably a good handful of weekends’ time, spread out over a couple months, but in comparison to time spent testing, fixing, and redesigning, very little time or effort was spent in the physical building.

Moreover, I bought most of the parts at the hardware store. The motor controller shield and cheap Arduino clone came from eBay. And even those that I did manufacture myself, the 3D-printed bits, were kind of made by a machine — my experience of the whole process wouldn’t have been any different if I ordered them out.

Of course craftsmanship still exists, and we see that in Hackaday projects all the time. Heck, I’ll admit that I still enjoy a lot of the process of making things with my own hands for its own sake. It’s peaceful. But if there’s one thing that the rapid proliferation of ideas and projects that have been facilitated by 3D printing and cheap short-run PCB services, it’s that the real value of many projects lies in the idea, and the documentation. Which is to say, I gotta get around to writing up that foam cutter…


DIY castellated PCB connectors

Snip Your Way To DIY PCB Castellations

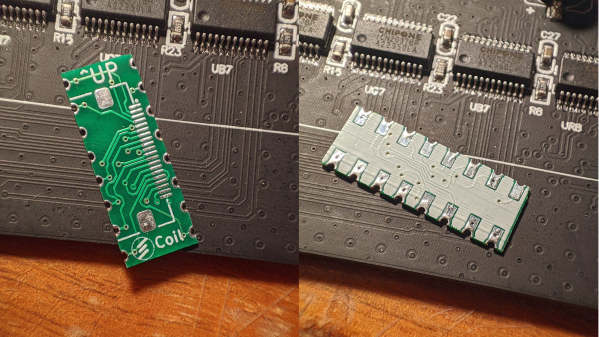
Castellated PCB edges are kind of magical. The plated semicircular features are a way to make a solid, low-profile connection from one board to another, and the way solder flows into them is deeply satisfying. But adding them to a PCB design isn’t always cheap. No worries there — you can make your own castellations with this quick and easy hack.

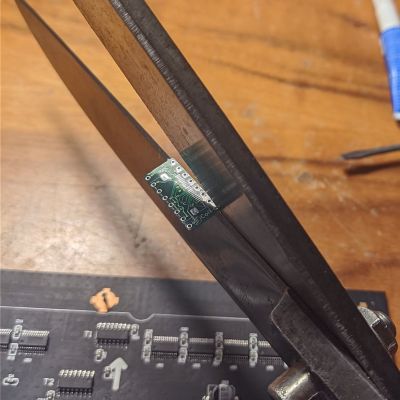
Scissors cutting a PCB through vias to make castellations[@CoilProtogen] doesn’t include much information in the Twitter thread about design details, but the pictures make it clear what the idea is here. OEM castellations are really just plated areas at the edge of a board that can be used to tack the board down to another one without any added hardware. The hack here is realizing that lining up a bunch of large-diameter vias and cleaving them in half with a sharp pair of scissors will result in the same profile without the added cost. The comments on the thread range from extolling the brilliance of this idea to cringing over the potential damage to the board, but [@CoilProtogen] insists that the 0.6-mm substrate cuts like butter. We’d worry that the plating on the vias would perhaps tear, but that seems not to be the case here.

The benefits of a zero-profile connection are pretty clear in this case, where castellated PCBs were used to replace bulky header-pin connectors on a larger PCB. We can see this technique being generally useful; we’ve seen them used to good effect before, and this is a technique we’ll keep in mind for later.

Controller Swaps Can Save An HDD If You Do It Right

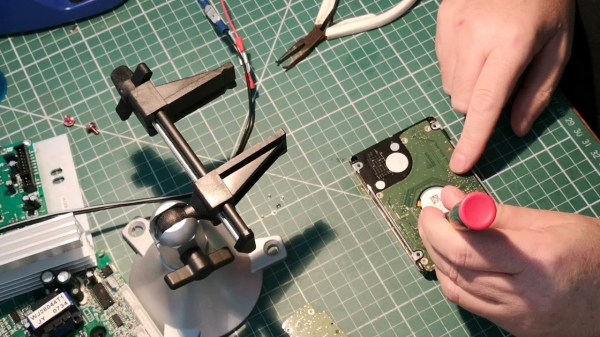
Hard drives are fragile and reliable all at once. It’s entirely possible to have a hard drive fail, even if your data is still in perfect condition on the magnetic platters inside. [Keith Sherry] was recently trying to recover data for a friend off a damaged hard drive, and demonstrated that modern twists on old tricks can still work.

The drive in question was an old 160GB disk that itself was being used as a backup. Of course, a backup you haven’t tested is no backup at all, and this one failed in the hour it was most needed.

The suspicion was that the controller board was the culprit, and that swapping the board out might bring things back to life. Back in the day, this was a common hacker trick. However, it often fails with modern drives, which store a great deal of drive-specific calibration data on the controller board. Without this specific data, another controller will be unable to access the data on the drive, and could even cause damage.

However, as [Keith] demonstrates, there is a way around this. A controller from a similar drive was sourced, albeit from a SATA version of the drive versus the original which used USB. A single chip is then removed from the original controller, containing the calibration data specific to that drive. Soldering this chip onto the new controller got everything up and running, and the files could be recovered.

If your data is invaluable, it’s likely worth paying a professional. As [Keith] demonstrates though, the old tricks can still come in handy as long as your techniques are up to date. DIYing your own data recovery can be done, it’s just risky is all.

Oh, and don’t forget — once you’ve recovered the files, throw the drive away. Don’t keep using it! Video after the break.

Continue reading “Controller Swaps Can Save An HDD If You Do It Right”

Arduino Drives Faux Spirograph

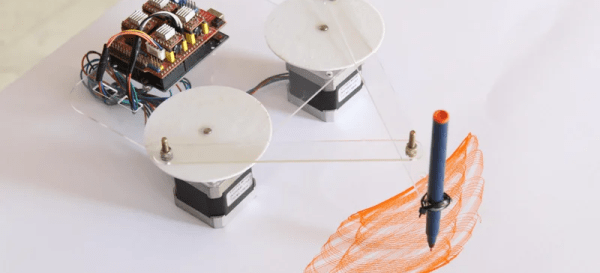
The holidays always remind us of our favorite toys from when we were kids. Johnny Astro, an Erector set, and — of course — a Spirograph. [CraftDiaries] has an Arduino machine that isn’t quite a Spirograph, but it sure reminds us of one. The Arduino drives two stepper motors that connect to a pen that can create some interesting patterns.

The build uses a few parts that were laser cut, but they don’t look like they’d be hard to fabricate using conventional means or even 3D printing. The author even mentions you could make them out of cardboard or foamboard if you wanted to.

Continue reading “Arduino Drives Faux Spirograph”

Build Your Own Submarine

If you are tried of building things that fly, why not try a submarine like [DIYPerks] did? As you can see in the video below, the key is to control buoyancy, and the mechanism used is impressive. The sub has two giant syringes fore and aft to compress or decompress water. The plungers are now 3D-printed actuators that travel on a lead screw. Two high-torque motors and some batteries sandwiched in acrylic disks make up the rest. This is a big vessel — you won’t be trying this in your bathtub and maybe not even your pool unless it is a big one.

Of course, everything needs to be watertight. Instead of trying to waterproof a power switch, this sub uses a reed switch so that a nearby magnet can turn it on. Not an original idea, but we always think it is more elegant than seals and potting compounds.

Continue reading “Build Your Own Submarine”

Naruto PCB Art

Ninja Art: PCB Nightlight Jutsu!

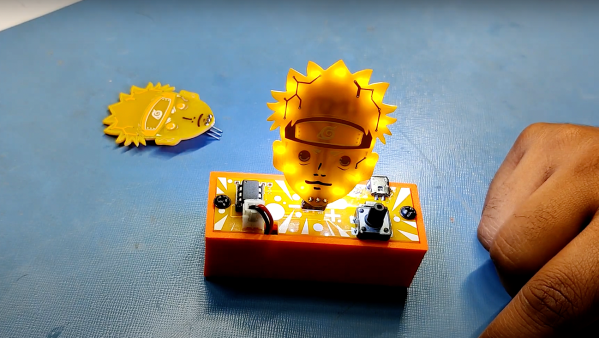
This latest PCB artwork comes to you courtesy of [Arnov]. His Naruto nightlight is definitely going to get your anime-loving friends’ attention.

The LED illumination styles are controlled by an ATtiny13A microcontroller. He probably could have opted for a 555 timer with this one, but maybe he wanted easily programmable blinking patterns. He also programmed the ATtiny to read a small button which he used to cycle through different illumination styles. Finally, a small LiPo battery makes this project pretty portable, so you can reposition it freely around your work area as you might like.

With all that being said, the meat of this project is in the physical dimensional design of the PCB. [Arnov] was able to design the circuit board in the shape of Naruto’s head, with pretty good detail for his hair, eyes, and headband. If you’ve ever tried your own PCB art, you know that it can be a fairly onerous task. He creatively used the copper traces as features within the PCB, in this case, Naruto’s ninja headband. We thought the subtle decision of putting the LEDs on the backside of the PCB was smart as well. By doing so, he used the solder mask as a natural light defuser which really gave the PCB a cool, yellow glow. Carefully removing the copper layer and not using a copper pour really aided in the aesthetic. He was also smart to opt for yellow solder mask since Naruto’s hair is yellow.

All in all, two thumbs up [Arnov]. While you’re here, check out some other great PCB art around Hackaday.

Continue reading “Ninja Art: PCB Nightlight Jutsu!”

Lasers Make PCBs The Old Fashioned Way

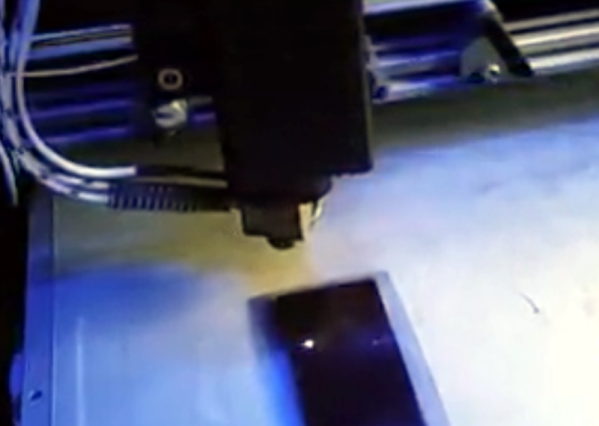
There are many ways to create printed circuit boards, but one of the more traditional ways involves using boards coated with photoresist and exposing the desired artwork on the board, usually with UV light. Then you develop the board like a photograph and etch it in acid. Where the photoresist stays, you’ll wind up with copper traces. Hackers have used lots of methods to get that artwork ranging from pen plotters to laser printers, but commercially a machine called a photoplotter created the artwork using a light and a piece of film. [JGJMatt] sort of rediscovered this idea by realizing that a cheap laser engraver could directly draw on the photoresist.

The laser dot is about 0.2 mm in diameter, so fine resolution boards are possible. If you have a laser cutter or engraver already, you have just about everything you need. If not, the lower-power laser modules are very affordable and you can mount one on a 3D printer. Most people are interested in using these to cut where higher power is a must, but for exposing photosensitive film, you don’t need much power. The 500 mW module used in the project costs about fifty bucks.

Continue reading “Lasers Make PCBs The Old Fashioned Way”