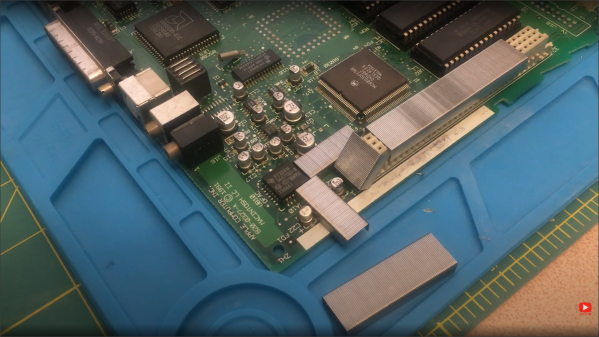
The Apple-I was a far cry from Apple’s later products. A $666 single-board computer, the product had some unique design features including using a shift register for video memory to save money. The shift registers of the day required high-current clock pulses that ranged from -11 to 5V and there was a DS0025 clock driver chip to handle the job. [Ken Shirriff] takes the unusual chip apart for us in a recent blog post.
The use of a shift register as memory isn’t a new idea. Really old computers like EDSAC used mercury delay lines as memory which was essentially a physical shift register. In those cases, the ALU and other processing only had to deal with a bit at a time, further simplifying things. For the Apple, there were seven shift registers to store 6-bits of display data and a cursor position. The 6 bits of character data drove — indirectly — a character generator ROM to convert the data into dots for the display.
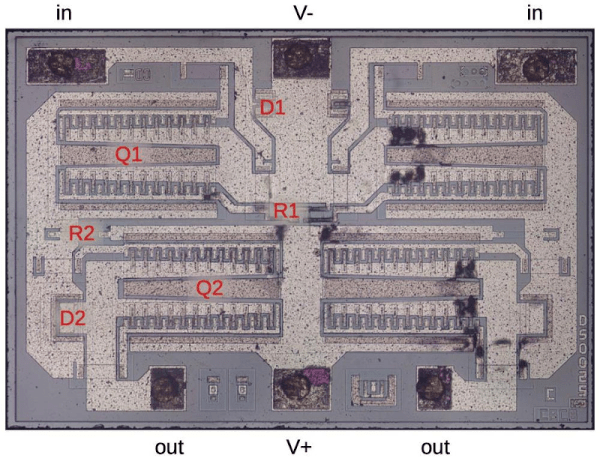
Driving all those shift register flip flops requires a lot of clock current, so the DS0025 uses an unusual transistor design. There are 24 separate emitters in two groups. It acts like a large transistor, but you could also consider it as two 12-emitter transistors or 24 separate transistors in parallel. The metal wiring, interestingly enough, tapers because at the start of the conductor, the current for all 12 sub-transistors flows, but by the end, it is only the current for the last sub-transistor, so the conductor doesn’t have to be as wide. In addition, the two transistors have to have matched resistance which requires careful design so the transistors turn on at the same time.
The final result is an inverter that can provide 1.5 amps. This current helps overcome the relatively large capacitance in the shift register’s clock line. The clock rate was 1 MHz and the load capacitance was about 150 picofarads.
We enjoy [Ken’s] posts ranging from mysteries to space hardware. It is always interesting to see what is inside these devices or, at least, what was in the old devices we’ve all seen.