Hackaday Links Column Banner

Hackaday Links: August 22, 2021

It’s usually pretty hard to miss when Boston Dynamics drops a new video of one or more of their robots doing something flashy. But in case you’ve been under a rock the last few days, you might want to check out the Atlas parkour video. We last saw a pair of Atlas robots busting some dance moves with a few other Boston Dynamics robots, and while that was an incredible demonstration of the level of control they’ve engineered, they really were just playing back a series of preprogrammed moves. The obstacle course demo, though, seems like something different. There’s a good overview of the demo in IEEE Spectrum, where they point out that this is the first time we’ve seen Atlas show off using all four limbs at once for coordinated motion — that sweet vault over the fence. And really, it’s hard not to watch such human-like moves and not think that it’s just somebody in a robot suit. Even the stumbles feel human. What’s even more fun, though, is the behind-the-scenes look at Atlas. Especially for the face-plants and fails.

August 19 was the 100th anniversary of the birth of Gene Roddenberry, the creator of Star Trek. In the process of just trying to build a fictional universe to tell some interesting stories and make a little money, he managed to spawn not only an enduring science-fiction franchise but also to inspire generations of future scientists and engineers. The number of things that Star Trek writers invented to move their stories along that later showed up as actual products is astonishing, as are the weird coincidences like placing the fictional planet Vulcan in orbit around star 40 Eridani, only to find out that there’s actually a potentially habitable exoplanet circling that star. As a salute to Roddenberry, the Deep Space Network was used last week to send a message to 40 Eridani. One of the big dishes at the Goldstone DSN site in California blasted the 20-kW signal out on Thursday, starting it on its 16.5-year journey to the stars. We looked for details on what was sent, but the only description was that it contained a 1976 recording by the Great Bird of the Galaxy himself. Whatever it was, it’ll take at least 33 years to see if we get a response. Mark your calendars.

I’ve been doing a lot of work on cars lately, a task made considerably more approachable by the fact that the newest vehicle in the family fleet is from 2004. I find working on cars very satisfying, and I’m dreading the day when we’re forced to replace one of our old-timers with something more modern and less amenable to driveway repairs. That said, there’s also a lot to like about newer vehicles, particularly electric vehicles. It would be nice to have a way to move away from ICE vehicles while still being able to work on your ride. But if Ford’s tease this week of an EV crate motor comes to pass, it just might be the best of both worlds. The motor, bearing the unfortunate moniker “Eluminator” — just can’t resist putting that “E” in there, can they? — is supposed to be a drop-in replacement for an internal combustion engine, suitable for a “restomod” project. These car builds aim to make a car look as vintage as possible, but radically change the guts to add functionality — think a Raspberry Pi running a Spotify client that’s stuffed into a vintage Atwater Kent cathedral radio. We like the idea of electrifying an old car, but it seems to us that a crate motor is only part of the answer. Is there such thing as a crate battery?

And finally, there was an interesting article detailing a new approach to repairing ruptured eardrums using 3D printing. The tympanic membrane is a thin, delicate sheet of tissue that is easily punctured, whether by blunt-force trauma, infections, or even by loud sounds like gunshots or explosions. Hearing is compromised when an eardrum is damaged, and the hole can serve as a route for pathogenic microorganisms to get into the inner ear. Fixing the hole usually requires a graft from the patient’s own tissues, often sourced from the little dongle covering the ear canal. But this tissue isn’t nearly as thin as the natural eardrum, and while hearing can be restored, it’s often muddy and muffled. The new technique is to 3D-print a custom graft for the patient, using a special polymer and printer. The artificial membrane mimics the structure of the natural tympanic membrane and restores more natural hearing immediately. It also serves as a scaffold for the body to fill in with natural cells, hopefully returning natural function as the 3D-printed part is absorbed. It’s interesting work, and the video in the linked article is pretty fascinating too.

3D Printing Liquid Crystal

If you think at all about liquid crystals, you probably think of display technology. However, researchers have worked out a way to use an ink-jet-like process to 3D print iridescent colors using a liquid crystal elastomer. The process can mimic iridescent coloring found in nature and may have applications in things as diverse as antitheft tags, art objects, or materials with very special optical properties.

For example, one item created by the team is an arrow that only appears totally green when viewed from a certain angle. The optical properties depend on the thickness of the material which, being crystalline, self-organizes. Controlling the speed of deposition changes the thickness of the material which allows the printer to tune its optical properties.

The ink doesn’t sound too exotic to create, although the chemicals in it are an alphabet soup of unpronounceable organic compounds. At least they appeared available if you know where to shop for exotic chemicals.

The iridescent coloring is common in nature, so art objects like butterfly wings are natural with this method. While inkjet printers aren’t common in the hacker community, they aren’t that hard to create, so this seems like it would be repeatable in a garage lab.

Liquid crystals have all kinds of interesting properties and we wonder if this material would help you print those sorts of things. If you want to experiment, we have seen a few hacked inkjet printers.

Thanks [jscotta] for the tip.

DIY LED Cube For The Masses

No matter what the size or shape of an LED, it brings out the curiosity in every hardware nerd, and is the lifeblood of badge life around the planet. Then there is the LED cube that takes LEDs to all sides — literally. [Tomverbeure] had his own adventure of creating an LED Cube by piecing together Pixel Purses and a Cisco3G Modem.

A quick search for Pixel Purse on the internet reveals a toy lady’s handbag with an LED matrix embedded in one side. [tomverbeure] tore down 12 of these so as to get two panels for each side of his creation. After a little bit of experimenting with PCB corner brackets, he finally got it right and he is able to merge the pieces together to form the cube.

Next comes the brain and the elected device An FPGA from an HWIC-3G-CDMA modem. Cisco routers have extension slots and the HWIC connector on this particular piece had usable GPIOs that connect directly to the Altera FPGA. Inside the FPGA, a RISC-V soft CPU is used to generate images that get processed and dispatched in a hardware block. [Tomverbeure] does a detailed explanation of the implementation for all the blocks which were written in SpinalHDL. The video below shows the project in action.

We love the detail that [Tomverbeure] provides and hope it does not drive up the prices of the pixel purse too much. If you are looking for a more fine pitched cube, look no further than this one. If you end up making your own, be sure to send us a link.

80's vintage Tomy Omnibot and Futaba RC Transmitter

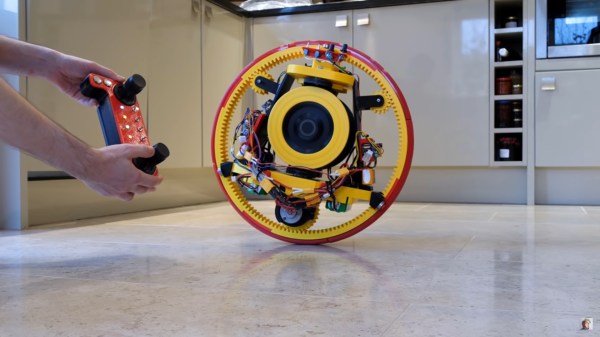
80’s Omnibot Goes RC And Gets A Modern Refresh

Thrift stores, antique shops, knick-knack stores- Whatever you might call them in your locale, they’re usually full of “another man’s treasure”. More often than not, we leave empty-handed, hoping another shop has something we just can’t live without. But on rare occasions, when the bits all flip in our favor, we find real gems that although we have no idea what we’re going to do with them, just have to come home with us.

[Charles] ran into this exact situation recently when he walked into yet another shop among many dotting the highways and byways of Georgia and spotted it: A Tomy Omnibot beckoning to him from the 1980s. [Charles] didn’t know what he’d do with the Omnibot, but he had to have it. Not being one to have things just sit around, he set out to make it useful by combining it with an era-appropriate Futaba 4 channel AM radio, and updating all of the electronics with modern hardware.  The Mission? Drive it around at car shows and meetups where he already takes his 1980’s era vans.

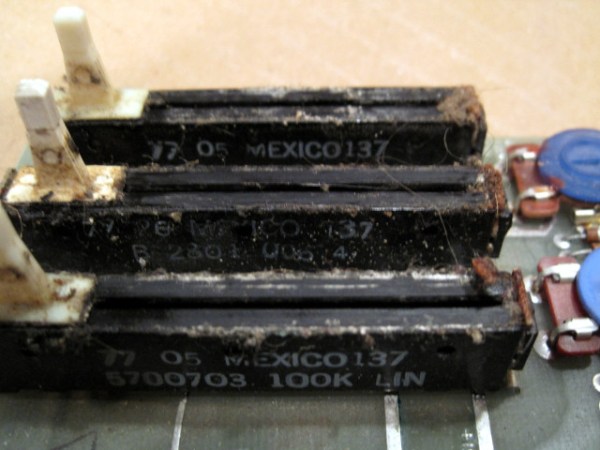
We’re not going to spoil the goodies, but be sure to read [Charles]’ blog post to see how he hacked a modern 2.4 GHz 7 channel radio into the vintage Futaba 4 channel AM radio case. We appreciated his analytical approach to meshing the older gimbals and potentiometers with the new radio guts. Not to mention what it took to get the Omnibot back into service using parts from his battle bots bin. You’ll love the attention to detail on the new battery, too!

We’ve featured [Charles] work in the past, and his Power Wheels racer fed by a recovered Ford Fusion battery is simply unforgettable. You might also appreciate another Omnibot revival we featured recently. And as always, if you have a hack to share, submit it via the Tip Line!

Automated musical instrument with LED array

ESP32 Is The Brains Behind This Art Installation

The ESP32 has enabled an uncountable number of small electronics projects and even some commercial products, thanks to its small size, low price point, and wireless capabilities. Plenty of remote sensors, lighting setups, and even home automation projects now run on this small faithful chip. But being relegated to an electronics enclosure controlling a small electrical setup isn’t all that these tiny chips can do as [Eirik Brandal] shows us with this unique piece of audio and visual art.

The project is essentially a small, automated synthesizer that has a series of arrays programmed into it that correspond to various musical scales. Any of these can be selected for the instrument to play through. The notes of the scale are shuffled through with some random variations, allowing for a completely automated musical instrument. The musical generation is entirely analog as well, created by some oscillators, amplifiers, and other filtering and effects. The ESP32 also controls a lighting sculpture that illuminates a series of LEDs as the music plays.

The art installation itself creates quite haunting, mesmerizing tunes that are illustrated in the video linked after the break. While it’s not quite to the realm of artificial intelligence since it uses pre-programmed patterns with some randomness mixed in, it does give us hints of some other projects that have used AI in order to compose new music.

Continue reading “ESP32 Is The Brains Behind This Art Installation”

Electromagnetic Interference For Fun And Profit

There was an urban legend back in the days of mechanical electricity meters, that there were “lucky” appliances that once plugged in would make the meter go backwards. It probably has its origin in the interaction between a strongly capacitive load and the inductance of the coils in the meter but remains largely apocryphal for the average home user. That’s not to say that a meter can’t be fooled into doing strange things though, as a team at the University of Twente have demonstrated by sending some more modern meters running backwards. How have they performed this miracle? Electromagnetic interference from a dimmer switch.

Reading the paper (PDF link) it becomes apparent that this behavior is the result of the dimmer switch having the ability to move the phase of the current pulse with respect to the voltage cycle. AC dimmers are old hat in 2021, but for those unfamiliar with their operation they work by switching themselves on only for a portion of the mains cycle. The cycle time is varied by the dimming control. Thus the time between the mains zero-crossing point and their turn-on point is equivalent to a phase shift of the current waveform. Since electricity meters depend heavily upon this phase relationship, their performance can be tuned. Perhaps European stores will now brace themselves for a run on dimmer switches.

If you’re curious about these old-style dimmers, take a look at some of their basic functionality.

Thanks [Dorus] for the tip.

Two-Part Primer In A Can Is A DIY Dream Come True

When putting together a home workshop, available floor space is often the deciding factor when it comes time to pick tools and equipment. This ultimately leads to some very difficult decisions, and we’d wager there isn’t a hacker or maker reading this that hasn’t had to pass on a new piece of gear because they didn’t have anywhere to put it.

For example, the average home gamer isn’t going to have a paint booth and spraying equipment, so they have to settle for a rattle can in the backyard. Traditionally this has limited the kinds of products you can realistically apply, but as [Eric Strebel] shows off in his latest video, it seems like spray can technology is starting to catch up.

3D printed part with two coats of spray primer applied
The finish after two coats of primer.

Specifically, he’s been working with a canned two-part primer that doesn’t require any complicated mixing or special equipment to apply. After hitting a plunger on the bottom, a small compartment containing the activator is ruptured and the reaction begins. From that point, you’ve only got 24 hours to use the contents of the can before it cures. But since you only need to wait about 10 minutes between coats, that should give you plenty of time to complete the project.

In the video, [Eric] demonstrates how quickly this high-build primer can smooth out the layer lines on a 3D print. While you’ll still need to sand and potentially break out the spot filler to achieve that perfect finish, it’s clear that the primer works much better than anything we’re used to seeing come out of a can. Even after just two coats, the results are truly remarkable.

If there’s a downside, it’s that a can of this primer will run you about $25 USD. That’s about five times the cost of the Rust-Oleum Filler Primer that usually gets recommended in DIY circles, but the results really do seem to speak for themselves. We wouldn’t necessarily use this on every project, but if you’ve got something that needs an especially fine finish, you’ve at least got an option that doesn’t involve borrowing somebody’s compressor and spray gun.

If you need help shaking your paint before spraying – definitely give this 3D printed paint shaker a look!

Continue reading “Two-Part Primer In A Can Is A DIY Dream Come True”