Cache prefetching is what allows processors to have data and/or instructions ready for use in a fast local cache rather than having to wait for a fetch request to trickle through to system RAM and back again. The Intel 8088 (and its big brother 8086) processor was among the first microprocessors to implement (instruction) prefetching in hardware, which [Ken Shirriff] has analyzed based on die images of this famous processor. This follows last year’s deep-dive into the 8086’s prefetching hardware, with (unsurprisingly) many similarities between these two microprocessors, as well as a few differences that are mostly due to the 8088’s cut-down 8-bit data bus.
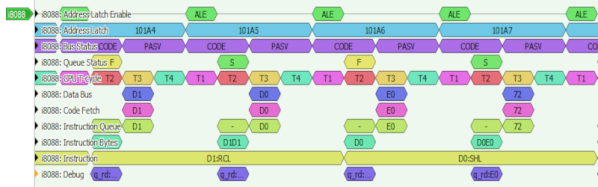
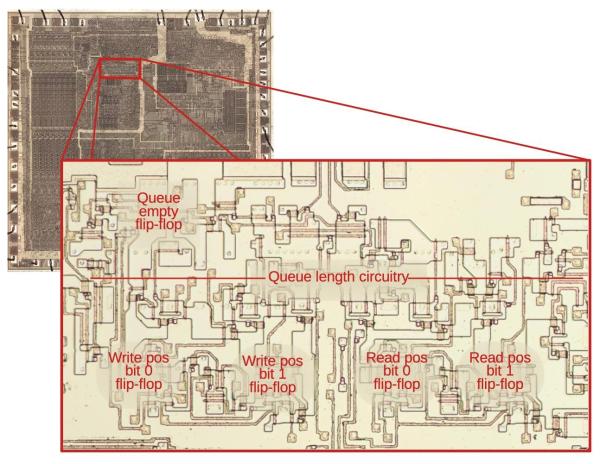
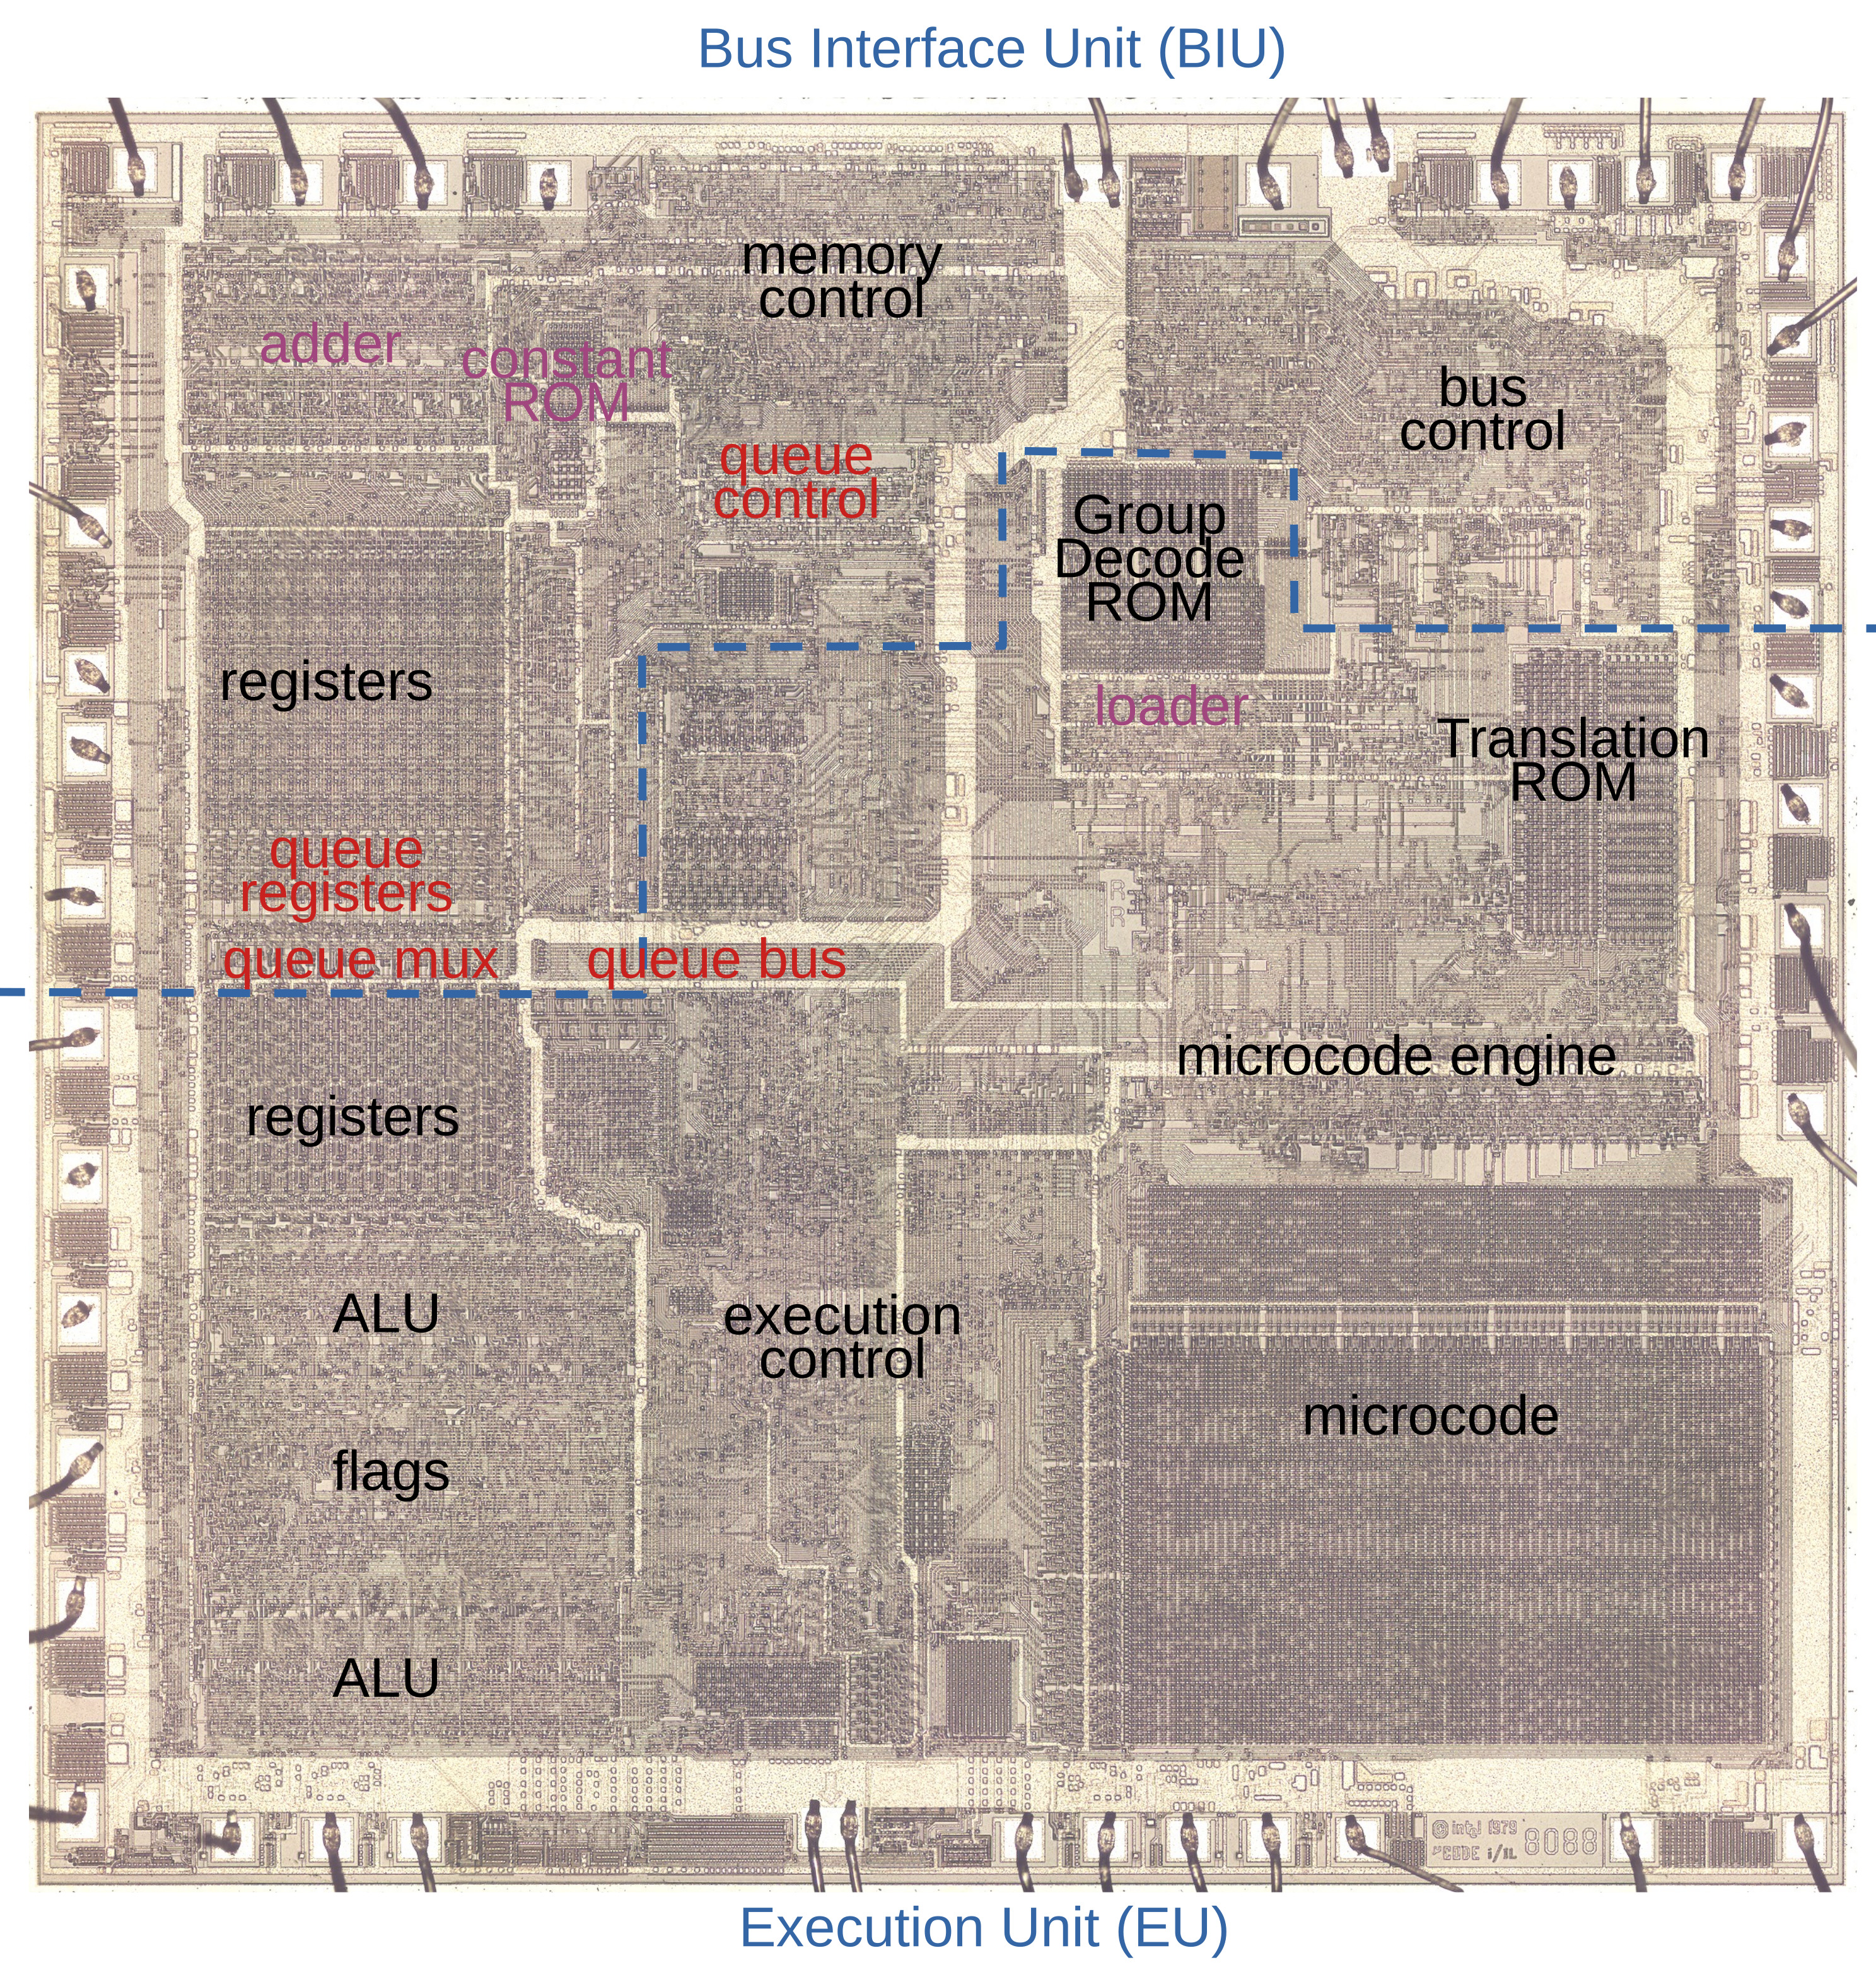
While the 8086 has 3 16-bit slots in the instruction prefetcher the 8088 gets 4 slots, each 8-bit. The prefetching hardware is part of the Bus Interface Unit (BIU), which effectively decouples the actual processor (Execution Unit, or EU) from the system RAM. While previous MPUs would be fully deterministic, with instructions being loaded from RAM and subsequently executed, the 8086 and 8088’s prefetching meant that such assumptions no longer were true. The added features in the BIU also meant that the instruction pointer (IP) and related registers moved to the BIU, while the ringbuffer logic around the queue had to somehow keep the queueing and pointer offsets into RAM working correctly.
Even though these days CPUs have much more complicated, multi-level caches that are measured in kilobytes and megabytes, it’s fascinating to see where it all began, with just a few bytes and relatively straight-forward hardware logic that you easily follow under a microscope.