When Is An LED A Lamp? When It’s 50mm Wide

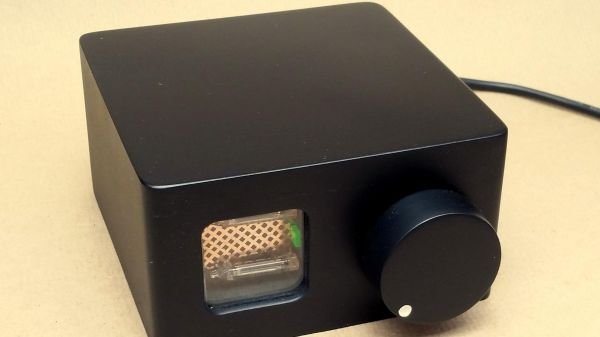
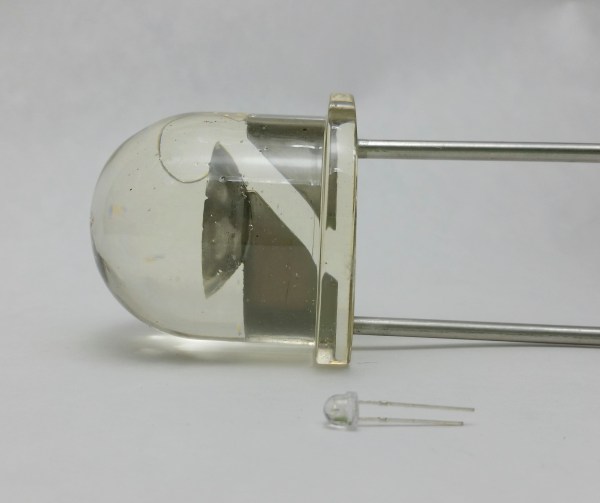
Call us childlike, but we sure do get a kick out of both larger-than-life and miniature things, especially when they work as their “normal-sized” counterparts do. So you can imagine our glee when we saw [JGJMatt]’s 50mm LED lamp, which looks like a giant version of something you might have wired up on your bench at any given moment — a bent-legged LED, wired up and ready to blink.

[JGJMatt] started by designing a mold in Fusion360 to make the lens, which he then printed in PLA. However, due to the heat generated by curing resin (especially all enclosed like that), he recommends using PETG or ABS instead to avoid any potential warping issues.

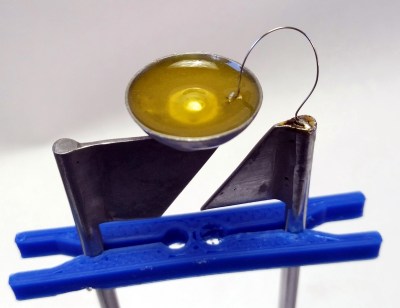
This is where things get a bit dangerous. For the internals, [JGJMatt] went all out, hand forming a reflector cup out of brass pipe, and the anode and cathode plates from flat 1 mm brass stock, plated to a silvery gray finish. The light source itself is a 1 W cool white LED that sits in the reflector cup, safe under a layer of epoxy mixed with a bit of yellow paint that represent the phosphor layer in a standard 5 mm white LED.

Once the innards were ready, it was time to cast the huge lens with them tucked safely inside. After the resin cured, [JGJMatt] sanded away the layer lines and airbrushed it with clear lacquer to clear up the lens and protect it from yellowing down the road. Then it was just a matter of bending the legs to form a stand, and wiring it up. What an awesome way to light up your workbench! Or anywhere, really.

This isn’t the first time we’ve seen a giant, working LED, though it’s probably only the second one since [Mike Szczys] saw some in the flesh at Maker Faire: Rome way back in 2019. Those are for sale on Tindie, BTW, though the shop is on holiday for the foreseeable, so you’ll have to make your own for now.

Lasers Make PCBs The Old Fashioned Way

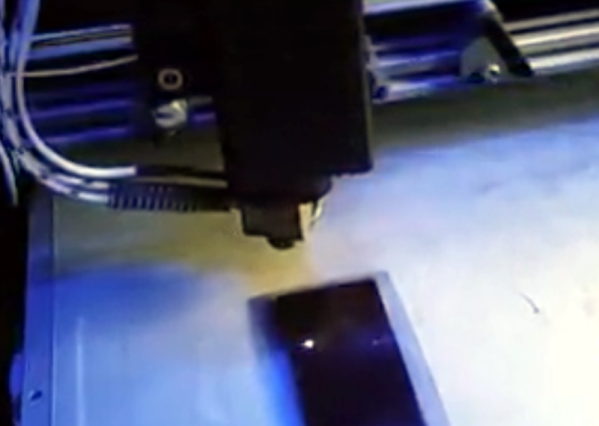
There are many ways to create printed circuit boards, but one of the more traditional ways involves using boards coated with photoresist and exposing the desired artwork on the board, usually with UV light. Then you develop the board like a photograph and etch it in acid. Where the photoresist stays, you’ll wind up with copper traces. Hackers have used lots of methods to get that artwork ranging from pen plotters to laser printers, but commercially a machine called a photoplotter created the artwork using a light and a piece of film. [JGJMatt] sort of rediscovered this idea by realizing that a cheap laser engraver could directly draw on the photoresist.

The laser dot is about 0.2 mm in diameter, so fine resolution boards are possible. If you have a laser cutter or engraver already, you have just about everything you need. If not, the lower-power laser modules are very affordable and you can mount one on a 3D printer. Most people are interested in using these to cut where higher power is a must, but for exposing photosensitive film, you don’t need much power. The 500 mW module used in the project costs about fifty bucks.

Continue reading “Lasers Make PCBs The Old Fashioned Way”

A portable Bluetooth turntable.

Bluetooth Record Player Puts A New Spin On Vinyl

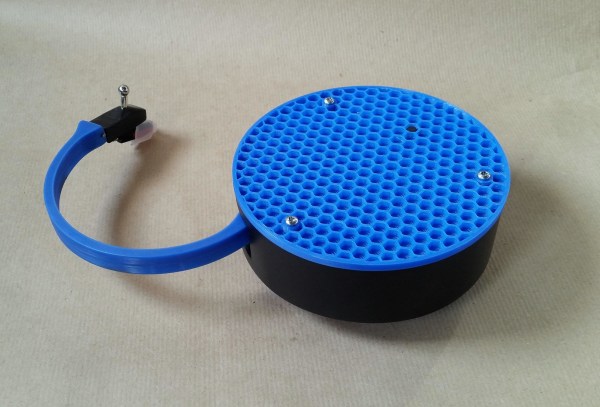
You know, we were just discussing weird and/or obsolete audio formats in the writers’ dungeon the other day. (By the way, have you ever bought anything on DAT or MiniDisc?) While vinyl is hardly weird or (nowadays) obsolete, the fact that this Bluetooth record player by [JGJMatt] is so modern makes it all the more fantastic.

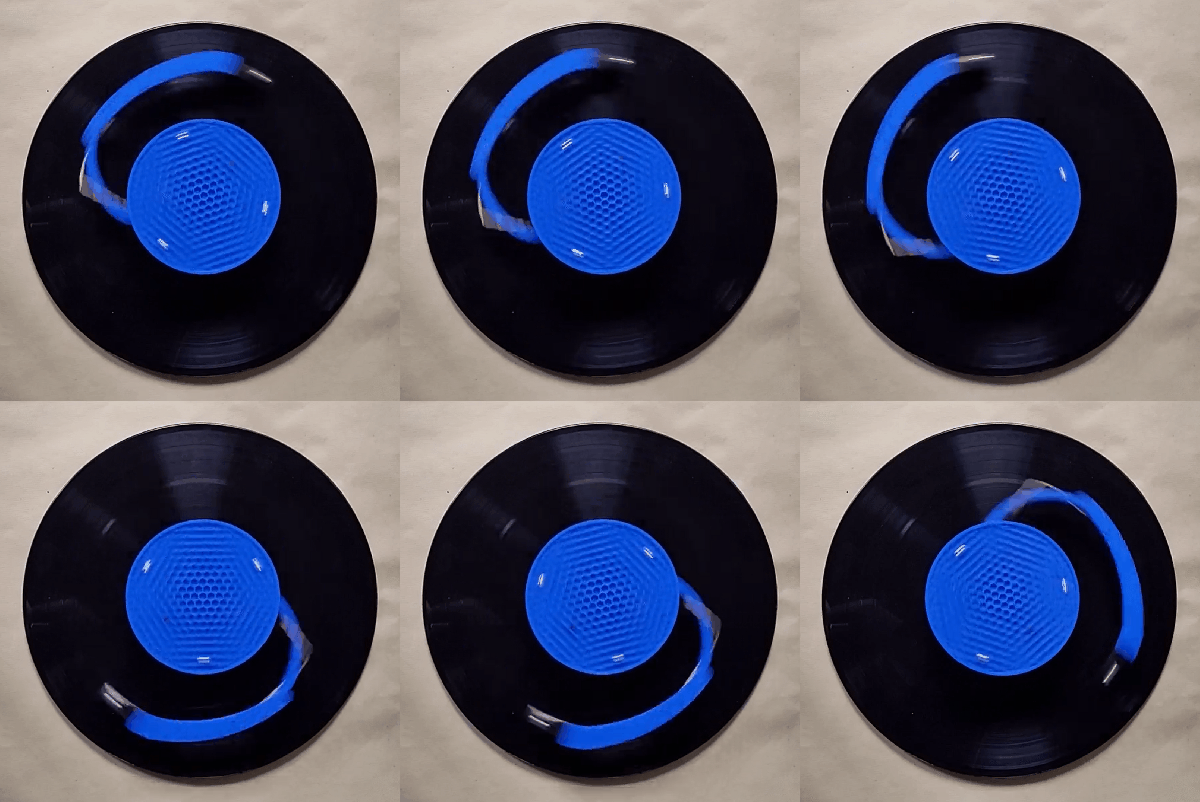
Not since the Audio-Technica Sound Burger, or Crosley’s semi-recent imitation, have we seen such a portable unit. But that’s not even the most notable part — this thing runs inversely to normal record players. Translation: the record stands still while the the player spins, and it sends the audio over Bluetooth to headphones or a speaker.

Inside this portable player is an Arduino Nano driving a 5 VDC motor with a worm gear box. There really isn’t too much more to this build — mostly power, a needle cartridge, and a Bluetooth audio transmitter. There’s a TTP223 touch module on the lid that allows [JGJMatt] to turn it off with the wave of a hand.

[JGJMatt] says this is a prototype/work-in-progress, and welcomes input from the community. Right now the drive system is good and the Bluetooth is stable and able, but the tone arm has some room for improvement — in tests, it only played a small section of the record and skidded and skittered across the innermost and outermost parts. Now, [JGJMatt] is trying two-part arm approach where the first bit extends and locks into position, and then a second arm extending from there and moves around freely.

Commercial record players can do more than just play records. If you’ve got an old one that isn’t even good enough for a thrift store copy of a Starship record, you could turn it into a pottery wheel or a guitar tremolo.

Building A Levitating Turbine Desk Toy

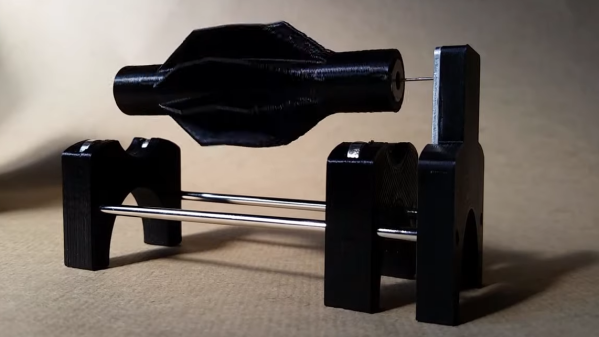
Magnetic levitation is a beautiful thing to watch. Seeing small objects wobble about while seemingly hovering in thin air never gets old. If you want something suitably distracting in this vein for your own desk, consider building this levitating turbine from [JGJMatt].

The build uses a combination of 3D printed parts and metal rods to form a basic frame.  The turbine is also 3D printed, making it easy to create the complex geometry for the curved fins. Rare earth magnets are then slotted into the parts in order to create the levitation effect. Two magnets are fitted to each frame piece, and one magnet is inserted into each end of the turbine. When aligned properly, the turbine will hover over the frame and can spin freely with almost no friction.

One concession made to functionality is a sewing needle inserted into the turbine. This presses against one part of the frame in order to keep the turbine from being pushed out of the magnetic field entirely. It’s possible that with very careful attention to detail in alignment, the pin could be eliminated, but it makes the system far more robust and reliable to have it there.

Floating in the magnetic field, a simple puff of air is enough to set the turbine spinning for quite some time. It makes for a captivating desk ornament, and one that can be tinkered with by changing the turbine blades for different performance. It may be frivolous, but at the larger scale, magnetic levitation is put to more serious uses like high-speed transport. Video after the break.

Continue reading “Building A Levitating Turbine Desk Toy”

Light Bulb Plant Propagation Station Is A Bright Idea

We’ve always enjoyed having a few indoor plants around the Hackaday dungeon because they just make the days more cheerful. Apparently there’s a big craze for them right now, which has led to price increases of things like propagation stations — places where cuttings from mature plants go to grow a root system before getting planted in dirt. Many plants will root readily in water, and it’s better for them to start out this way because soil can come with a bunch of problems.

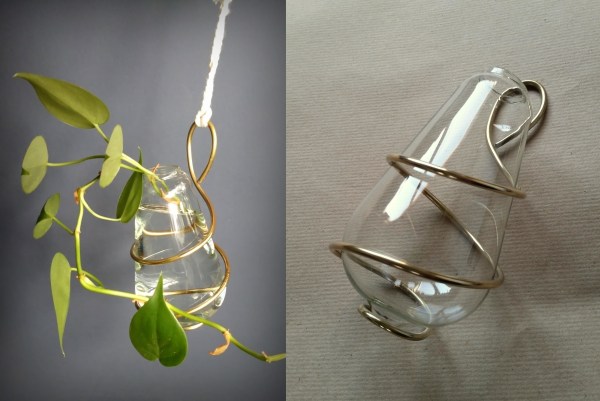
This goes really well with the older craze of Edison-style light bulbs. We’re glad we never bothered with those because [JGJMatt] says they don’t last long at all. The bulbs themselves are really nice looking, so [JGJMatt] decided to turn a few of them into hanging water propagation stations. After cleaning out the bulb and embiggening the opening, [JGJMatt] formed a holder by applying a torch to brass rod. This dulls the brass, so they shined it up with steel wool and some automotive polishing compound. Then it’s time for some simple macrame to hang it with, because it will soon be full of water.

Does the handle sound familiar? It ought to — [JGJMatt]’s elegant builds have graced these pages a few times before.

A Hi-Fi Speaker From Some Foil And Magnets

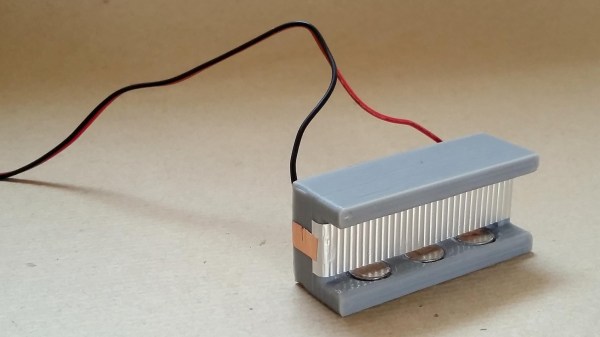
In the world of speakers, mass is the enemy of high frequency response. In order to get the crispest highs, some audiophiles swear by speakers in which the moving element is just a thin ribbon of metal foil. As the first step towards building a set of ribbon headphones, [JGJMatt] has designed a compact ribbon speaker made from aluminum foil.

A 3D-printed body holds six permanent magnets, which produce the static magnetic field necessary for the speaker to work. The sound itself is produced by a corrugated aluminum diaphragm made by taking a strip of foil and creasing it with a gear. Aluminum is difficult to solder, so electrical contact is made with a couple of short segments of copper tape. A little Blu Tack and glue hold it all together, and the result is stunning in its simplicity.

Check out the video after the break to hear how it sounds. If you want to try this yourself, it’s important to remember that ribbon speakers have very low input impedances (0.1 Ω for this design), so in order to prevent damage to your amplifier, a transformer or series resistor must be used to bring the impedance up to the 4-8 Ω your amplifier expects.

[JGJMatt] is no newcomer to exotic speaker technology—check out these thin distributed-mode loudspeakers they made! If you’re more interested in recording music than playing it, you might want to read about how a metal ribbon suspended in a magnetic field is used to make incredible microphones. Shout out to [Itay] for the tip. Continue reading “A Hi-Fi Speaker From Some Foil And Magnets”

Building Distributed Mode Loudspeakers With Plywood

Distributed-mode loudspeakers work rather differently from the typical drivers used in 99% of applications. Instead of using piston-like motion to create sound waves, they instead rely on exciting an entire panel to vibrate and thus produce sound. [JGJMatt] decided to build a pair of bookshelf-sized units, with great results.

The build begins with a pair of 44mm DML exciters, readily available online. These had to be modified to remove their stock metal mounting plates that degraded the sound output in early tests. Instead, 3D printed pieces were used to mount the exciters to the 3mm plywood boards, which were lasercut to act as the main DML panels. Additionally, whizzer cones were fitted to the panels in an effort to further boost the high frequency response of the speakers. The speaker stands are assembled out of more 3D printed pieces and aluminium rods, giving a clean, modern look to the final product.

The performance of the speakers is admirable based on the test video, though [JGJMatt] notes that they should be paired with a subwoofer in use as the DML units do not readily produce frequencies below 100Hz. We’ve seen similar builds before on a larger scale, too. Video after the break.

Continue reading “Building Distributed Mode Loudspeakers With Plywood”