A small B/W TV showing a Pong-like game being played on a Soviet-era game console

Soviet-Era Pong Console Is Easy To Repair

Many early home video game consoles were developed by American and Japanese companies: think Nintendo, Commodore, and Atari. But on the other side of the Iron Curtain, which was still very much in place in the 1980s, an entirely separate industry was built on names like Tesla and Elektronika. As a resident of the republic of Georgia, [Thomas] over at Workshop Nation has built up a sizeable collection of such Soviet-era hardware. A while back, he stumbled upon an Elektronika Video Sport 3, a 1990-vintage Pong-like video game console made in the USSR, and made a delightful video that shows him bringing it back to life.

A circuit board from an Elektronika game consoleLike its Western counterparts, the Video Sport 3 is built around a dedicated chip, in this case a K145IK17. This is a Soviet clone of the GI AY-3-8500 that powered nearly every TV Pong console in the West, allowing it to run several variations of Pong as well as a simple target shooting game. Interestingly, the Video Sport 3 also has a “test” mode in which it outputs a test signal to help you adjust your TV settings — quite useful in the days of analog CRTs. It also came with a comprehensive user manual, as well as full schematics to help you repair it in case anything breaks.

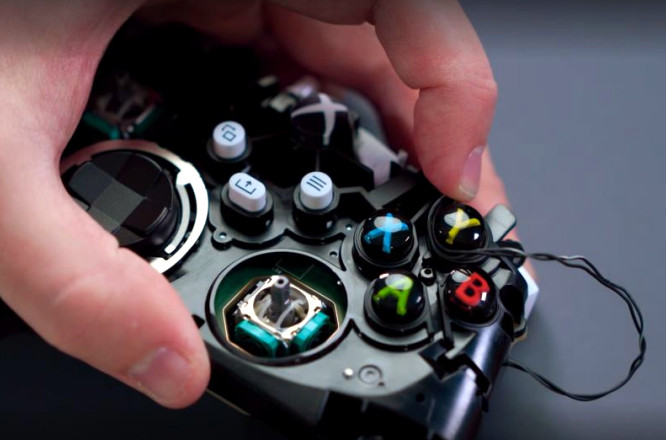
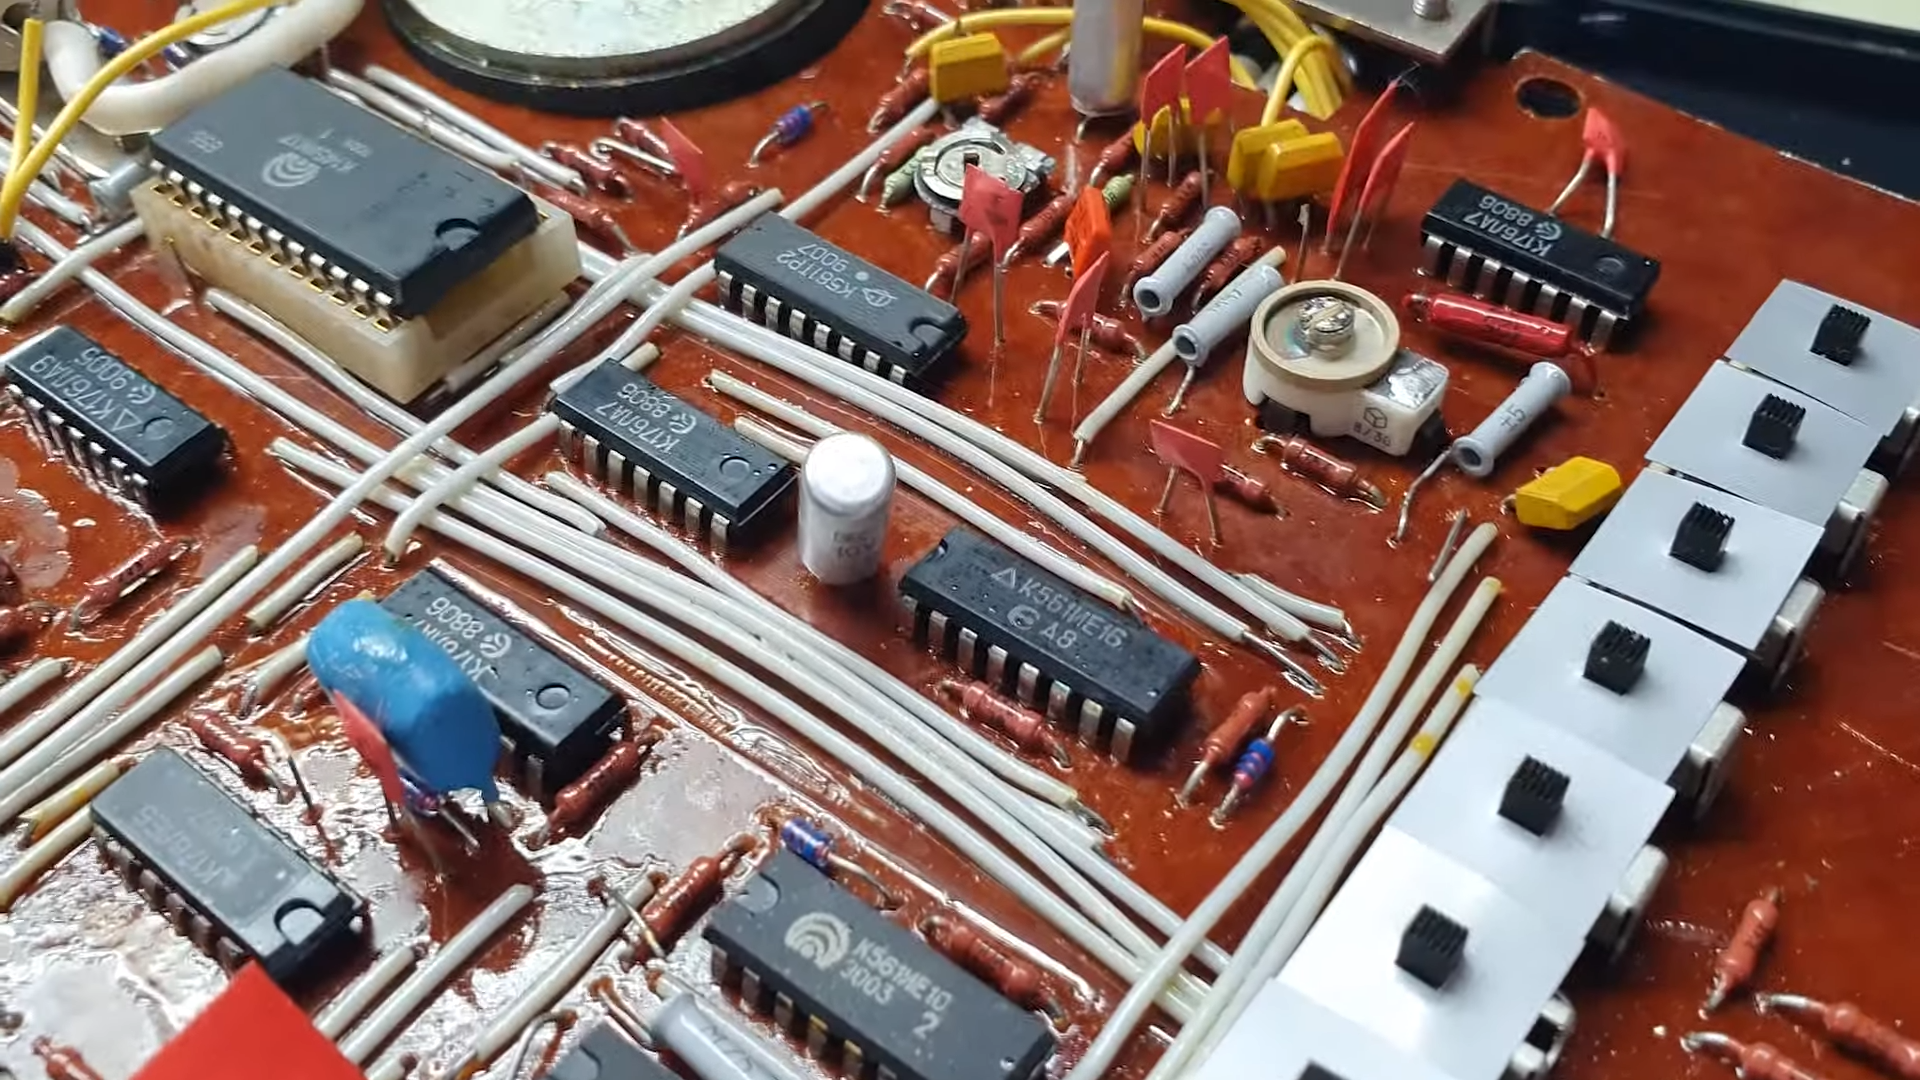
[Thomas]’s device didn’t immediately work, which is why he opened it up and tried to find any errors. The main board he found inside was a beautifully hand-made, single-layer board with around a dozen chips and lots of discrete components. Nothing seemed obviously broken, but [Thomas] decided to replace a few electrolytic capacitors as a precaution. This turned out to be enough to get the console working again — dodgy caps truly are a universal problem with older hardware.

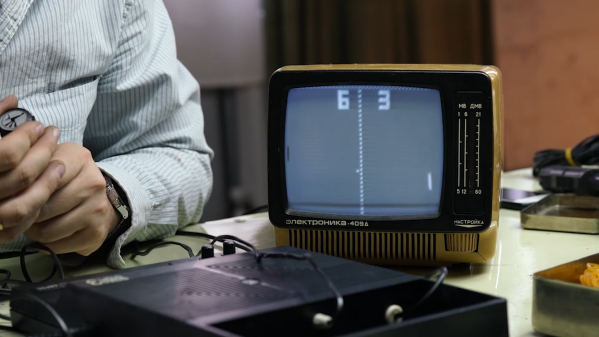
A small Elektronika black-and-white TV that [Thomas] found earlier forms a perfect complement to the Video Sport 3. Together, they give us a glimpse into what a typical video game setup may have looked like in an early 1990s Soviet home. In fact, the Eastern Bloc supplied a reasonably wide selection of home computers, although not many people could actually buy them. Some truly bizarre machines were also produced for professional users.

Continue reading “Soviet-Era Pong Console Is Easy To Repair”

Stepper Killer Killer Killed, Repair Attempted

The low-cost servo motor in [Clough42]’s lathe’s electronic leadscrew bit the dust recently, and he did a great job documenting his repair attempts ( see video below the break ). When starting the project a few years ago, he studied a variety of candidate motors, including a ClearPath servo motor from Teknic’s “Stepper Killer” family. While that motor was well suited, [Clough42] picked a significantly lower-cost servo motor from China which he dubbed the “Stepper Killer Killer”.

He does a very thorough post-mortem of the motor’s integrated servo controller, checking the circuits and connections on the interface PCB first. Not finding any obvious problem, he proceeds to the main PCB which contains the microcontroller, motor driver transistors, and power supplies. There is no visible damage, but a check of the logic power supply shows 1.65V where 3.3V is expected. Looking at the board with a smart-phone mounted IR camera, he quickly finds the bad news — the microcontroller has shorted out.

Continue reading “Stepper Killer Killer Killed, Repair Attempted”

A thermostat unit and a replacement PCB for it

Custom Thermostat PCB Connects Boiler To Home Assistant

Thanks to Home Assistant, automating the various systems that run your home is easier than ever. But you still need to make a connection between those systems and your Home Assistant setup, which can be tricky if the manufacturer didn’t have this use case in mind. When [Simon] wanted to automate his home heating system, he discovered that most Home Assistant-enabled thermostats that he could find didn’t support his two separate heating zones connected to a single boiler. The easiest solution turned out to be to design his own.

The original heating system consisted of two control boxes that each had a 230 V mains connection coming in and a “request heat” control line going to the boiler. [Simon] considered replacing these with a simple off-the-shelf ESP8266 relay board and a 12 V power supply, but figured this would look messy and take up quite a bit of space. So he bought a neat DIN-rail mounted enclosure instead, and designed a custom PCB to fit inside it.

A Home Assistant screen showing two thermostatsThe PCB holds a Wemos D1 Mini connected to two relays that switch the two heating circuits. The D1 runs ESPhome and needs just a few lines of configuration to connect it to [Simon]’s home network. There’s no separate power supply — the 230 V line is connected directly to a 12 V DC power module mounted on the PCB, so the new system is plug-and-play compatible with the old.

Complete PCB design files are available on [Simon]’s website and GitHub page. There are several other ways to make custom thermostats for your home, with an Arduino for example. If you’re interested in repairing your own heating system, or want to optimize it even further, there’s a whole community out there to help you.

Ask Hackaday: What’s Your Worst Repair Win?

Like many of you, I’ve become the designated “fix-it” person for my family and friends. While it can be a lot of work — I just finished an oil change that required me to lay in a cold, wet driveway and I can’t mention in polite company the substances I was bathed in while fixing a clogged pipe last week  — I generally relish my role. I enjoy solving problems, I love working with my hands and my head, and who doesn’t like saving money and time?

But for me, the best part of being the fix-it guy is the satisfaction that comes from doing something others can’t do. I find this especially true with automotive repairs, which conventional wisdom says is strictly the province of factory-trained experts. A little bit of a hero complex, perhaps? Absolutely! After all, I don’t get paid for my repairs, so I’ve got to get a little something for the effort.

This is why a recent pair of unrelated fixes left me feeling thoroughly unsatisfied. Neither of these jobs was a clear win, at least in terms of getting the rush of being able to do something that nobody else could. At best, these were qualified wins, which both still left me feeling a little defeated. And that got me thinking that I’m probably not the only one who has had marginal repair wins like these.

Continue reading “Ask Hackaday: What’s Your Worst Repair Win?”

PCB Gets Weighty Assignment

[Curious Scientist] tried building an integrated strain gauge on a PCB, but ran into problems. Mainly, the low resistance of the traces didn’t show enough change under strain to measure easily. Even placing a proper strain gauge on the PCB had limitations. His new design uses a bridge design to make the change in the gauges usefully large. You can see a video of the project below.

Bridging strain gauges isn’t a new idea. However, the novelty of this design is that the PCB has cantilever beams that facilitate the weighing. Standoffs mount a plate to the beams so that weight on the plate cause deformation on the beam that the strain gauges can measure.

Continue reading “PCB Gets Weighty Assignment”

HP 33120A Repair: Shutting Down The Eye Of Sauron

When a friend of [Tom Verbeure] came into possession of two HP 33120A 15 MHz function/arbitrary waveform generators, he could not resist giving them a try. Although not exactly high-end units, the HP 33120A makes for a pretty nice unit for a home lab. During the first test run, however, [Tom] discovered that one of the units had a dead output, which made it rather useless. Undeterred, [Tom] set to work diagnosing it, helped by the repair manual and full schematics.

While the cause was quickly tracked down to the general area around an exploded MLCC, fixing the fried Zener diode that may have initiated the short on the -15V rail revealed an unpleasant surprise. To [Tom]’s horror, he saw a portal to Hell itself open when part of the PCB caught on fire due to an internal short. After making sure to capture a video of this event, he then proceeded to use a thermal camera to track down the hot spot and uses a drill to remove the short.

While one can argue with the use of a drill to remove shorts on inner layers of a PCB, ultimately the fix was effective. A look on the schematic and comparison with the functioning 33120A unit later, all it took was two bodge wires to restore functionality. After this event, [Tom]’s friend gave him the repaired unit as thanks, and definitely not because [Tom] had begun to refer to it as ‘his precious’.