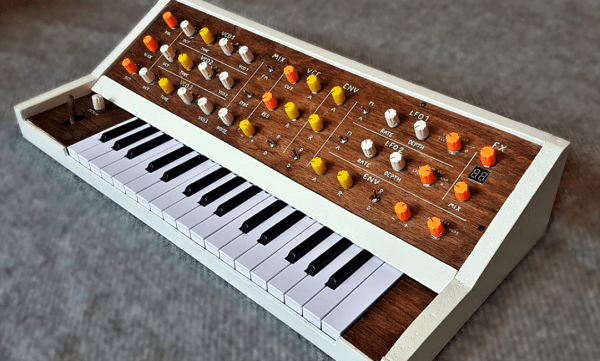
Building A Levitating Turbine Desk Toy

Magnetic levitation is a beautiful thing to watch. Seeing small objects wobble about while seemingly hovering in thin air never gets old. If you want something suitably distracting in this vein for your own desk, consider building this levitating turbine from [JGJMatt].

The build uses a combination of 3D printed parts and metal rods to form a basic frame.  The turbine is also 3D printed, making it easy to create the complex geometry for the curved fins. Rare earth magnets are then slotted into the parts in order to create the levitation effect. Two magnets are fitted to each frame piece, and one magnet is inserted into each end of the turbine. When aligned properly, the turbine will hover over the frame and can spin freely with almost no friction.

One concession made to functionality is a sewing needle inserted into the turbine. This presses against one part of the frame in order to keep the turbine from being pushed out of the magnetic field entirely. It’s possible that with very careful attention to detail in alignment, the pin could be eliminated, but it makes the system far more robust and reliable to have it there.

Floating in the magnetic field, a simple puff of air is enough to set the turbine spinning for quite some time. It makes for a captivating desk ornament, and one that can be tinkered with by changing the turbine blades for different performance. It may be frivolous, but at the larger scale, magnetic levitation is put to more serious uses like high-speed transport. Video after the break.

Continue reading “Building A Levitating Turbine Desk Toy”

Three-Stage Thrust Vectoring Model Rocket With Tiny Flight Computers

Flying a thrust-vectoring rocket can be a challenge, and even more so if you stack multiple stages and a minimalist flight computer on top of it all. But [Joe Barnard] is not one to shy away from such a challenge, so he built a three stage actively guided rocket named Shreeek.

[Joe] is well known for his thrust-vectoring rockets, some of which have came within a hair’s breadth of making a perfect powered landing. Previous rockets have used larger, more complex flight computers, but for this round, he wanted to go as small and minimalist as possible. Each stage of the rocket has its own tiny 16 x 17 mm flight computer and battery. The main components are a SAM21 microcontroller running Arduino firmware, an IMU for altitude and orientation sensing, and a FET to trigger the rocket motor igniter. It also has servo outputs for thrust vector control (TVC), and motor control output for the reaction wheel on the third stage for roll control. To keep it simple he omitted a way to log flight data, a decision he later regretted. Shreeek did not have a dedicated recovery system on any of the stages, instead relying on its light weight and high drag to land intact

None of the four launch attempts went as planned, with only the first two stages functioning correctly in the test with the best results. Thanks to the lack of recorded flight data, [Joe] had to rely on video footage alone to diagnose the problems after each launch. Even so, his experience diagnosing problems certainly proved its worth, with definitive improvements. However, we suspect that all his future flight computers will have data logging features included.

Continue reading “Three-Stage Thrust Vectoring Model Rocket With Tiny Flight Computers”

Build Yourself A Nifty Cable Smartphone Mount

Smartphones have supplanted cameras in day to day use for the vast majority of purposes. However, unlike cameras, they don’t come with tripod mounts or any real good way of holding them in a set position. [Mrballeng] has built an excellent mount, however, that uses cable to hold a smartphone in all manner of positions, for photography or other purposes.

The mount relies on vinyl-coated steel cable. Upon this cable are slotted four blocks that are 3D printed out of resin. The blocks are also fitted with strong magnets. This allows them to be positioned along the vinyl cable while sticking themselves in place thanks to the magnetic attraction to the steel core. The blocks can also be used to attach the cable to magnetic objects like drywall screws or light fittings.

Using the mount is simple. The cable is wrapped around the phone and the blocks cinched up to hold it in place. Then, the magnets in the blocks can be used to hold the phone to walls or other surfaces.

It’s a tidy build, and one we can imagine using regularly if we had one. Of course, there’s no reason you couldn’t produce the parts on a more common filament-based printer, either. We’ve seen some other great smartphone photography hacks too, like this mod that lets you use your phone as a microscope for under $10. Video after the break.

Continue reading “Build Yourself A Nifty Cable Smartphone Mount”

Building An Aluminum RC Truck From Scratch

These days you can get just about any kind of radio controlled vehicle as a ready-to-run model. Cars, trucks, excavators, you name it. Open the box, charge the batteries, and you’re ready to roll. Even with all these modern conveniences, there is still a special breed of modelers who create their own models using only a few off-the-shelf parts.

[Rini Anita] is exactly that rare breed, creating this aluminum RC truck from scratch. The truck itself is a cab-over — short for Cab Over Engine (COE), a style seen making local deliveries worldwide. He starts with the ladder frame chassis, which is constructed using an extruded aluminum channel. This is the same material you’d normally use for the door tracks in retail store display cases. The electronics and standard RC fare: a receiver, electronic speed control, and a servo for steering. Batteries are recycled lithium cells. The main gearbox and drive axle look to be sourced from another RC vehicle, while leaf springs and suspension components are all custom built.

The truck’s body is a great example hand forming metal. First, a wooden form was created. Sections for the windows and door panels were carved out. Sheet aluminum was then bent over the wood form. Carefully placed hammer blows bend the metal into the carved sections – leaving the imprints of doors, windows, and other panel lines.

Throughout this build, we’re amazed by [Rini]’s skills, and the fact that the entire job was done with basic tools. A grinder, an old drill press, and a rivet gun are the go-to tools; no welder or 3D printer to be found. This puts a project like this well within the means of just about any hacker — though it may take some time to hone your skills! For his next truck, maybe [Rini] can add a self driving option!

Continue reading “Building An Aluminum RC Truck From Scratch”

Interactive LED Shoes That Anyone Can Build!

Normally when we see blinky projects these days, it’s using addressable LED strips with WS2812Bs, or similar alternatives. However, old-school blobby round LEDs are still on the market, and can still be put to great use. These DIY LED shoes from [TechnoChic] are an excellent example of just that.

The shoes use big 10mm LEDs that have color-changing smarts baked in. Simply power them up and they’ll fade between a series of colors. They’re run from a coin cell sewn on to the side of each shoe, with the LEDs jammed into the rear of the sole. A conductive product called Maker Tape is then used to create a circuit for the LEDs and the coin cell, along with a pressure switch inside each shoe. When the wearer puts weight on their heel, the switch conducts, lighting up the LEDs as the wearer takes each step.

This isn’t the first time we’ve seen a pair of shoes bedazzled with LEDs, but it’s arguably the easiest version of the concept to grace these pages. This is a quick way to create interactive flashing LED gadgets, and a great way for beginner makers to jazz up their projects.

Continue reading “Interactive LED Shoes That Anyone Can Build!”

‘Quiet On The Set’ Goes For Objects, Too

Unless you’re sonically savvy, trying to sleep, or simply on edge, you probably don’t realize just how noisy common items can be. Pretty much everything makes enough racket to ruin a sound man’s day, or at the very least, their chance of picking up the dialogue between two characters. What you need on a set are noiseless but realistic versions of common noisemakers like paper bags, ice cubes, and to a lesser extent, billiard balls.

If you’ve spent any time at all on Reddit, you’ve probably seen frustratingly short GIFs of [Tim Schultz] quickly explaining how this or that noiseless prop is made. Embedded below is a compendium of prop hacks with more information worked in along the way. Talk about dream job! Problem solving and then hacking together a solution for a living sounds terrifying and delightful all at once.

Speaking of terrifying and delightful hacks, there’s still plenty of time to enter our Halloween Hackfest contest, which runs through Monday, October 11th. Halloween is the best time to go all out, so show us what you can do!

Continue reading “‘Quiet On The Set’ Goes For Objects, Too”

Giving A Console Controller Mouse-Like Precision Aim

Controller vs keyboard and mouse is one of the never-ending battles in the world of gaming, with diehard proponents on both sides of the fence. [Tech Yesterday] has been working to create a controller that’s the best of both worlds. His latest Mouse Pro Controller V5 features an inverted mouse riding on ball bearings.

Mouse Pro Controller V1-3‘s main focus was to create the largest possible moving surface for an optical thumb mouse for precision aiming. However, [Tech Yesterday] found that one’s thumb doesn’t work well for traversing a large flat surface, but works better with a concave surface. On V4 he flipped the optical sensor around, embedding it in the controller, with a small circular “mouse pad” attached to his thumb. The concave surface was made from the diffuser of a large LED light bulb. It had slightly too much friction for [Tech Yesterday]’s liking, so he embedded an array of small ball bearings in the surface using magnets.

While this “thumb mouse” has excellent precision, it can be a bit slow when you need to make large movements, like when performing 360° no scopes for the clips. For these situations, [Tech Yesterday] embedded a thumb stick on the back of the controller to allow for fast sideways movements using his middle fingers.

[Tech Yesterday] is already working on V6, but feels close to the limit of his skills. If you are interested in working with him, be sure to get in touch! Modding controllers for fun and performance are great, but for gamers with prosthetic fingers it’s a requirement.

Continue reading “Giving A Console Controller Mouse-Like Precision Aim”