Raise your hand if you remember when PulseAudio was famous for breaking audio on Linux for everyone. For quite a few years, the standard answer for any audio problem on Linux was to uninstall PulseAudio, and just use ALSA. It’s probably the case that a number of distros switched to Pulse before it was quite ready. My experience was that after a couple years of fixing bugs, the experience got to be quite stable and useful. PulseAudio brought some really nice features to Linux, like moving sound streams between devices and dynamically resampling streams as needed.
Mind control might seem like something out of a sci-fi show, but like the tablet computer, universal translator, or virtual reality device, is actually a technology that has made it into the real world. While these devices often requires on advanced and expensive equipment to interpret brain waves properly, with the right machine learning system it’s possible to do things like this mind-controlled flame thrower on a much smaller budget. (Video, embedded below.)
[Nathaniel F] was already experimenting with using brain-computer interfaces and machine learning, and wanted to see if he could build something practical combining these two technologies. Instead of turning to an EEG machine to read brain patterns, he picked up a much less expensive Mindflex and paired it with a machine learning system running TensorFlow to make up for some of its shortcomings. The processing is done by a Raspberry Pi 4, which sends commands to an Arduino to fire the flamethrower when it detects the proper thought patterns. Don’t forget the flamethrower part of this build either: it was designed and built entirely by [Nathanial F] as well using gas and an arc lighter.
While the build took many hours of training to gather the proper amount of data to build the neural network and works as the proof of concept he was hoping for, [Nathaniel F] notes that it could be improved by replacing the outdated Mindflex with a better EEG. For now though, we appreciate seeing sci-fi in the real world in projects like this, or in other mind-controlled projects like this one which converts a prosthetic arm into a mind-controlled music synthesizer.
In the movies, everything is modular. Some big gun fell off the spaceship when it crashed? Good thing you can just pick it up and fire it as-is (looking at you, Guardians of the Galaxy 2). Hyperdrive dead? No problem, because in the Star Wars universe you can just drop a new one in and be on your way.
Of course, things just aren’t that simple in the real world. Most systems, be they spaceships or cell phones, are enormously complicated and contain hundreds or thousands of interconnected parts. If the camera in my Samsung phone breaks, I can’t exactly steal the one from my girlfriend’s iPhone. They’re simply not interchangeable because the systems were designed differently. Even if we had the same phone and the cameras were interchangeable, they wouldn’t be easy to swap. We’d have to crack open the phones and carefully perform the switch. Speaking of switches, the Nintendo Switch is a good counterexample here. Joycon break? Just buy a new one and pop it on.
What if more products were like the Nintendo Switch? Is its modularity just the tip of the iceberg?
[TheStaticTurtle] built a custom controller for automating his garage doors. He wanted to retain the original physical button and RF remote control interfaces while adding a more modern wireless control accessible from his internet connected devices. Upgrading an old system is often a convoluted process of trial and error, and he had to discard a couple of prototype versions which didn’t pan out as planned. But luckily, the third time was the charm.
The original door-closer logic was pretty straightforward. Press a button and the door moves. If it’s not going in the desired direction, press the button once again to stop the motor, and then press it a third time to reverse direction. With help from the user manual diagrams and a bit of reverse-engineering, he was able to get a handle on how to plan out his add-on controller to interface with the old system.
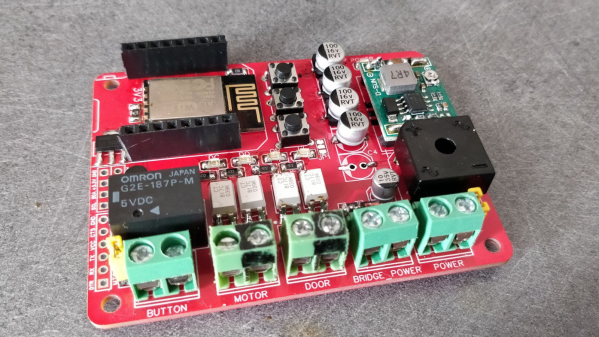
There are many micro-controller options available these days when you want to add IoT to a project, but [TheStaticTurtle] decided to use the old faithful ESP8266 as the brains of his new controller. For his add-on board to work, he needed to detect the direction in which the motor was turning, and detect the limit switches when the door reached end of travel in either direction. Finally, he needed a relay contact in parallel with the activation button to send commands remotely.
To sense if the motor was moving in the “open” or “close” direction, he used a pair of back-to-back opto-couplers in parallel with the motor terminals. He connected another pair of opto-couplers across the two end-limit switches which indicated when the door was fully open or closed, and shut off the motor supply. Finally, a GPIO from the ESP8266 actuates a relay to send the door open and close commands. The boards were designed in EasyEDA and with a quick turnaround from China, he was able to assemble, test and debug his boards pretty quickly.
The code was written using the Arduino IDE and connects the ESP8266 to the MQTT server running on his home automation computer. The end result is a nice dashboard with three icons for open, close and stop, accessible from all the devices connected to his home network. A 3D printed enclosure attaches outside the original control box to keep things tidy. Using hot melt glue as light pipes for the status LED’s is a pretty nifty hack. If you are interested in taking a deeper look at the project, [TheStaticTurtle] has posted all resources on his Github repository.
If you have a Hello Sense sleep tracking device lying around somewhere in your drawer of discards, it can be brought back to life in a new avatar. Just follow [Alexander Gee]’s instructions to resurrect the Hello Sense as an IoT air quality data-logger.
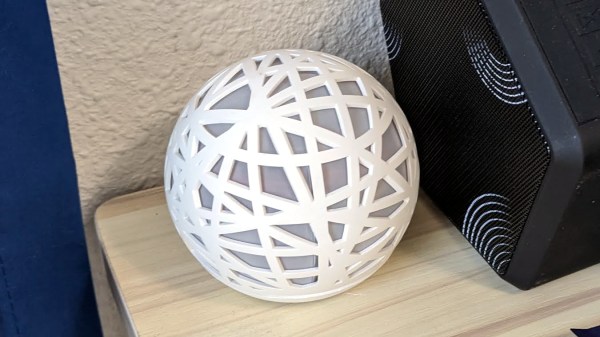
In 2014, startup “Hello” introduced the Sense, an IoT sleep tracking device with a host of embedded sensors, all wrapped up in a slick, injection molded spherical enclosure. The device was quite nice, and by 2015, they had managed to raise $21M in funding. But their business model didn’t seem sustainable, and in 2017, Hello shut shop. Leaving all the Sense devices orphaned, sitting dormant in beautifully designed enclosures with no home to dial back to.
The original Sense included six sensors: illumination, humidity, temperature, sound, dust / particulate matter on the main device, and motion sensing via a separate Bluetooth dongle called the Pill. [Alexander] was interested in air quality measurements, so only needed to get data from the humidity/temperature and dust sensors. Thankfully for [Alexander], a detailed Hello Sense Teardown by [Lindsay Williams] was useful in getting started.
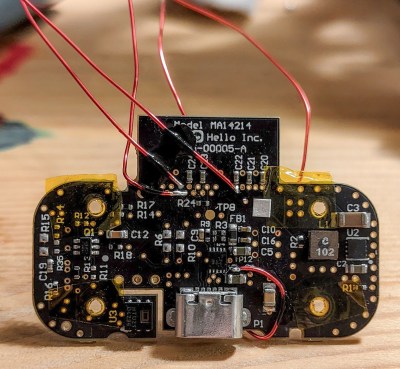
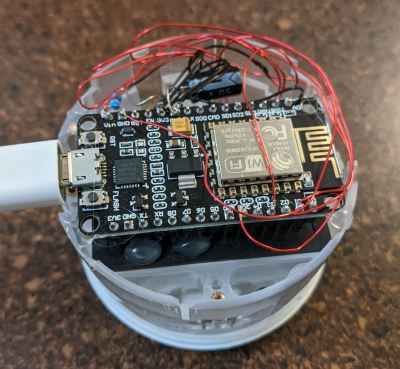
The hardware consisted of four separate PCB’s — power conditioning, LED ring, processor, and sensor board. This ensured that everything could be fit inside the orb shaped enclosure. Getting rid of the LED ring and processor board made space for a new NodeMCU ESP8266 brain which could be hooked up to the sensors. Connecting the NodeMCU to the I2C interface of the humidity/temperature sensor required some bodge wire artistry. Interfacing the PM sensor was a bit more easier since it already had a dedicated cable connected to the original processor board which could be reconnected to the new processor board. The NodeMCU board runs a simple Arduino sketch, available on his Git repo, to gather data and push it online.
Sensor board bodge
NodeMCU
For the online data display dashboard, [Alexander] found a nice solution by [Nilhcem] for home monitoring using MQTT, InfluxDB, and Grafana. It could be deployed via a docker compose file and have it up and running quickly. Unfortunately, such projects don’t usually succeed without causing some heartburn, so [Alexander] has got you covered with a bunch of troubleshooting tips and suggestions should you get entangled.
Hackaday editors Mike Szczys and Elliot Williams curate a week of great hacks. Physical displays created in 3D space are a holy grail, and you can make one with 200 ultrasonic transducers, four FPGAs, and a lot math. Smart speakers have one heck of a microphone array in them, it’s yours for the hacking if you just roll your own firmware. Hobby servos can be awful, but this week we saw they can be made really great by cracking open the DC motor to add a simple DIY position sensor. And lasers are making their way into car headlights; we illuminate the situation in this episode.
Take a look at the links below if you want to follow along, and as always, tell us what you think about this episode in the comments!
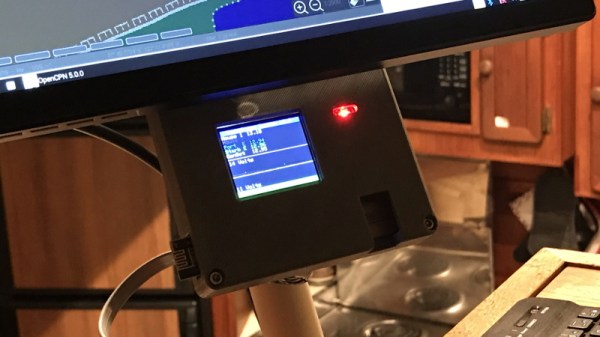
A little over a a year ago, we covered an impressive battery monitor that [Timo Birnschein] was designing for his boat. With dedicated batteries for starting the engines, cranking over the generator, and providing power to lights and other amenities, the device had to keep tabs on several banks of cells to make sure no onboard systems were dipping into the danger zone. While it was still a work in progress, it seemed things were progressing along quickly.
But we know how it is. Sometimes a project unexpectedly goes from having your full attention to winning an all-expense-paid trip to the back burner. In this case, [Timo] only recently put the necessary finishing touches on his monitor and got it installed on the boat. Recent log entries on the project’s Hackaday.io page detail some of the changes made since the last time we checked in, and describe the successful first test of the system on the water.
Certainly the biggest issue that was preventing [Timo] from actually using the monitor previously was the lack of an enclosure and mounting system for it. He’s now addressed those points with his 3D printer, and in the write-up provides a few tips on shipboard ergonomics when it comes to mounting a display you’ll need to see from different angles.
The printed enclosure also allowed for the addition of some niceties like an integrated 7805 voltage regulator to provide a solid 5 V to the electronics, as well as a loud piezo beeper that will alert him to problems even when he can’t see the screen.
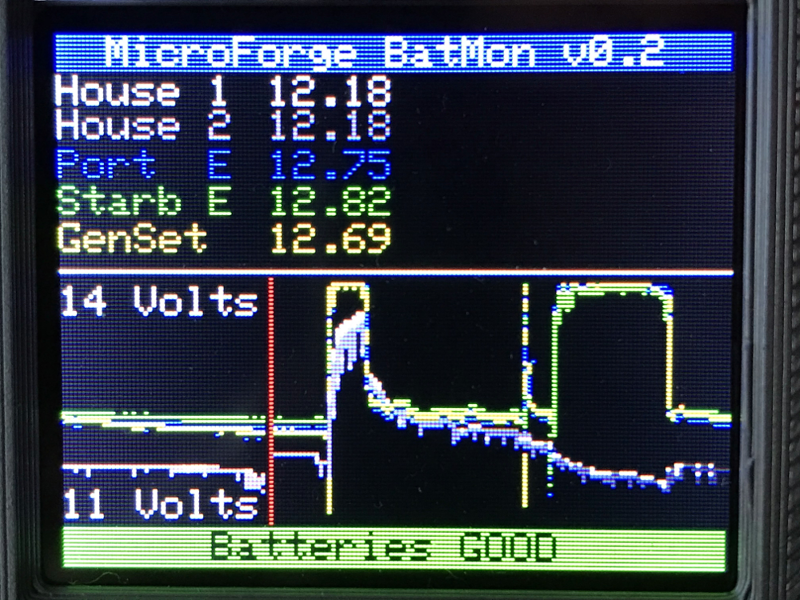
Under the hood he’s also made some notable software improvements. With the help of a newer and faster TFT display library, he’s created a more modern user interface complete with a color coded rolling graph to show voltages changes over time. There’s still a good chunk of screen real estate available, so he’s currently brainstorming other visualizations or functions to implement. The software isn’t using the onboard NRF24 radio yet, though with code space quickly running out on the Arduino Nano, there’s some concern about getting it implemented.