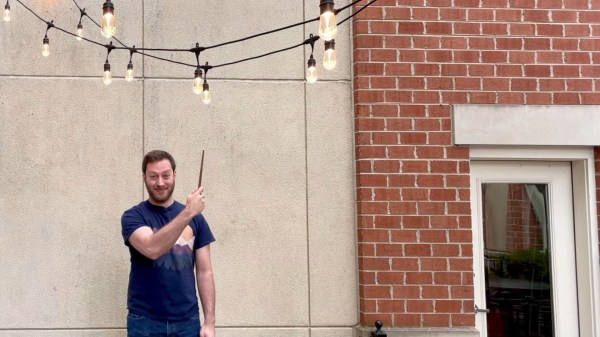
Smartphones and voice assistants are the typical way most of us interact with our smart devices around the home, but it doesn’t have to be the only way. [Sam March] wanted things to feel a little more magical – so built a wand to do the job instead.
The wand relies on a DA14531 Bluetooth Low Energy (BLE) system-on-chip, and is paired with what appear to be smart plugs running on the same hardware. With an accelerometer in the wand, it’s able to detect waving motions, and then signal the smartplugs over Bluetooth to switch outlets on or off. As far as the magic side of things is concerned, [Sam] took his lead from [Arthur C. Clarke], who famously stated “Any sufficiently advanced technology is indistinguishable from magic.” Thus, efforts were made to miniaturize the electronics down to a single tiny PCB, allowing it to be secreted inside a turned wooden wand that’s wrapped in leather.
The end result is a fun project that’s also probably useful when [Sam] wants to turn the lights off without getting out of bed. We could imagine that, configured properly to work on a room-by-room basis, it could be useful for guests who don’t know where the light switches are.
There was a time when a Vector Network Analyser or VNA was the type of instrument that cost as much as a very fancy car or even a small house. The advent of commodity semiconductors that perform at high RF frequencies coupled with microcontrollers powerful enough to handle the data acquisition and processing might not yet have put those high-perfomance instruments within reach, but at our end of the market it’s opened the possibilities for some useful yet affordable devices. A fresh contender comes from [Jankae], whose LibreVNA tops out at 6 GHz and shows some significant attention to design detail that puts it above some of the budget offerings.
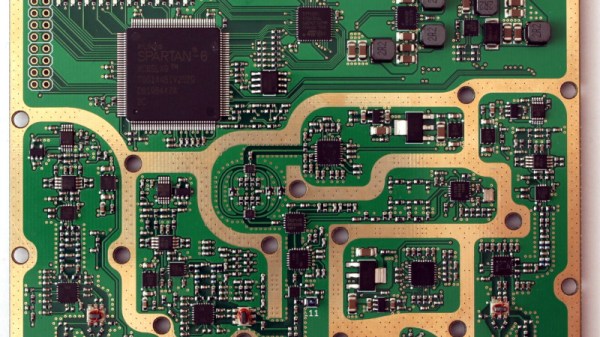
At its heart is the versatile Si5351 multi-way clock generator, accompanied by a pair of MAX2871 phase-locked-loop chips for the higher frequency local oscillators. A switched bank of low-pass filters take care of local oscillator harmonics, and in the receive chain there are ADL5081 mixers feeding a dual conversion IF running at 70 MHz and then 300 kHz. Finally the ADCs are Microchip’s MCP3313, and all is kept in sync by an FPGA and an STM32G431 microcontroller. The main data proccessing is offloaded to a host computer, with a software package and GUI able to be compiled on Windows, Linux, and OSX.
The PCB shows the attention to detail, not least in the power supply arrangements, with every major component receiving its own regulator to ensure no RF makes it down the power rails. It’s clear that a properly made LibreVNA won’t be as cheap as some of its rivals, but we think the corresponding performance hike would make the extra cost worthwhile.
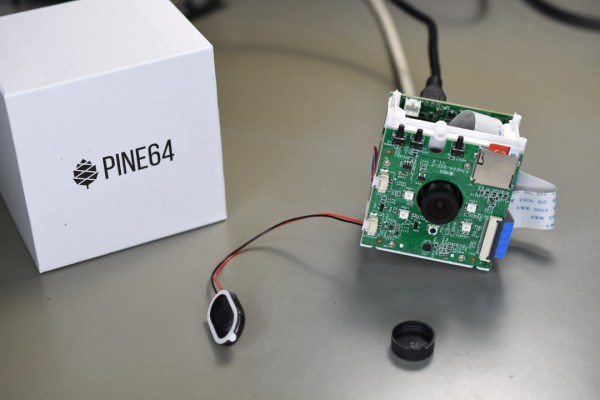
When the PineCube was announced by the Pine64 project in 2020, it created a fair bit of interest. Most of this was due to the appeal of a single-board computer (SBC) in a network-based (IP) camera form factor with integrated camera module, for a mere $29.99. Add an enclosure to it, and you would have a neat little package combining a 5 MP camera module with 100 Mbit Ethernet and WiFi. As a bonus, the system could be powered either via an optional battery pack as well as passive PoE, in addition to MicroUSB.
A few weeks ago I bought two of these boards, as part of a client project, and set out to use it for a custom IP camera implementation. With existing Linux-on-SBC and MIPI (CSI) camera experience on my end ranging from the Raspberry Pi to the Odroid, Orange Pi and Banana Pi boards, I felt fairly confident that I could make it work with minimal fuss.
Unfortunately, my experiences were anything but positive. After spending many hours with the PineCube, I’m not able to recommend it for those seeking an IP camera. There are many reasons for this, which I’ll try to explain in this article.
Is there anything more satisfying than building a useful machine from mostly junk? We think not. [ke4mcl] is a big fan of reusing and repurposing things before settling for the recycle bin, and was in the market for a vibratory parts tumbler to quickly clean off old, rusty bits and bobs in the course of repairing old electronics. For just $10, most of which went into a new tube of RTV silicone, [ke4mcl] built their own tumbler and came away with a reusable amplifier setup in the process.
We’ve all seen speaker cones dance, and they are definitely our favorite way to observe non-Newtonian fluids. This old woofer can still move, so it’s got a second life shaking sand and screws around until they’re somewhat shiny. The ideal woofer for this purpose has a rubber surround — that’s the ring that connects the speaker cone to the frame. [ke4mcl]’s foam-surrounded woofer works just as well, though it may not last as long.
After scrounging a container with a screw-top lid that fits the woofer perfectly, [ke4mcl] joined them together with a bead of RTV silicone. Since there weren’t any amplifiers lying around, [ke4mcl] spent a few bucks on a class D amplifier board and found a spare laptop brick to power it. An old phone with a tone generator app gets the sand churning with a friendly sine wave, which you can see in the videos after the break.
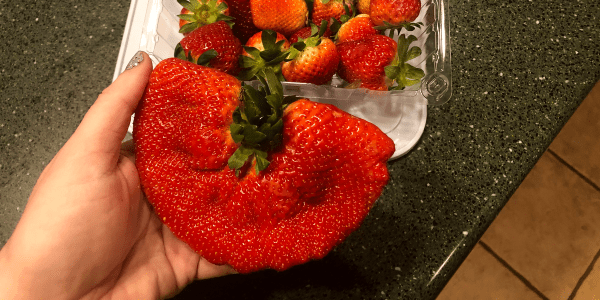
The other day, I saw this gigantic mutant strawberry on reddit that looked like it had either been growing in a radiation zone, hitting the gym regularly, or sprinkled with magic dust. I immediately felt more than mildly interested in this phenomenon, which is called fasciation.
As it turns out, fasciation is fairly rare occurrence that nonetheless occurs in a wide variety of vascular plants. These mutant strawberries may be a bit unnerving to look at, but they are totally safe to eat. The only problem is that you’re more likely to come across a fasciated dandelion or daisy out in the wild than a strawberry or pineapple at the grocery store because the so-called ugly produce tends to be weeded out.
Fasciation is essentially unregulated tissue growth that occurs when the apical meristem, better known as the growing tip of the plant strays from shooting upward in cylindrical fashion and instead splays out flat, resulting in ribbon-like plant stems, elongated or multiple flower heads, and semi-circular strawberries.
Although fasciation tends to present as a flattened main stem, the phenomenon can occur nearly anywhere in the plant — the root, stem, leaves, flower heads, or fruit. It can be localized to just one area, or it affect the entire plant.
Fasciation gets compared to cancer because it has a number of causes and ways of expression, but it’s not quite as harmful or scary. Some races of plants exhibit extreme expression of fasciation. While it’s not fatal, it’s also not ideal, because the condition can result in broken tissues, distorted organization, and a decrease in fertility.
Fasciation: How does it work?
One absolute unit of dandelion. Image via Wild Yorkshire
Fasciation has many causes both internal and external. Internally, it happens because of a hormonal imbalance in the growth cells, a bacterial or viral infection, or a random genetic mutation. There are also environmental causes, like chemical exposure, cold and frost exposure, or fungi, mite, and insect attacks.
The wonder of fasciation knows no geographical, climatic, ecological, or taxonomical bounds among vascular plants. It equally affects annuals, biennials, and perennials; woody and herbaceous plants; shrubs, trees, and vines. Although fasciation can occur in any vascular plant, it is quite common in the rose (includes strawberries), legume, sunflower, and cactus families, and is often found among dandelions and snapdragons.
Some vascular plants are prone to fasciation and prized for it, like the cockscomb (Celosia cristata) flower. A few fasciated flora have even become objects of reverence, like the Virgin Mary appearing on a slice of toast. There was once a fasciated pumpkin vine growing in South India. The twenty-foot-long fasciated portion drew huge crowds of people to worship it, believing the vine to be an incarnation of King Cobra or Naga Sarpa, messenger of the god Vishnu.
This spring, I’ll be looking high and low for abnormal dandelions and daisies. I’ve already started scouting the produce at the grocery store for giant strawberries and found these two in the same box. Won’t you join me? We’re probably more likely to find fasciated fruits or flowers than four-leaf clovers.
Star Trek famously showed its medical staff using a multifunctional device by the name of the tricorder. While no such devices are regularly used by current medical staff in this timeline, the concept is nonetheless appealing to fans of the show. [directive0] is one such person, and built himself a replica by the name of the Picorder 2.
Picorder 2 is inspired by the tricorders from Star Trek: The Next Generation. The name is an indication that this isn’t a first attempt; it builds upon an earlier project based on the models from the original series. It’s built with a nifty 3D printed case that folds in half, just like the real deal. Plenty of attention to detail has been invested in the decals and backlit controls to really complete the look.
Inside, a Raspberry Pi Zero W runs the show, paired with a bunch of sensors and accessories to get the job done. The human interface is via capacitive touch, and data is displayed on an ST7735 LCD display for output. The graphing software [directive0] built does a great job of creating a Trekesque aesthetic, displaying data from various in-built sensors, such as temperature, humidity, and barometric pressure. There’s also a low-resolution thermal imaging camera – and it’s hard to get more sci-fi than that.
While we’re a ways off from medically-useful tricorders, it’s nonetheless fun to see replica props that have some life and functionality built into them. The tricorder remains a popular build – we see them pretty regularly! – and we can’t wait to see where the fandom takes them over the next few years. Video after the break.
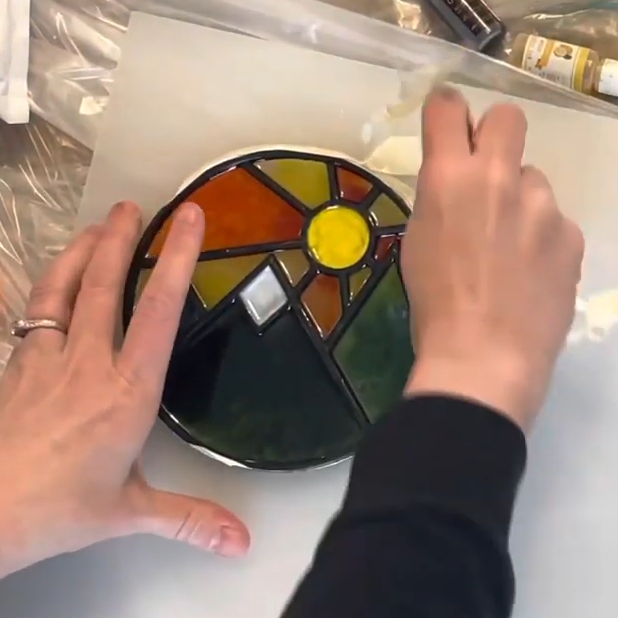
Like the looks of stained glass, but not the amount of work, skill, and materials involved? Well, [Northern Geometry] shows how to sidestep all that nonsense and use a 3D printed frame, epoxy, and some alcohol-based inks to create a pretty good fake stained-glass effect piece of art.
A smooth polypropylene board is the key to a glassy smooth back.
[Northern Geometry] has played with this idea before, but shares some refinements and tips on getting the best results. One suggestion is to begin by securely taping the 3D printed frame to a smooth polypropylene board as a backer. Giving the cured resin a smooth surface is important to get the right look, and since resin will not bond to the polypropylene, it can be used as a backer to get that done.
Once the frame is mounted, pour a small amount of epoxy into each cavity and ensure it gets into every corner, then let it cure. The thin bottom layer of resin will seal things as well as create a glassy-smooth backing that is the perfect foundation for finishing the piece with colored resin as needed.
Once that is done, and everything has had plenty of time to cure fully, just pop the piece off the board. Check it out in the video embedded below, where [Northern Geometry] shows the process from start to finish.