Winners Of Hackaday’s Data Loggin’ Contest: Bluetooth Gardening, Counting Cups, And Predicting Rainfall

The votes for Hackaday’s Data Loggin’ Contest have been received, saved to SD, pushed out to MQTT, and graphed. Now it’s time to announce the three projects that made the most sense out of life’s random data and earned themselves a $100 gift certificate for Tindie, the Internet’s foremost purveyor of fine hand-crafted artisanal electronics.

First up, and winner of the Data Wizard category, is this whole-garden soil moisture monitor by [Joseph Eoff]. You might not realize it from the picture at the top of the page, but lurking underneath the mulch of that lovely garden is more than 20 Bluetooth soil sensors arranged in a grid pattern. All of the data is sucked up by a series of solar powered ESP32 access points, and ultimately ends up on a Raspberry Pi by way of MQTT. Here, custom Python software generates a heatmap that indicates possible trouble spots in the garden. With its easy to understand visualization of what’s happening under the surface, this project perfectly captured the spirit of the category.
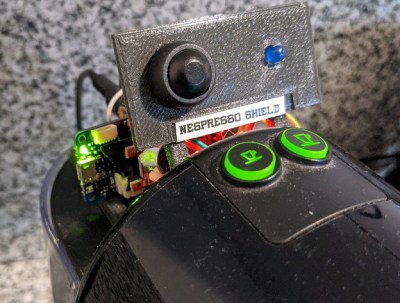
Next up is the Nespresso Shield from [Steadman]. This clever gadget literally listens for the telltale sounds of the eponymous coffee maker doing its business to not only estimate your daily consumption, but warn you when the machine is running low on water. The clever non-invasive method of pulling data from a household appliance made this a strong entry for the Creative Genius category.

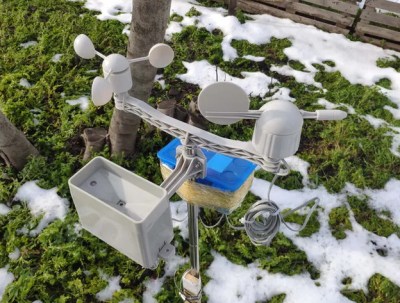
Last but certainly not least is this comprehensive IoT weather station that uses machine learning to predict rainfall. With crops and livestock at risk from sudden intense storms, [kutluhan_aktar] envisions this device as an early warning for farmers. The documentation on this project, from setting up the GPRS-enabled ESP8266 weather station to creating the web interface and importing all the data into TensorFlow, is absolutely phenomenal. This project serves as a invaluable framework for similar DIY weather detection and prediction systems, which made it the perfect choice for our World Changer category.

There may have only been three winners this time around, but the legendary skill and creativity of the Hackaday community was on full display for this contest. A browse through the rest of the submissions is highly recommended, and we’re sure the creators would love to hear your feedback and suggestions in the comments.

Continue reading “Winners Of Hackaday’s Data Loggin’ Contest: Bluetooth Gardening, Counting Cups, And Predicting Rainfall”

Could Seven Gamers Play Quake On Just One 1996 SGI Machine?

[Linus Tech Tips] undertook a fun experiment a few years back. By running multiple virtual machines on a single tower PC with tons of RAM and GPUs, it was possible to let seven gamers play on a single rig at once. [CelGenStudios] found the idea intriguing, and has theorised that the same feat could be possible on mid-1990s Silicon Graphics hardware.

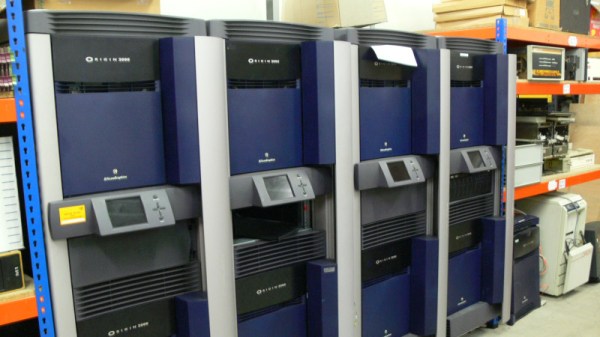
The idea is to use the Origin 2000 server as the base. These didn’t ship with any form of video output or even a keyboard and mouse interface. However, by substituting in the IO6G module from the Onyx2 machine, and SI graphics cards from the Octane, it’s possible to get graphics and input up and running. With multiple graphics cards and a few CAD DUO boards installed via a PCI adapter called the “shoebox”, there’s provisions for up to four separate monitors, keyboards and mice. With all this hardware, it’s theoretically possible for four users to login to the X server running in the IRIX OS on the Origin 2000 machine. Then, it’s a simple matter of firing up four instances of Quake and a dedicated server and you’re up and gaming.

[CelGenStudios] goes so far as exploring the limits of the supercomputer-grade hardware, suggesting that 7 players or more could be possible. Unfortunately, SGI hardware isn’t easy to come by, nor is it cheap, even decades after release — so thus far, the concept remains untested. We’d dearly love to see such a setup happen at QuakeCon or a hacker con, though, so if you pull it off, you know how to call. We note there’s a few Octane 2000s at the Jim Austin Computer Collection, so perhaps they might be the ones to achieve the feat.

In the meantime, check out a practical exploration of the concept on modern hardware with the original [Linus Tech Tips] project. The basic theory is simple – create a hugely powerful PC, with a beefy CPU, plenty of RAM, and one graphics cards for each of the seven players. They run multiple virtual machines and managed to deliver a full 7 player experience running off just one CPU.

Continue reading “Could Seven Gamers Play Quake On Just One 1996 SGI Machine?”

If You Can Measure It, You Must Display It

When can you be sure that you’re logging enough data? When you’re logging all of the data! Of course there are exceptions to the above tongue-in-cheek maxim, but it’s certainly a good start. Especially since data storage on, for instance, an SD card is so easy and cheap these days, there’s almost no reason to not record most every little bit of data that your project can produce. Even without an SD card, many microcontrollers have enough onboard flash, or heck even RAM, to handle whatever you throw at them. The trick, then, is to make sense out of that data, and for me at least, that often means drawing pretty pictures.

I was impressed this week by a simple but elegant stepper motor diagnosis tool hacked together by [Zapta]. Essentially, it’s a simple device: it’s a “Black Pill” dev board, two current sensors, an EEPROM for storing settings, and a touchscreen. Given that most of us with 3D printers rely on stepper motors to get the job done, it’s certainly interesting to do some diagnostics.

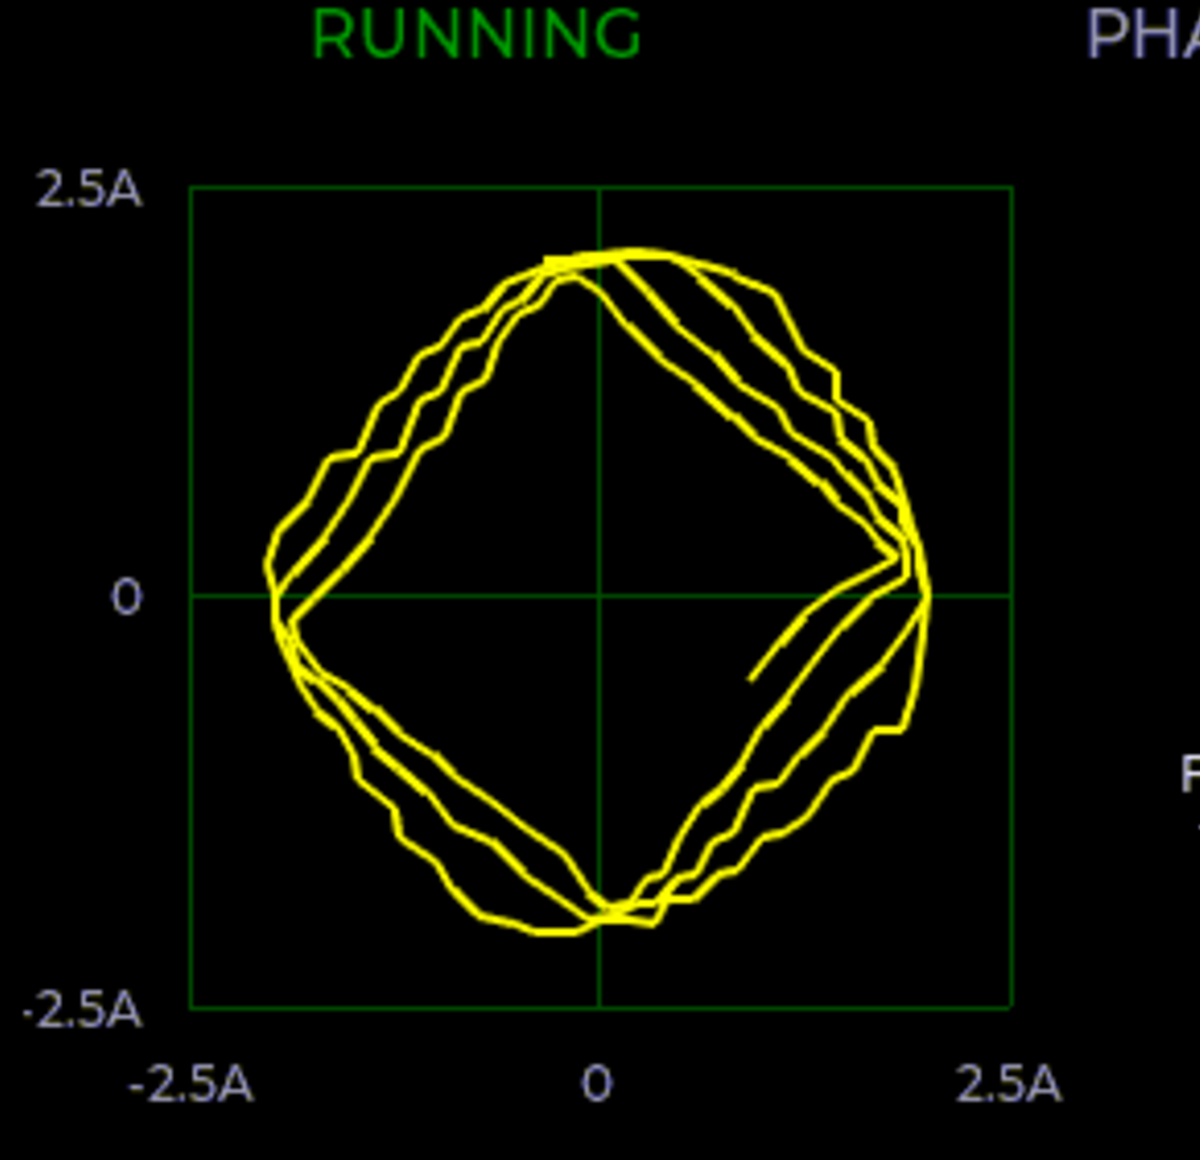
By logging voltage and current measurement on each phase of a stepper motor, you can learn a lot about what’s going on, at least if you can visualize all that data. And that’s where [Zapta]’s tool shines. It plots current vs motor speed to detect impedance problems. Tuning the current in the first place is a snap with Lissajous patterns, and it’ll track your extruder’s progress or look out for skipped steps for you across an entire print job. It does all this with many carefully targeted graphs.

I was talking to [Niklas Roy] about this, and he said “oh check out my hoverboard battery logger“. Here we go again! It sits inline with the battery and logs current and voltage, charging or discharging. Graphs let you visualize power usage over time, and a real-time-clock lets you sync it with video of using the hoverboard to help make even more sense of the data.

So what are you waiting for? Sensors are cheap, storage is cheap, and utilities to graph your data after the fact are plentiful. If you’re not logging all the relevant data, you’re missing out on some valuable insights. And if you are, we’d love to see your projects! (Hint, hint.)

3D Printer Control Board Packs A Raspberry Pi Compute Module 4

Traditionally, 3D printer control boards have used simplistic 8-bit microcontrollers to command the stepper drivers and ultimately move the machine where it needs to go. Newer boards have switched over to 32-bit microcontrollers, but they’re still relatively limited computationally. Because of this, a Raspberry Pi running OctoPrint is usually used to provide more complex features such as remote management and live video.

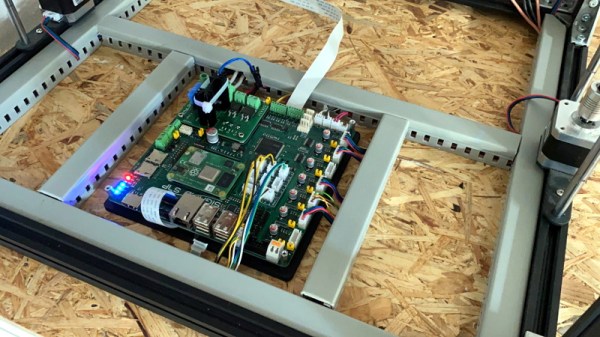
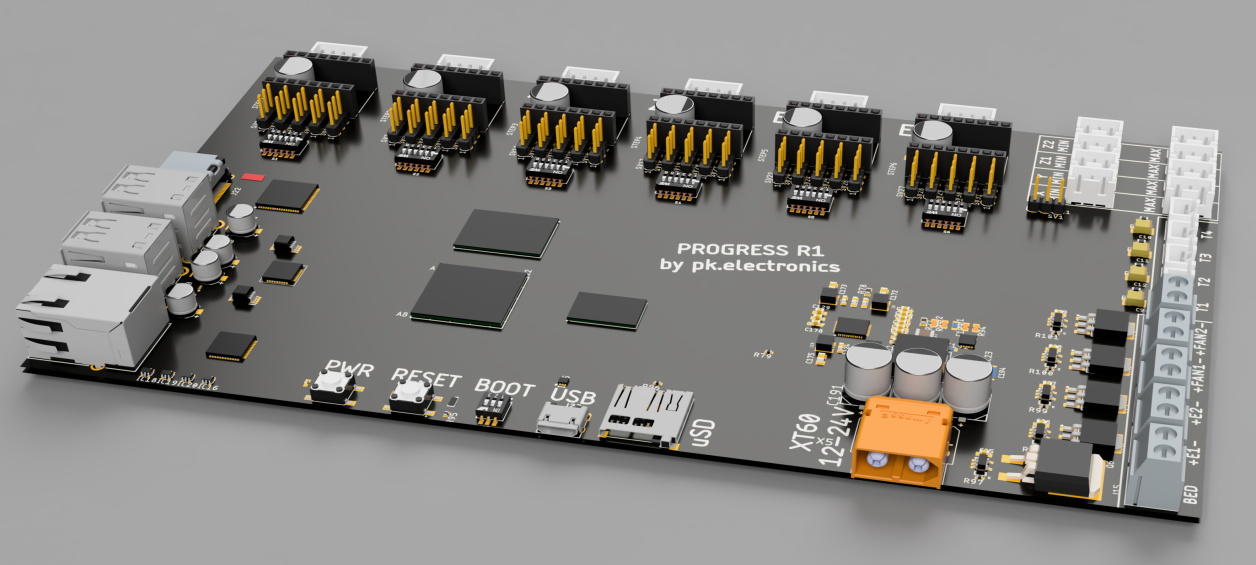
Looking to combine these different devices into a single all-in-one board, [pkElectronics] developed the Sigmoid S7P. With an STM32 microcontroller, TMC2209 stepper drivers, a Raspberry Pi Compute Module 4, and plenty of room for expansion, it promises to be a drop-in upgrade for essentially any 3D printer running on an open source firmware that could be ported over.

An earlier concept for the Sigmoid

According to [pkElectronics], the idea for the Sigmoid had been floating around for several years, but never got off the ground due to the difficulties in dealing with the SO-DIMM interface used by previous iterations of the Compute Module. But with the switch to smaller and denser connector for the CM4, the board finally started to take shape.

Whether you just used it as a convenient way to integrate OctoPrint into your printer, or want to get into something more advanced like Klipper, the Sigmoid S7P looks like a very exciting project. [pkElectronics] says they are considering producing the board commercially if there’s interest, so if you want one of these for your own custom 3D printer build, let them know.

Apple-Picking Robot Stems From Labor Shortage

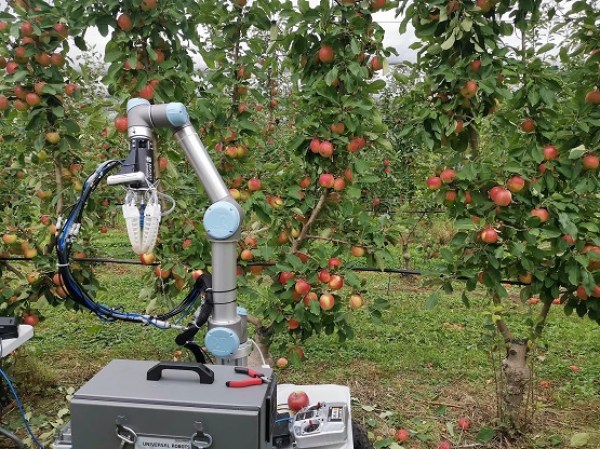
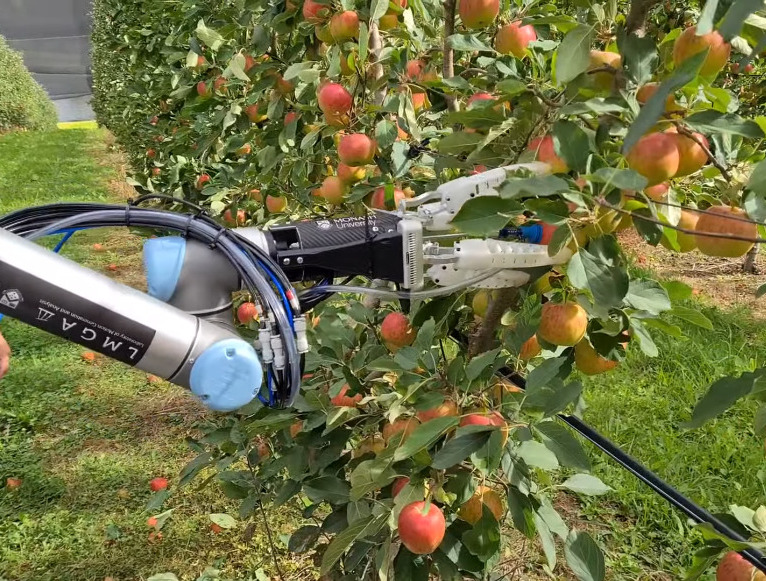
Among all the job-related problems wrought by the pandemic, here is another one that comes as the result of people generally staying home: there are hardly any backpackers to do traditional transient backpacker jobs like picking apples. Researchers at Monash University’s Department of Mechanical and Aerospace engineering found a way to fill in the gap by building a pneumatic robot arm that can harvest an apple every seven seconds at top speed.

A suite of cameras and algorithms look for fruit amongst the foliage and carefully remove it by gripping it gently and twisting, much like a human would. In order to do this, the robot must consider the shape of the fruit, the way it’s hanging, and where to separate it from the tree while keeping damage to a minimum. A suction system helps pull the apple into the soft, four-fingered grip and then the arm twists and turns to deposit the apple into the bin.

There are a lot of upsides to this robot, including the fact that it works in any lighting and weather conditions and can ID an apple in less than 200 milliseconds. The only problem is that this operation results in the occasional missing stem — a cosmetic problem that sounds nit-picky, but would definitely prevent some stores from buying the fruit. Well, that, and there only seems to be one of these robots so far.

There are two videos after the break — a short one that gives you the gist, and a much longer one that offers a view of the suction cup, which emerges from the middle of the fingers like a xenomorph’s little mouth.

Some readers may be wondering why apples are still picked individually when shaking harvesters exists. “Shake-and-catch” tends to bruise apples, making them undesirable for produce sellers, however, apples destined for juicing have no issue with being handled roughly by the harvesters as shown in this fascinating harvest video. Robot grippers are gentle and we’ve seen all shapes and sizes that are suited to a particular need. When the needs are more general, rollers or squishy spheres might be the answer.

Continue reading “Apple-Picking Robot Stems From Labor Shortage”

Modding A Casio W800-H With A Countdown Timer

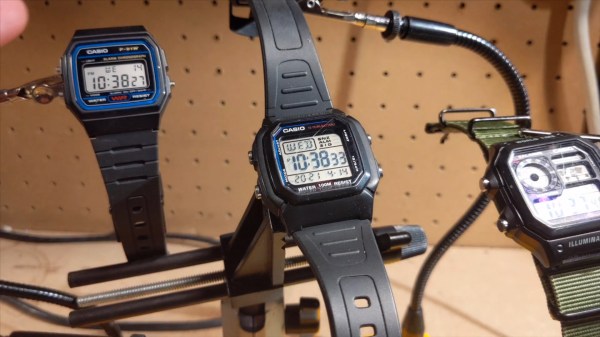
Stock, the Casio W800-H wristwatch ships with dual time modes, multiple alarms, and a stopwatch – useful features for some. However, more is possible if you just know where to look. [Ian] decided to dive under the hood and enable a countdown timer feature hidden from the factory.

The hack involves popping open the case of the watch and exposing the back of the main PCB. There, a series of jumpers control various features. [Ian]’s theory is that this allows Casio to save on manufacturing costs by sharing one basic PCB between a variety of watches and enabling features via the jumper selection. With a little solder wick, a jumper pad can be disconnected, enabling the hidden countdown feature. Other features, such as the multiple alarms, can be disabled in the same way with other jumpers, suggesting lower-feature models use this same board too.

It’s a useful trick that means [Ian] now always has a countdown timer on his wrist when he needs it. Excuses for over-boiling the eggs will now be much harder to come by, but we’re sure he can deal. Of course, watch hacks don’t have to be electronic – as this custom transparent case for an Apple Watch demonstrates. Video after the break.

Continue reading “Modding A Casio W800-H With A Countdown Timer”

VGA Graphics Card In 74xx Logic

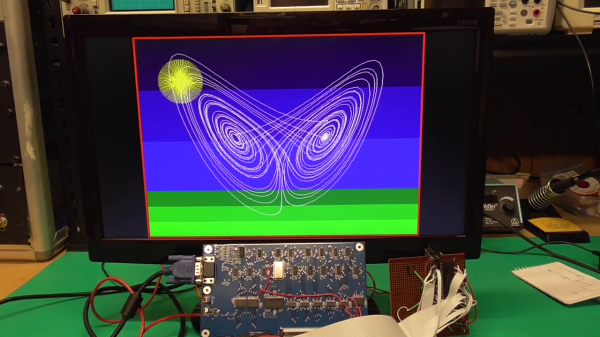
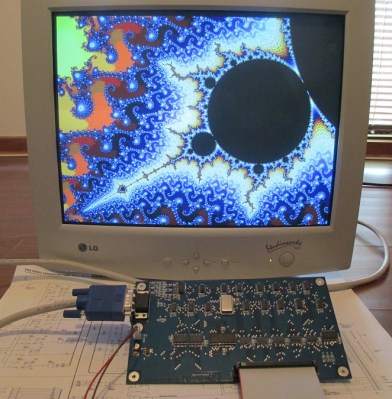
Feeling nostalgic we presume, [Glen Kleinschmidt] set out to build a 640x480x64 VGA controller card from discrete logic chips. If we ignore the 512Kx8 Cypress SRAM video memory, he succeeds, too — and on a very readable, single page A3 schematic. The goal is to interface some of his older 8-bit machines, like the TRS-80 Model 1 and the BBC Micro, but for now he’s running a demo using a 20+ year old PIC16F877 micro.

[Glen] provides all the schematics, Gerbers, and C source code on his website should you be inclined to reproduce one for yourself. He has three versions in the works, with various capabilities (there’s a table on his website). As an alternative, one could always use an FPGA or a custom-built chip such as the SSD1963 to generate video for these micros, but sometimes the urge to go retro is too great to resist. We get the feeling that for [Glen], this is a project unto itself, and being able to interface it to his 8-bit computers is just a convenient excuse.

This isn’t [Glen]’s first retro project, either. Check out his analog computer “bouncing ball” project we covered back in 2017. Have you struggled with the build vs. buy decision, and how do you decide?

Continue reading “VGA Graphics Card In 74xx Logic”