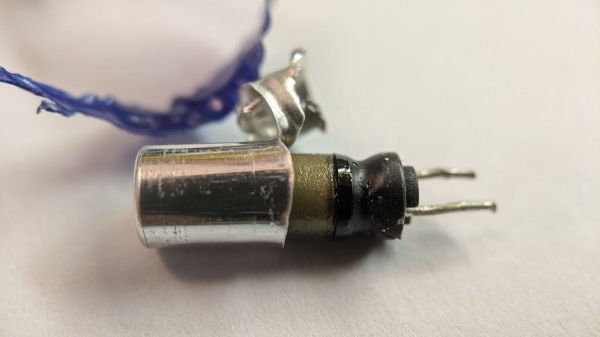
Custom Laser Tag Rifle Packs A Sonic Punch

Laser tag is rarely (if ever) referred to as “The Sport of Kings”, but is a fun pastime nonetheless. While some are content to play with off-the-shelf toys, others prefer to make their own gear to suit their needs. [Heine Nielsen] is just one such builder, creating a fully-featured laser rifle loaded with features.

As far as hardware goes, [Heine]’s laser rifle is packed to the gills. There are two ESP32s running the show, along with a meaty 6S lithium battery to provide plenty of juice for long combat sessions. A 40W audio amp is hooked up to a speaker mounted in a faux-grenade launcher, aping the design of the M203 – and is able to deliver ear-splitting sound for that realistic touch.

Knowing the popularity of modern FPS games, [Heine] cribbed a lot from titles like PUBG and CS:GO. Grabbing sound effects from various weapons was just one step, with the ultimate goal being to replicate advanced game modes from these games. To help keep the player aware of the game state, there’s even a HUD on the gun, thanks to a 2.8″ TFT screen tucked into the scope.

It’s a serious build for playing serious laser tag, and we’d love to head out to the field for a match with gear like this. We’ve seen other hyper-realistic builds before too, like this one that uses actual blanks. Video after the break.

Continue reading “Custom Laser Tag Rifle Packs A Sonic Punch”

Tool Writes Your PWM Code For You

The good thing about computers is they do your work for you, right? If you are a programmer, that doesn’t always seem to be a true statement. [Runtimemicro] has the answer, at least if you are writing PWM code for the Arduino. Their free application lets you set a few parameters, visually see the results, and then generates code for you. You can see a video of the tool in operation, below.

According to their site, the tool works for timers 1 through 5 on an Arduino Nano, Uno, or Mega2560. The app appears to work on Windows, but it doesn’t look like it would have any trouble running under Wine on other platforms.

Continue reading “Tool Writes Your PWM Code For You”

Dutch Hackerspaces At Ten Years Old: Celebrating A Community With A Special Map

The exotic cruise destination of Hoek van Holland Haven.

A couple of months ago I wrote a piece about the evolution of hackerspaces, and mentioned that I’d be attending a party for a hackerspace birthday. As I write this that party was last weekend, and it was celebrating both the birthday of RevSpace in the Hague, and the tenth anniversary of hackerspaces in the Netherlands. After a relaxing ocean cruise across the North Sea and a speedy train ride I found myself in RevSpace with a bottle of Club-Mate in my hand, hanging out with not only the locals but a selection of others from all across northwestern Europe and beyond. RevSpace is an exceptionally well-organised hackerspace with a large membership, so there was plenty to talk about and a lot of interesting projects to look at.

There was a short programme of talks in Dutch, covering hackerspace history and interviewing a panel of hackerspace founders. I am told that these may make their way online with an English translation in due course, and should be worth looking out for. Then there was an epic-scale barbecue, an old-school rave with Gameboy chiptunes and analogue synth EDM among other delights, and the chance for an evening’s socialising with the rest of the attendees. Continue reading “Dutch Hackerspaces At Ten Years Old: Celebrating A Community With A Special Map”

Fallout-Inspired Clock Radio Helps You Party Like It’s 2077

Since its first release seven years ago, Raspberry Pi single-board computers have become notoriously ubiquitous in compact and portable builds. They’re used in many different applications, but one of the most interesting has got to be how it can turn just about any old thing into a Linux computer. [xito666] writes in with his own build, a portable retro computer inspired by the retro-futuristic stylings of the Fallout games.

For true aesthetic accuracy, [xito666] used an old discarded Crown 5TV-65R portable TV and radio combo. The unit hails from the 1970s, so a bit newer than Vault technology, but it still gives off a great retro charm with its CRT screen and knobs. Sadly, the original components couldn’t be reused, and the shell was stripped empty so that the new hardware could take its place. This includes an off-the-shelf HDMI LCD screen with resistive touchscreen and new potentiometers and knobs that still fit in with the overall look of the machine.

What makes this build unique, however, is that it also includes custom software to turn it into a clock and music player, with the deliciously Pip Boy-like UI being controlled entirely with the front buttons and knobs. The whole project is well written up in the Reddit post, in it [xito666] explains some of their choices and planned improvements. One that we would suggest ourselves is replacing the menu scrolling selector dial with a rotary encoder rather than a potentiometer, for that added knob feel. We also think that with the addition of a keyboard, it would easily pass for one of those luggables from the 1980s, a style of project we’ve featured once or twice here before.

Troubleshooting A Symlink — A Whodunnit For The Git Record Books

While I normally sport the well-worn fedora of a hard-boiled sysadmin, Sunday mornings I swap that neo-noir accessory for the tech-noir: a pair of pro headphones. This is the tale of the collision of those two roles. An educational caper, dear reader. You see, my weekly gig is to run a Facebook Live Stream, and Facebook just recently began enforcing a new policy: all video streams are required to use encryption. We have Fedora installed on the media machine, and use Open Broadcaster Software (OBS) to stream. It should have been easy to update the stream settings. I made the necessary changes and tested it out — no luck. The error message was less than helpful: “Failed to connect to server”. With a sigh, I took off my headphones, put my sysadmin hat on, and walked out into the digital darkness. It was time to get back to work.

Continue reading “Troubleshooting A Symlink — A Whodunnit For The Git Record Books”

Arduino Handheld Game System Gets A Grip

With little more than an Arduino, an OLED display, and some buttons, it’s easy to build your own faux-retro game system. There’s even a growing library of titles out there that target this specific combination of hardware, thanks in no small part to the Arduboy project. But unless you’re content to play Circuit Dude on a breadboard, at some point you’ll probably want to wrap the build up in a more convenient form.

Like many that came before it, the OLED handheld created by [Alex Zidros] takes inspiration from a Nintendo product; but it’s not the Game Boy. Instead, his design is based on a 3D printed grip for the Switch Joy-Cons that he found on Thingiverse. After tacking on a holder for the PCB, he had the makings of a rather unique system.

We especially like the offset SSD1306 OLED display. Not because we think a game system with an asymmetrical layout is a particularly sound design decision, but because it gives the whole build a rather cyberpunk feel. When combined with the exposed electronics, the whole system looks like it could have been cobbled together from a futuristic dumpster. Which is high praise, as far as we’re concerned.

Opposite the display is a LiPo pouch battery that [Alex] says was liberated from a portable speaker, and down below is an Adafruit Feather 328P. There are two tactile switches mounted to the front of the Feather, and in something of a departure from these sort of builds, there are two more on the shoulders of the 3D printed case. Everything is held together with nothing more exotic than a scrap of perfboard, making it easy for anyone who might want to build their own version.

If you prefer your Arduino and OLED gaming to come in a slightly more familiar form factor, the build that was done inside of a Dreamcast Visual Memory Unit (VMU) has always been a favorite around these parts.

A Network Attached VFD Tube Clock

The elegance of Power over Ethernet (PoE) is that you can provide network connectivity and power over a single cable. Unfortunately not nearly enough hardware seems to support this capability, forcing intrepid hackers to take matters into their own hands. The latest in this line of single-cable creations is this beautiful Vacuum Fluorescent Display (VFD) clock from [Glen Akins].

Testing the VFD tube socket

One of the key advantages VFDs have over their Nixie predecessors is greatly reduced energy consumption, and after [Glen] ran the numbers, he saw that a display using six VFD tubes could easily be powered with standard PoE hardware. With this information, he started designing the PCB around the early 1990s era IV-12 tube, which has the advantage of being socketed so he could easily remove them later if necessary.

[Glen] first had to create a schematic and PCB footprint for the IV-12 tube that he could import into Eagle, which he was kind enough to share should anyone else be working with these particular tubes down the line. After a test of the newly designed socket was successful, he moved onto the rest of the electronics.

The clock is powered by a Microchip PIC18F67J60, which connects to the Ethernet network and pulls the current time down from NTP. After seeing so many clocks use an ESP to connect to the Internet over WiFi, there’s something refreshing about seeing a wired version. The tube segments are driven by a HV5812, also Microchip branded. Lastly, [Glen] used a number of DC/DC converters to generate the 1.5 V, 3.3 V, 5 V, and 25 V necessary to drive all the electronics and VFDs.

We absolutely love the simplicity of this clock, from its sleek aluminum enclosure to that single RJ45 jack on the back. But if you’re looking for something with a bit more flash, [Glen] also put together some PoE Christmas lights over the holidays which share a number of design elements with this project.

Continue reading “A Network Attached VFD Tube Clock”