The Ultimate Guide To Artisan USB Cables

If you’ve gone through the trouble of building your own customized mechanical keyboard, the last thing you want to do is plug it into your computer with some plebeian USB cable from the local electronics shop. Your productivity, nay livelihood, depends on all those 1s and 0s being reproduced with the crisp fidelity that’s only possible with a high-end USB cable. Anything less would be irresponsible.
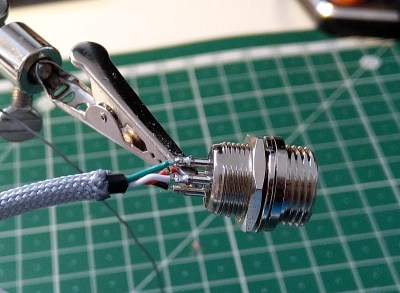
Or at least, that’s what the advertising on the back of the package would say if we tried to sell the custom USB cables built by [Josef Adamčík]. But alas, he’s decided to give away all the details for free so that anyone can build their own delightfully overengineered USB cables. Do you need a paracord USB cable with GX12 aviation connectors in the middle? Of course not. But you still want one, don’t you?

As [Josef] admits in his blog post, there’s nothing particularly special about what he’s doing here. If you can splice wires together, you can build your own bespoke USB cables. But what attracted us to his write-up was the phenomenal detail he goes into. Every step is clearly explained and includes a nice, well-lit, photo to illustrate what he’s doing. Honestly, when the documentation for soldering some USB connectors onto a wire looks this good, there’s no excuse why more substantial projects get little more than a few blurry shots.

Of course, even for those of us who are no stranger to the ways of the soldering iron, there’s likely a few ideas you can pull from this project. We particularly liked his tip for taping the USB connector to the workbench while soldering it rather than trying to get it to stay in a vise, and his method for adding a coil the cable with a wooden jig and a heat gun is definitely something to file away for future use.

Then again in an era where even the lowly-USB cable can potentially be a security threat, or simply not live up to published specifications, rolling your own might not be such a bad idea.

An Arduino Pro Micro With USB-C

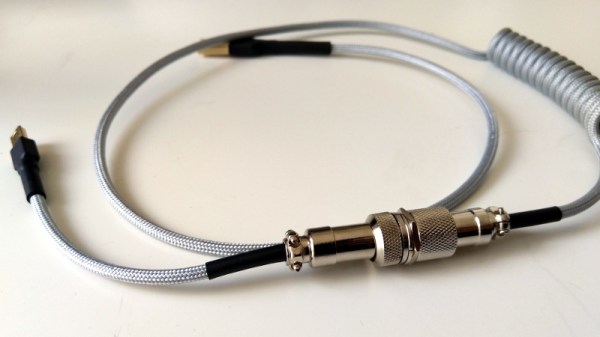
USB-C versus USB Micro connectors are turning into one of the holy wars of our time. Rather than be left on the wrong side of the divide [Stefan S] has come up with his own USB-C version of of an Arduino Pro Micro to avoid having to always find a different cable.

Home made Arduinos come in all shapes and sizes from the conventional to the adventurous, and from the pictures it seems that this one is firmly in the former camp. The USB-C is present in connector form alone as the device is only capable of talking at the much slower speed of the ATMEGA32U4 processor, but having the newer connector should at least make cabling more accessible.

This is one of the most practical Arduino clones we’ve ever seen, but one of our other favourites is also a bit impractical.

3D Printer Emission Monitor Quantifies The Stench

While we don’t yet know the long-term effects of hanging out around 3D printers, it doesn’t take a in-depth study to figure out that their emissions aren’t healthy. What smells toxic usually is toxic. Still, it’s oh-so-fun to linger and watch prints grow into existence, even when we have hundreds or thousands of hours of printing under our belts.

Most of us would agree that ABS stinks worse than PLA, and that’s probably because it releases formaldehyde when melted. PLA could be viewed as slightly less harmful because it has a lower melting point, and more volatile organic compounds (VOCs) are released at higher temperatures. Though we should probably always open a window when printing, human nature is a strong force. We need something to save us from our stubbornness, and [Gary Peng] has the answer: a smart 3D printer emission monitor.

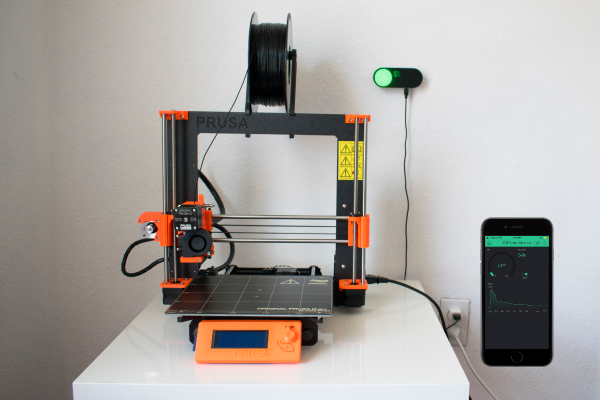
The monitor continually checks the air quality and collects data about VOC emissions. As the VOCs become elevated during printing, the user is notified with visual, audio, and phone notifications. Green means you’re good, yellow means open a window, red means GTFO. There’s a brief demo after the break that also shows the phone interface.

The heart of this monitor is a CCS811 gas sensor, which provides VOC data to a Particle Photon. [Gary] built a simple Blynk interface to handle the alerts and graph historical VOC readings. He’s got the code and STLs available, so let this be the last time you watch something print in blissful semi-ignorance.

Concerned about air quality in general? Here’s a standalone portable monitor designed to quantify the soul-crushing stuffiness of meetings.

Continue reading “3D Printer Emission Monitor Quantifies The Stench”

Solar-Harvesting Blinkenlights

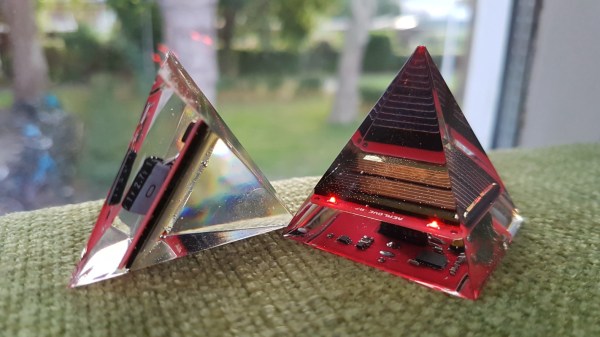
A few years ago a fad ripped through the makersphere where people would build cheap, solar powered LED blinkers, glue a magnet to them, and throw them on anything metal. It was an interesting time, but luckily did not last for too long. With some effort and craftsmanship, though, the solar throwie idea can be turned into something more elegant, though, such as this solar harvesting blinking gadget.

Like its predecessors, the device itself behaves simply, although this one is equipped with a small supercapacitor which can run the device for 8 hours without sun. It has a small solar panel which can charge the capacitor in five minutes, and from there the LEDs inside simply blink. The quality shows in the final packaging, as [Jasper] has taken to encasing them in epoxy shapes such as pyramids, for a nice paperweight or tchotchke. It is also noteworthy because of Jasper’s test device; since he is mass producing them he needed something to test each board for functionality before encasing them in the epoxy, and he built a small pen tester specifically for them too.

While the build is pretty straightforward, anyone looking to enclose a simple circuit in epoxy without bubbles or other problems might want to check this one out. It would also be a good platform for building other throwie-like projects on top of. In the past they didn’t just blink lights but also did things like run small Linux servers.

Building A Full-Fat Air Quality Monitor

Over the years many people have made an air quality monitor station, usually of some configuration which measures particulates (PM2.5 & PM10). Some will also measure ozone (O3), but very few will meet the requirements that will allow one to calculate the Air Quality Index (AQI) as used by the EPA and other organizations. [Ryan Kinnett]’s project is one of those AQI-capable stations.

The AQI requires the measurement of the aforementioned PM2.5 (µg/m3), PM10 (µg/m3) and O3 (ppb), but also CO (ppm), SO2 (ppb) and NO2 (ppb), all of which has to be done with specific sensitivities and tolerances. This means getting sensitive enough sensors that are also calibrated. [Ryan] found a company called Spec Sensors who sell sensors which are pretty much perfect for this goal.

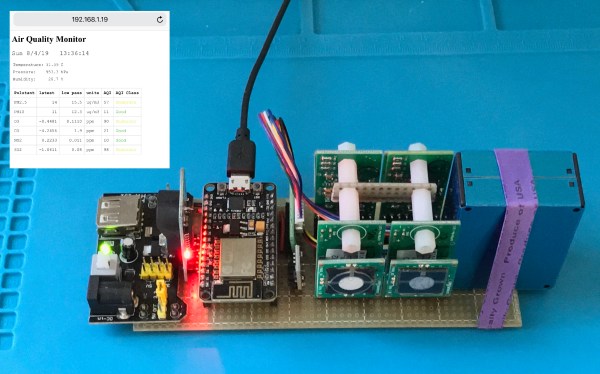
Using Spec Sensor’s Ultra-Low Power Sensor Modules (ULPSM) for ozone, nitrogen-dioxide, carbon monoxide and sulfur dioxide, a BME280 for air temperature, pressure and relative humidity, as well as a Plantower PMS5003 laser particle counter and an ADS1115 ADC, a package was created that fit nicely alongside an ESP8266-based NodeMCU board, making for a convenient way to read out these sensors. The total one-off BOM cost is about $250.

The resulting data can be read out and the AQI calculated from them, giving the desired results. Originally [Ryan] had planned to take this sensor package along for a ride around Los Angeles, to get more AQI data than the EPA currently provides, but with the time it takes for the sensors to stabilize and average readings (1 hour) it would take a very long time to get the readings across a large area.

Ideally many of such nodes should be installed in the area, but this would be fairly costly, which raises for [Ryan] the question of how one could take this to the level of the Air Quality Citizen Science project in the LA area. Please leave your thoughts and any tips in the comments.

A Pocket QWERTY For Arduino And More

If you want to add a keypad to your Arduino project, the options are pretty limited. There’s that red and blue 4×4 membrane we’ve all seen in password-protected door lock projects, and the phone layout version that does pretty much all the same tricks. Isn’t it time for a full Arduino-compatible keyboard? [ELECTRONOOBS] thinks so.

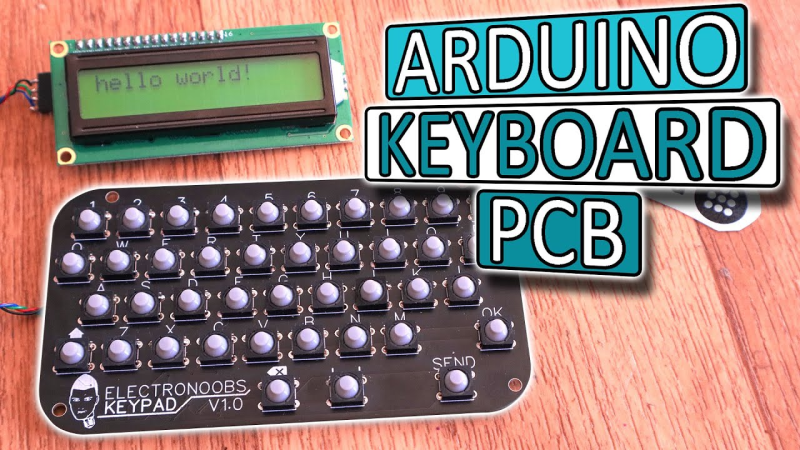
This 41-button Arduino keyboard PCB is a stepping stone to his next project, a pair of two-way texting machines. (Which is nice, because we were totally going to suggest that). It’s based on that ubiquitous red/blue keypad, but it has a full QWERTY layout. There’s also a shift button that opens up special characters and uppercase, and the addition of return, ok, and send keys puts it over the top. The best part of this keyboard, hands down, is the soft, soundless buttons. Though you trade clicky feedback for comfort, it will be well worth it after a few dozen presses.

The keypad uses an onboard ATMega328P to scan the matrix for button presses, decode them, and send them via UART or I²C to an Arduino. [ELECTRONOOBS] has the PCB files available via Patreon for now, though they will be open in the future. The code is already available for download on his website.

Future plans include an LED to indicate when shift is pressed, and adding the special characters next to the numbers on the silkscreen (whoops!). Be sure to check out the build video after the break.

Want an Arduino-driven keyboard for longer hauls across the alphabet? Saddle up and ride this candy-colored mechanical unicorn.

Continue reading “A Pocket QWERTY For Arduino And More”

When Project Enclosures Go Bad: A Message From The Trenches

A wall-mounted, electric car charging station doesn’t sound like it’d require the most exciting or complicated enclosure. This was pretty much the assumption [Mastro Gippo] and his team started out with when they decided to turn what came back from a product designer into a real enclosure for the ‘Prism’ charging hardware they had developed. As it turned out, the enclosure proved to be the most challenging part of the project.

The first thought was to make a cheap, simple prototype enclosure for integration testing. This led them through trying out FDM 3D printed enclosures, wooden enclosures, folded (glued) plastic enclosures, aluminium extruded enclosures, Zamac alloy enclosures, and finally the plastic injection molded enclosure they had been avoiding due to the high costs.

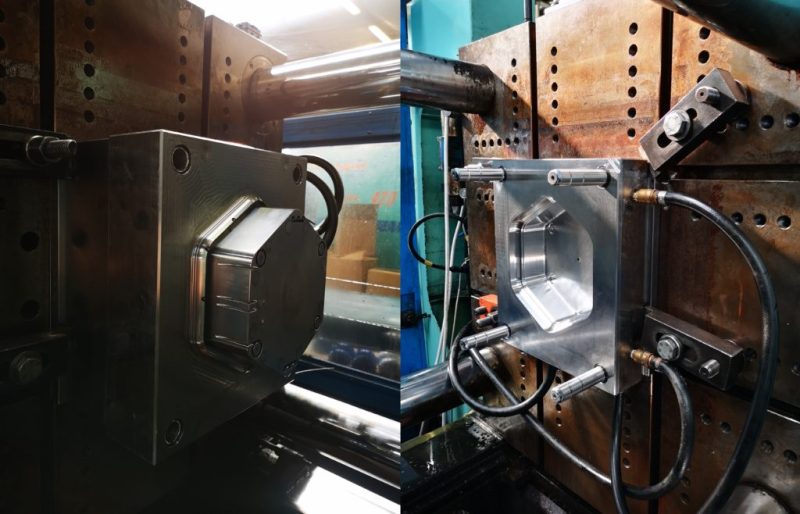
The injection mold used to produce the Prism enclosures with.

Even if it meant taking out a loan to cover the setup costs, the results really do speak for themselves with a well-integrated design and two really happy looking partners-in-business. It does make us wonder how projects lacking this kind of financial leeway can get professional-grade enclosures without breaking the proverbial bank.

FDM 3D printing is always getting better and with a lot of post-processing you can have one enclosure that looks great, but that doesn’t scale. Outsourcing it to a professional 3D printing company like Shapeways is better, but it’s still not injection-molding quality and if the product is successful you’ll eventually invert the cost/benefit you were shooting for in the first place. Where is the middle ground on great-looking enclosures? Please let us know your experiences and thoughts in the comments.