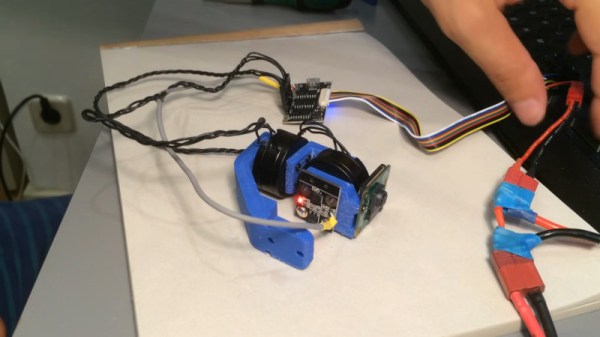
On the outside, a Geiger counter seems like a complicated thing. And you might think a device that detects a dangerous, mostly invisible threat like radiation should be complicated. But they’re actually pretty simple. The Geiger-Muller tube does most of the work, which boils down to detecting brief moments of conductivity caused by chain reactions of charged particles in radioactive materials.
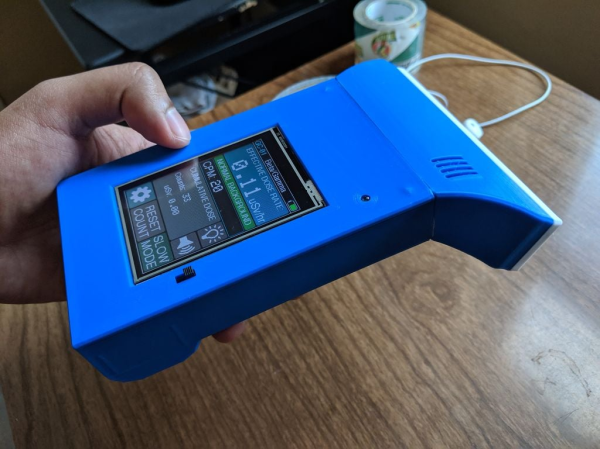
[Prabhat_] wanted to build a unique-looking Geiger counter, and we’d say that this slick, Star Trek-esque result succeeds. A well-organized display shows the effective dose rate, counts per minute, and cumulative dose, which can be displayed in either microsieverts or millirems. We dig the 3D printed case design, because we like to see form follow function.
The counter is powered by an 18650 cell that’s DC-to-DC boosted to 400+ volts. A NodeMCU processes the signal coming in from the G-M tube and expresses it in both clicks and LED blinks, both of which can be toggled on or off from the home screen. The alert threshold can be customized in the settings, which means the point at which green changes to red.
Click-click-click past the break for [prabhat_]’s great walk-through video, where he tests it with uranium ore and a thoriated gas lantern mantle.
If you want to take the opposite approach and get to clicking ASAP, well, fire up your hot glue gun and dump out your scrap bin.
Continue reading “DIY Geiger Counter Is Sure To Generate Clicks”