Add A Trackpoint To A Mechanical Keyboard

People love their tech, and feel like something’s missing when it’s not there. This is the story of one person’s desire to have the venerable trackpoint in their new keyboard.

[Klapse] loves a Lenovo old-style non-chicklet keyboard, so, despite the cost, five were ordered. They very quickly ended up with keys that didn’t work, although the trackpoints still did. After buying a sixth which ended up the same, [Klapse] decided that maybe giving up on the Lenovo keyboards was the best idea. A quick stop at a local store scored a fill-in mechanical keyboard, but in the back of [klapse]’s mind the need for a trackpoint remained. Maybe one could be frankensteined in to the keyboard that was just purchased?

Underside of the trackpoint, fitted to the keyboard PCB

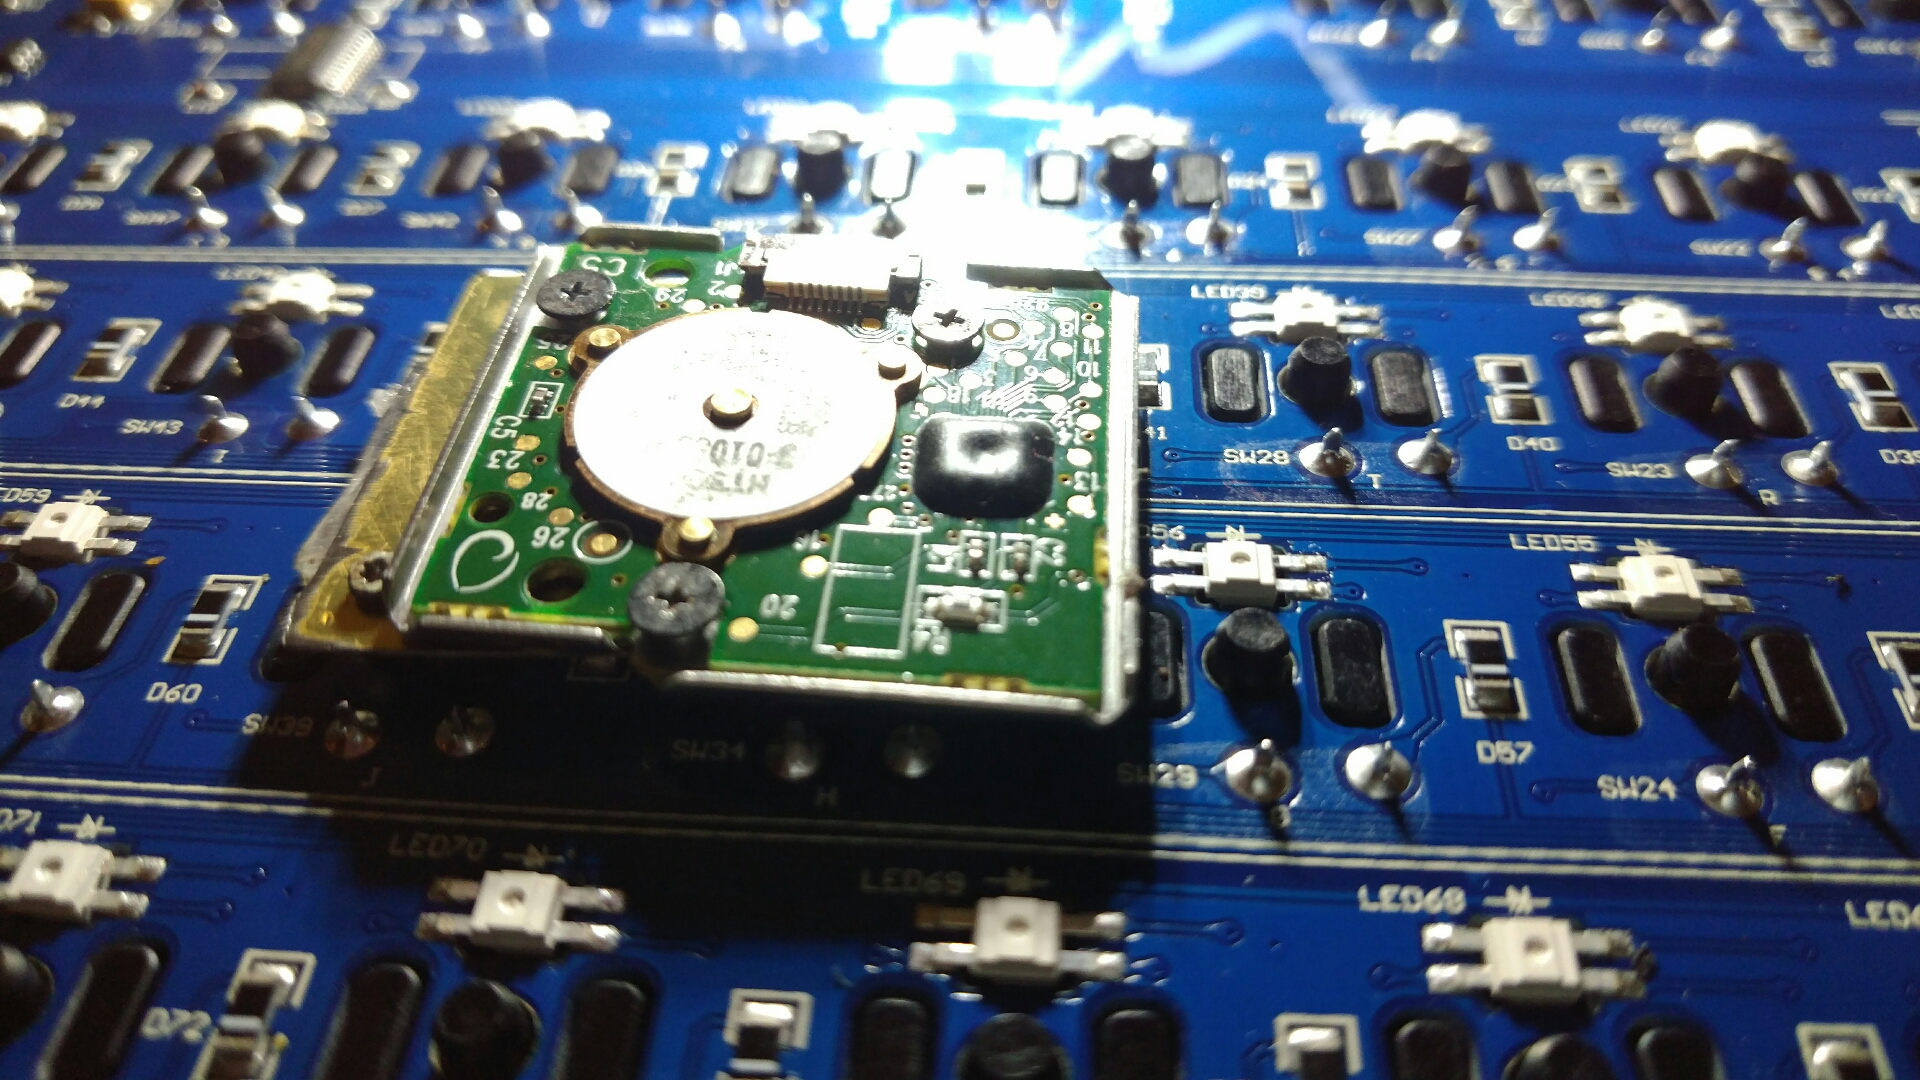
The keyboard’s circuit board had traces everywhere, with nowhere to drill through between the correct keys, typically between the G, H and Y keys. But there was a hole used for mounting the PCB nearby. between the H, J, U and Y keys. The trackpoint needed to be extended to reach all the way through the key caps, so [klapse] searched the house looking for something that might do. Turns out that a knitting needle fits perfectly.

At this point a side-hack emerged. [Klapse] found a drill bit small enough to make the necessary hole in the trackpoint shaft to fit the needle. But the bit was too small for the drill chuck. In true hacking style, the bit was wrapped with duct tape and held in the drill. Sure, it wobbled a lot and it was really difficult to get it to drill in the center of the shaft, but it worked, eventually. The needle was cut off and glued into the hole, the key caps were modified a bit to allow the trackpoint through and the rubber tip put back on.

They say, “desire to cram old tech into new is the mother of invention.” Or something similar, anyway. Check out how a Teensy liberated a Lenovo laptop keyboard trackpoint and all. Also, check out this custom keyboard with integrated trackpoint, of course.

Picovoice Puts Smarts Offline In 512K Of Memory

We live in the future. You can ask your personal assistant to turn on the lights, plan your commute, or set your thermostat. If they ever give Alexa sudo, she might be able to make a sandwich. However, you almost always see these devices sending data to some remote server in the sky to do the analysis and processing. There are some advantages to that, but it isn’t great for privacy as several recent news stories have pointed out. It also doesn’t work well when the network or those remote servers crash — another recent news story. But what’s the alternative? If Picovoice has its way, you’ll just do all the speech recognition offline.

Have a look at the video below. There’s an ARM board not too different from several we have lying around in the Hackaday bunker. It is listening for a wake-up phrase and processing audio commands. All in about 512K of memory. The libraries are apparently quite portable and the Linux and Raspberry Pi versions are already open source. The company says they will make other platforms available in upcoming releases and claim to support ARM Cortex-M, Cortex-A, Android, Mac, Windows, and WebAssembly.

Continue reading “Picovoice Puts Smarts Offline In 512K Of Memory”

Raspberry Pi Raccoon-proof Cat Feeder

Feeding things in the outside world is difficult, especially when there are clever creatures like raccoons out there that will break in and steal everything given half a chance. [_ah6] wanted to build a feeder for feral cats that would dispense food, but without encouraging the local raccoons. So, they built a feeder that included a webcam that could see who was waiting for dinner, and dispense food remotely without spooking the cat.

The feeder is built around a modified cereal dispenser that is connected to a Raspberry Pi. This is also connected to a webcam and an IR light source. The camera view can be checked through a web browser, and the feeding can be triggered from a voice assistant. Cats are creatures of routine, so [_ah6] feeds them twice a day and the cats quickly figured out the routine. The feeder only dispenses small amounts of food, and the heavyweight construction of the feeder means that the local raccoons can’t get into the stored food. [_ah6] had originally planned to use a solar power source, but that remains a project for another day.

We’ve come a long way, but cat-facial recognition was en vogue eight years ago for guarding the cat door — keeping the dead mice out rather than the racoons.

Via [reddit]

Forcing Amazon Alexa Compatible Stuff To Speak To Google Assistant

It took a long time, but it’s 2019, and we’re starting to get used to the concept of talking to a computer to make it control things around the house. It’s not quite as cool as it seemed when we saw it in films way back when, but that’s just real life. The problem is, there’s a multitude of different systems and standards and they don’t all necessarily work together. In [Blake]’s case, the problem is that Woods brand hardware only works with Amazon Alexa, which simply won’t do.

[Blake] went through the hassle of getting an Amazon Alexa compatible WiFi outlet to work with Google Assistant. It’s a bit of a roundabout way of doing things, but it works. A TP-Link HS-105 WiFi plug is used, which can be controlled through Google Assistant voice commands. The part consists of two PCBs – a control board that speaks WiFi, and a switching board with relays. [Blake] used the control board and hooked it up to a Raspberry Pi. When switched on by a command from Google, the HS-105 sets a pin high, which is detected by the Raspberry Pi. The Raspberry Pi then runs a software implementation of the KAB protocol used by the Woods hardware, triggering it when it receives the signal from the TP-Link hardware.

If we understand correctly, [Blake] had to go to this trouble in order to make his special outdoor-rated outlets work with his Google Home setup. Hopefully interoperability improves in years to come, but we won’t hold our breath.

We’ve seen some pretty convoluted projects in this space before, often using IFTTT — like this ESP8266 voice controlled tank.

Homebrew ZX Spectrum title Nohzdyve

Netflix Drops ZX Spectrum Homebrew Title Nohzdyve

The dark, dystopian future is ever-present in the Netflix show Black Mirror, but the latest release in the series, Bandersnatch, presents a decidedly different narrative. Bandersnatch is a branching story that follows the fictional events of a garage-programmer named Stephan who develops the titular game, Bandersnatch, for the Tuckersoft company set in 1980s England. The whole thing plays out as a choose-your-own adventure game fit straight off the Sega CD (albeit with actual full motion video) by allowing watchers to pick what happens next in the story. Not one to miss a cross-promotional opportunity, Netflix also released a playable ZX Spectrum homebrew title, Nohzdyve, developed by a friend of Hackaday, [Matt Westcott].

Keen viewers of Bandersnatch were able to ascertain that the screeching sound at the end of the show when loaded into a ZX Spectrum would display a QR code. That in turn led to a real website for the fake Tuckersoft company (thankfully in HTML). The website itself showcases the fictional company’s software library and upcoming releases, but it also took things a step further. The duality of Bandersnatch is carried over to the website as there are branching paths for those that remove ‘www’ from the URL. Doing so reveals Tuckersoft’s website from an alternate timeline where Bandersnatch was never created, however, a downloadable copy of Nohzdyve in a .tap file is there for the taking.

The Nohzdyve game itself is a vertically scrolling action game that uses the ZX Spectrum’s garish color palette to great effect. Racking up a high score in the game can be done via emulator (for example Speccy) or for the most authentic experience, on real hardware. This may be the best reason to fire up a tape drive in a while, but for those seeking the less-analog approach there is always this gameplay footage from Mr. Tom FTW’s channel:

Continue reading “Netflix Drops ZX Spectrum Homebrew Title Nohzdyve”

Designing Tiny Motors Right Into The Robot’s Circuit Board

Motors are not overly complex, but this one is downright simple. Carl Bujega has been working on a motor design that heavily relies on the capabilities of the printed circuit board (PCB) fabrication processes. His talk at the 2018 Hackaday Superconference covers how he built a brushless DC motor and speed controller into a PCB. You can watch the newly published video after the break.

There are two main parts of an electric motor; the stator is stationary while the rotor spins on bearings. Electromagnetic forces are used to cause that spinning action. In this case, Carl has built the electromagnets as coils on a 4-layer circuit board (six coils on each layer). When electrified, a magnetic field is generated that pushes against the rare-earth magnets housed in the rotor.

A couple of things are really interesting here. First, those coils are usually made of “magnet wire” (enamel covered wire that is very thin) wrapped around an iron core. Using the circuit board instead saves both physical space, and the time and expense of wrapping coils of wire in the traditional way. Second, Carl has been designing with manufacture in mind; you can see in the image show that his motor design is dead-simple to assemble by inserting a 3mm bearing in the PCB, inserting magnets into the plastic rotor and snapping it into place. The end goal is to make robot actuators that are part of the circuit board itself.

The genesis of this idea came from Carl’s interest in drone design, in fact, he jumped right into a drone startup immediately after finishing his EE. The company didn’t last, but his thirst for interesting designs is ongoing. When looking at reducing the total parts necessary to build a quadcopter he happened on the idea of PCB-based coils and he’s followed it to this motor design, and beyond to some very interesting flexible-PCB robot design work which you can check out on his Hackaday.io page, YouTube, and Twitter.

There are of course some trade-offs to this. The motor is low torque since it uses an air core and not an iron core. And he’s had trouble implementing a sensor-less Electronic Speed Controller (ESC) as the back-EMF from the coils appears to be too weak. Not to fret, he added a hall sensor and has succeeded in designing an ESC that measures just 14mm by 8mm. In fact, he’s holding up the ESC and motor in the image at the top of this article!

Continue reading “Designing Tiny Motors Right Into The Robot’s Circuit Board”

A Smartwatch You Can Easily Build Yourself

The concept of a smartwatch was thrown around for a long time before the technology truly came to fruition. Through the pursuit of miniaturisation, modern smartwatches are sleek, compact, and remarkably capable for their size. Companies such as Apple and Samsung throw serious money into research and development, but that doesn’t mean you can’t create something of your own. [Electronoobs] has done just that, with this Arduino-based smartwatch build.

The brain of the watch is that hacker staple, the venerable ATmega328, most well known for its use in the Arduino Uno and Nano platforms. An FTDI module is used for USB communication, making programming the board a snap. Bluetooth communication is handled by another pre-built module, and a smartphone app called Notiduino handles passing notifications over to the watch.

This is a build that doesn’t do anything crazy or difficult to understand, but simply combines useful parts in a very neat and tidy way. The watch is impressively thin and compact for a DIY build, and has a host of useful functions without going overboard.

We’ve seen other DIY builds in this space, too – such as this ESP8266-based smartwatch. Video after the break.

Continue reading “A Smartwatch You Can Easily Build Yourself”