If there’s one thing that can trigger people, it’s the printer racket. Printer manufacturers who put DRM-like features into their consumables are rightly viewed as Satan’s spawn, and while these monsters have been content so far to only put digital rights management features into their ink and toner cartridges, they appear to now have their rapacious gaze set on print media too. At least according to the good folks over at the Electronic Frontier Foundation, who claim that Dymo’s latest generation of label printers will have RFID tags in the label cartridges, apparently to prevent consumers from buying non-Dymo media. The company doesn’t bill it as a way to lock you into their exorbitantly priced consumables, of course; rather, this is an exciting new feature that’s called “Automatic Label Recognition,” which keeps track of what labels are installed and how many are left. Of course, this is just red meat to people like us, and we fully expect to see workarounds in the not-to-distant future.
Hackaday Podcast 157: Airtag Security, Warped 3D Printing, Suturing Grapes With A DIY Robot Arm, And The Wizard’s Calculator
This week Hackaday Editor-in-Chief Elliot Williams and Managing Editor Tom Nardi look at the week’s most interesting stories and projects, starting with the dystopian news that several people have had their bionic eye implants turn off without warning. We then pivot into an only slightly less depressing discussion about the poor security of Apple’s AirTags network and how it can be used to track individuals without their knowledge. But it’s not all doom and gloom. We’ll look at new projects designed to push the envelope of desktop 3D printing, and marvel at a DIY robotic arm build so accurate that it can put stitches in the skin of a grape. You’ll also hear about the surprisingly low cost of homebrew hydrophones, the uncomfortable chemistry behind wintergreen, and an early portable computer that looks like it came from Hogwarts School of Witchcraft and Wizardry.
Take a look at the links below if you want to follow along, and as always, tell us what you think about this episode in the comments!
You wouldn’t Direct Download a Podcast, would you?
Inputs Of Interest: Canadian MCM/70 Was Kinda Like The First Cyberdeck
Not to start a debate in the comments or anything, but what would you say was the first microcomputer, or personal computer? We suppose the answer depends on your definition. Some would argue that the PC was born at Xerox PARC with a curious portrait-mode display and a three-button mouse, while others would say it all began in a garage in either Los Altos, California or Albuquerque, New Mexico.
If you take the term ‘computer’ to mean that which can crunch big numbers fairly quickly, then the Canadian-made MCM/70 is arguably the first personal computer in that it is portable, has an alphanumeric keyboard, a display, and supports cassette storage, which could be used to extend the 8K of memory. It was an all-in-one computing solution, and it could have an optional telephone modem built in. This was a forward-thinking machine for 1974.
Continue reading “Inputs Of Interest: Canadian MCM/70 Was Kinda Like The First Cyberdeck”
3D Printer Showdown: $350 Consumer Vs $73,000 Pro Machine
The quality of consumer-grade 3D printing has gone way up in recent years. Resin printers, in particular, can produce amazing results and they get less expensive every day. [Squidmar] took a miniature design and printed it (or had it printed) on some cheap resin printers and a 65,000 Euro DWS029. How much difference could there be? You can see for yourself in the video below.
We were surprised at the specs for the more expensive machine. It does use a solid-state laser, but for that cost, the build volume is relatively small — around 15 x 15 x 10 cm. There were actually five prints created on four printers. Three were on what we think of as normal printers, one was on the 65,000 Euro machine, and the fifth print was on a 10,000 Euro printer that didn’t look much different from the less expensive ones.
Of course, there is more to the process than just the printer. The resin you use also impacts the final object. The printers tested included a Phrozen 4K Mini, a Phrozen 8K Mini, a Solos Pro, and the DWS 029D. The exact resins or materials used was hard to tell in each case, so that may have something to do with the comparisons, too.
Do you get what you pay for? Hard to say. The 8K and Solos were neck-and-neck with some features better on one printer and some better on the other. The DWS029D did perform better, but was it really worth the increase in price? Guess it depends on your sensitivity. The 8K printer did a very credible job for a fraction of the cost. Of course, some of that could have been a result of the materials used, too, but it does seem likely that a very expensive dental printer ought to do better than a hobby-grade machine. But it doesn’t seem to do much better.
The DWS printer uses a laser, while most hobby printers use UV light with an LCD mask. We’ve seen low-end resin printers on closeout for around $100 and you can get something pretty nice in the $200 neighborhood. In between these two extremes are printers that use Digital Light Processing (DLP).
Continue reading “3D Printer Showdown: $350 Consumer Vs $73,000 Pro Machine”
The SHA2017 Badge Just Keeps On Giving, This Time It’s A Solar Monitor
Regular readers will know that we have covered the world of electronic badges for many years, and nothing pleases us more than seeing an event badge having a life afterwards rather than becoming a piece of e-waste. Thus we were especially pleased to see [Angus Gratton]’s use of a SHA2017 badge as a solar output monitor, over four years after the event.
The SHA badge used an ESP32 as its processor, and paired it with a touch keypad and an e-ink screen. Its then novel approach of having a firmware that could load MicroPython apps laid the groundwork for the successful open source badge.team firmware project, meaning that it remains versatile and useful to this day.
The solar monitor simply grabs time-series information from the database used by his web graphing system and displays it on the e-ink screen in graph form, but the interest apart from the use of the badge in his treatise on MicroPython coding. He makes the point that many of us probably follow unconsciously, writing for full-fat Python and then fixing the parts which either don’t work or use too many resources on its slimmer cousin. Finally he powers the device from an old phone charger, and shares some tips on controlling its tendency to reboot on power spikes.
It’s almost a year ago that we showed you a SHA badge being used as an environmental sensor.
Thanks [Sebastius] for the tip.
LED Bubbles From The 1970s Tell The Time
[CuriousMarc] is nothing if not curious. Finding some old TI timekeeping chips to reverse engineer, he set out to make a clock using old-fashioned “bubble LEDs.” You can see the result of his tinkering in the video below. For the uninitiated, bubble LEDs are 7-segment LEDs with magnifying bubbles over each digit. These were popular in calculators, watches, and other places that used LEDs before LCDs largely displaced them.
The history of these has to do with the power required to light an LED. You don’t technically need a magnifying lens, but larger LEDs take more power. These displays were relatively low power and used tiny LEDs with light pipes to make each dot a full segment. The lens made the segments larger and easier to see.
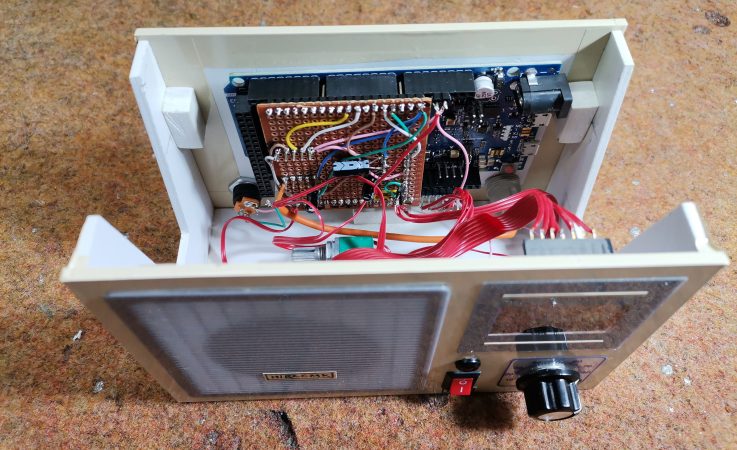
Beyond the TI chip and HP displays, there isn’t too much else needed. [Marc] just wired the whole thing using the IC as a substrate. Sort of dead bug construction using enameled wire. At first, it didn’t work but it turned out to be a battery issue. The device really wanted 2.5 V and not the 3 V provided by the battery. The solution required a little detective work.
We know this isn’t a very practical project, but we love seeing this old tech again and while the dead bug construction isn’t beautiful, there is something appealing about the look of it. Maybe one day people will build steampunk things and discopunk will be for the 1970s?
We’ve seen bubble LED projects before. If you want something more in a watch form factor, that exists, too.
$7 Tent Heater Provides Comfort On A Budget
At Hackaday’s Minnesota office, we appreciate central heat and hot coffee because the outdoor temperature is sub-zero in Celsius and Fahrenheit. Not everyone here has such amenities, and families living in tents could use heater help. If you live somewhere inhospitably cold and have the resources (time being the most crucial), please consider building and donating alcohol jet burners.
Alcohol burners like these are great for tents because if they tip over, they self-extinguish. You can fill them with 70% rubbing alcohol and they’ll heat a small space, and if running on denatured alcohol, they can be used to cook with. They won’t do you much good outdoors unless you have significant wind protection, as the tiny jet is likely to blow out. The first time you light one, you must heat the coil with a lighter or another heater to vaporize incoming fuel, then it can sustain itself by wicking fluid up from the reservoir jar. Relighting after a tip or accidental gust only takes a spark since the copper is already hot.
If you came for a hack, note how they fill the small tubes with salt funneled through a condiment cap before bending them. Sure, there are springy pipe bending tools, but who doesn’t already have salt and tape? Keeping humans warm is crucial, but heating metal takes a different approach.
Heater Bloc's Guide for Building the Copper Coil Alcohol Heater and Safety Enclosure is now available!
Please share this zine with anyone interested in instructions on how to build a tent-safe alcohol heater. https://t.co/iv5xKd93jo— Heater Bloc (@HeaterBloc) November 23, 2021
Thank you for the tip, [cyberlass]