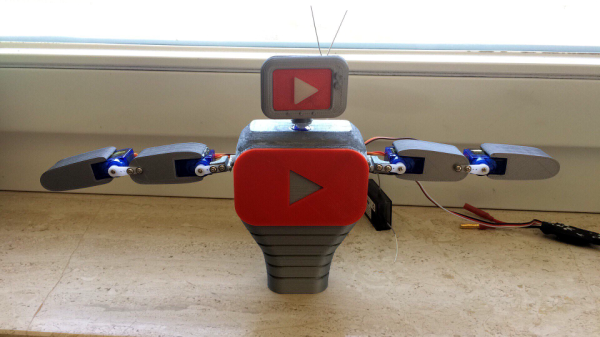
Racing Simulator Built From Scrapheap Finds

Paradise means something different for everyone, it could be a sitting by a fire on a rainy night or lying on a sun-kissed beach. But for us, and makers like [liltreat4you], it’s a well stocked scrap pile out behind the house. After buying a racing wheel and pedals for his Xbox, he took a trip out to his little slice of paradise and found nearly all the hardware he needed to build a professional looking race simulator. According to his breakdown, most of the money he spent on this build ended up going into that sweet red paint job and the speed-enhancing stickers.

Everything the light touches is our kingdom.

Not all of us are as lucky as [liltreat4you], and we probably won’t just happen upon a driver’s seat out of a Mazda, or a bunch of perfectly bent metal pipes from an old trampoline out on the back forty. But trolling Craigslist or cruising around for flea markets can still get you parts like these for cheap, so try not to be too discouraged if your backyard isn’t quite as well stocked.

Once he had the metal pipes and seat from the car, the rest of the build came together pretty quickly. After building an oval out of his salvaged pipes, he attached the seat and the arms that would eventually hold the steering wheel and display. A plate was also added at the bottom for the pedals to sit on. By using long bolts, [liltreat4you] was even able to add a degree of adjustment to the wheel position. Being that he got his seat out of a real car, there’s the usual adjustment you’d expect there as well.

Speaking of which, [liltreat4you] casually mentions that you should disconnect the battery of the donor vehicle before taking out the seat, as it’s possible that the removal of the seat or the disconnection of the seat harness can cause the airbags to deploy. We can neither confirm nor deny this, but it’s probably safe advice to follow.

The purists out there may claim that what [liltreat4you] has put together doesn’t quite meet the definition of simulator in its current form. But with the addition of some instrumentation and just a bit of physical feedback, he’ll be well on his way to the complete driving experience.

Precision Voltage Reference Source

[barbouri] found a few old (vintage?) parts from the early ’80’s while rummaging through his parts bin, and quickly spun out a small PCB to build a 10.000 V reference using these old ICs. Throwing together a small number of parts, he was able to build a source which might be good enough to use as a reference for another circuit or provide a quick calibration check for some of his bench instruments that have a resolution of 1 mV or maybe even 100 μV.

The AD584* pin programmable precision voltage references have been available since the ’80’s and offer four programmable output voltages of 10.000 V, 7.500 V, 5.000 V, and 2.500 V. The chip is laser-trimmed to ensure high accuracy and low temperature coefficient and requires just a few external components to function. It is available in TO-99 hermetically sealed metal can and 8-pin DIP variants. The “S” version of the device that [barbouri] used provides a temperature coefficient of 30 ppm/°C max over a -55 °C to +125 °C temperature range but other versions of the chip offer a better stability. Analog Devices seem to have discontinued the “L” version (pdf), since it is no longer listed in the current data sheet, but you can still get them from a few sources. The “L” version has a temperature coefficient of just 5 ppm/°C.

Using quality parts such as high stability resistors and TO-99 PTFE socket with gold-plated contacts, his observations confirm that the unit is stable within 30 μV, with a very slow voltage increase of a few microvolts every 6 hours. A 15 V linear regulator powers the device with input power coming from an external wall wart. A small aluminum enclosure houses the device, with two gold-plated 4 mm sockets for the output. If you would like to build your own, his board design is hosted on OSH park, or you can download the Eagle CAD design files. He’s posted all links on his blog post, and provides part numbers for all of the parts used. [barbouri] has been doing a good job of building handy devices for his work bench – check out his well-built milli Ohm Meter that we had featured earlier.

Bringing MATLAB To A Vacuum Near You

The essence of hacking is modifying something to do a different function. Many of us learned as kids, though, that turning the family TV into an oscilloscope often got you into trouble.

These days, TVs are flat and don’t have high voltage inside, but there’s always the family robot, often known as a Roomba. Besides providing feline transportation, these little pancake-shaped robots also clean floors.

If you don’t want to evict the cat and still get a robust domestic robot platform for experimentation, about $200 will get you a Roomba made to be hacked — the iRobot Create 2. [Gstatum] has a tutorial for using a Raspberry Pi and MATLAB to get one quickly running and even doing basic object recognition using the Pi’s camera.

The code even interfaces with Twitter. The impressive part is the code fits on about a page. This isn’t, however, completely autonomous. It uses a connected phone’s sensor’s so that the phone’s orientation controls the robot’s motion, but the robot does use sensors to prevent driving into walls or falling off a cliff. It also can detect being picked up and uses the Pi’s camera to detect a green flag.

Continue reading “Bringing MATLAB To A Vacuum Near You”

Dumb Box? Make It Really Smart!

[Stephen Harrison]’s Really Smart Box is a great concept, it’s simultaneously a simple idea while at the same time being super clever. The Really Smart Box isn’t really a box; it’s a drop-in platform that can be made any size, intended to turn any dumb storage box into one that helps manage and track levels and usage of any sort of stock or consumable.

It does this by measuring the weight of the stuff piled on top of it, while also monitoring temperature and humidity. The platform communicates this information wirelessly to a back end, allowing decisions to be made about stock levels, usage, and monitoring of storage conditions. It’s clearly best applied to consumables or other stock that comes and goes. The Really Smart Box platform is battery-powered, but spends most of its time asleep to maximize battery life. The prototype uses the SigFox IoT framework for the wireless data, which we have seen before in a wireless swimming pool monitor.

This is still just a prototype and there are bugs to iron out, but it works and [Stephen] intends to set-and-forget the prototype into the Cambridge Makespace with the task of storing and monitoring 3D printer filament. A brief demo video is embedded below.

Continue reading “Dumb Box? Make It Really Smart!”

Swarm Of Servos Plays This Robotic Glockenspiel

It’s the happiest sounding instrument in the marching band, and it’s got the best name to boot. It’s the glockenspiel, and if this robotic glockenspiel has anything to say about it, the days of human glockenspielists are numbered.

In its present prototype form, [Averton Engineering]’s “Spielatron” looks a little like something from a carousel calliope or an animatronic pizza restaurant band. Using a cast-off glockenspiel from a school music room as a base, the Spielatron uses four mallets to play all the notes. Each key is struck by a mallet secured to a base made of two servos. For lack of more descriptive mallet terminology, these servos provide pan and tilt so the mallet can strike the proper keys. The video below shows the Spielatron’s first recital.

An Arduino runs the servos and a MIDI interface; unfortunately, this version can’t play chords and is a little limited on note length, but upgrades are on the way. We’ve seen a robotic glockenspiel before with a similar design that might have some ideas for increasing performance. But if you’re looking for a more sublime sound, check out this dry ice-powered wind chime.

Continue reading “Swarm Of Servos Plays This Robotic Glockenspiel”

Glue Gun Teardown Reveals Microcontroller Mystery

[electrobob] got a Bosch GluePen cordless hot glue gun. The thing has some nice features — it heats up in fifteen seconds, and charges via USB, and is generally handy for those small and quick jobs that hot glue guns were made to perform. At first glance it seems like a huge improvement over the plug-in varieties, which seem to take forever to heat up when all you need is a quick dab of glue.

As cool as the product sounded, [bob] did what any right-minded hacker would do and opened it up to see how that sucker work and found an ATtiny24A inside. What’s most interesting is that there appears to be no temperature regulation or sensing capability, with the exception of the thermistor in the battery-charging circuit. It’s an intriguing mystery.

The ATtiny controls a power MOSFET that brings the heating element to “approximately 170 degrees” according to the manual. [bob] could find no temperature regulation of the hot end, which measures a steady 12 V at the gate of the transistor then entire time the glue gun is powered on.

That ATtiny24A that runs the whole thing packs 12 GPIO pins, 4 PWM channels, and 2 KB program memory. It appears a bit overpowered for a glue gun controller. [bob] found one of the Tiny’s pins connected the heating element and another to the charging circuit. Maybe a shutoff in case the battery catches fire?

Without a clear shot of the back of the board, it’s a bit of a guessing game, but eight of the twelve GPIO pins appear to be in use. Leave your theories in comments. And if you’ve got any bright ideas about what to do with the remaining four GPIO pins, have at it!

For another of [bob]’s tool hacks, check out his constant current sink we posted earlier this year.

Hackaday Store Discounts To Satiate The Shopping Urge

Score everything in the Hackaday store for 50% off right now.

Today is Thanksgiving in the United States, a time when people migrate back home to spend time with families, fill themselves with Turkey and cranberry sauce, and are inevitably dragged out to the big box stores in search for that one great deal to satisfy their consumer urge.

Whether you observe the holiday or not, you can grab some geeky stuff from the Hackaday Store without the early rise or the need to be in a specific place. You’ll find a collection of some of our favorite hardware, sweet Hackaday apparel, and our beloved print goods sprinkled in. Give it a look.

Facedancer21

Fly a quad indoors with the CrazyFlie 2.0, impersonate USB devices with the Facedancer21, and have a blast with our favorite clock kit, the Bulbdial Clock.

MeARM Pocket Sized Robot ArmGoodfet ProgrammerUSB Tester Bundle

Assemble and program your own robotic MeARM, be the master of all things serial bus with the GoodFET42, and monitor the juice flowing to your USB device with the USB Tester 2.0.

Hundreds of Tindie Items are also on sale this weekend. Tindie where you go to find unique and cutting edge hardware sold by those that designed it. Check out to the Tindie sale page for a complete listing of items going on sale now and throughout the weekend.