We’ll go way out on a limb here and say you’ve probably got a ridiculous amount of flattened cardboard boxes. We’re buying more stuff online than ever before, and all those boxes really start to add up. At the least we hope they’re making it to the recycling bin, but what about reusing them? Surely there’s something you could do with all those empty shipping boxes…
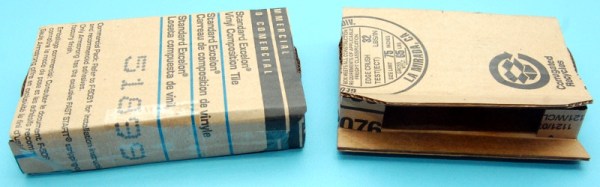
 Here’s a wild idea…why not use them to ship things? But not exactly as they are, unless you’re in the business of shipping big stuff, the probably won’t do you much good as-is. Instead, why not turn those big flattened cardboard boxes into smaller, more convenient, shippers? That’s exactly what [Felix Rusu] has done, and we’ve got to say, it’s a brilliant idea.
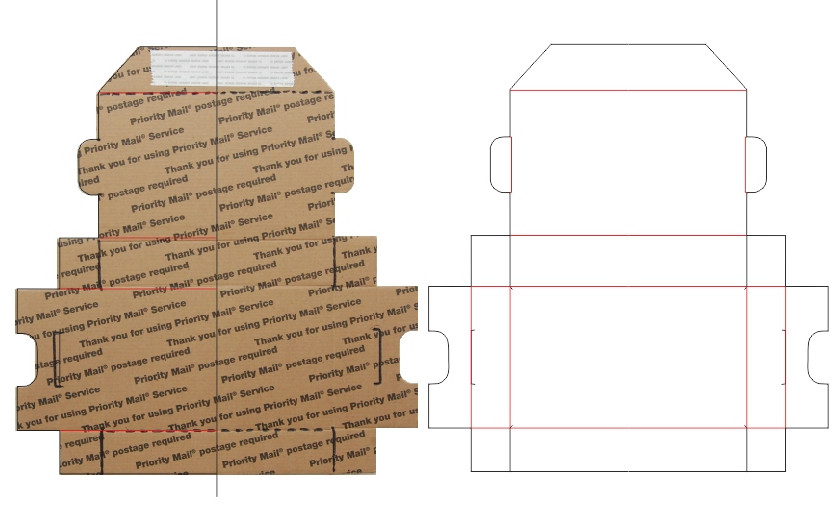
[Felix] started by tracing the outline of the USPS Priority Small Flat Rate Box, which was the perfect template as it comes to you flat packed and gets folded into its final shape. He fiddled with the design a bit, and in the end had a DXF file he could feed into his 60W CO2 laser cutter. By lowering the power to 15% on the fold lines, the cutter is even able to score the cardboard where it needs to fold.
Assuming you’ve got a powerful enough laser, you can now turn all those Amazon Prime boxes into the perfect shippers to use when your mom finally makes you sell your collection of Yu-Gi-Oh! cards on eBay. Otherwise, you can just use them to build a wall so she’ll finally stay out of your side of the basement.
[Thanks to Adrian for the tip.]