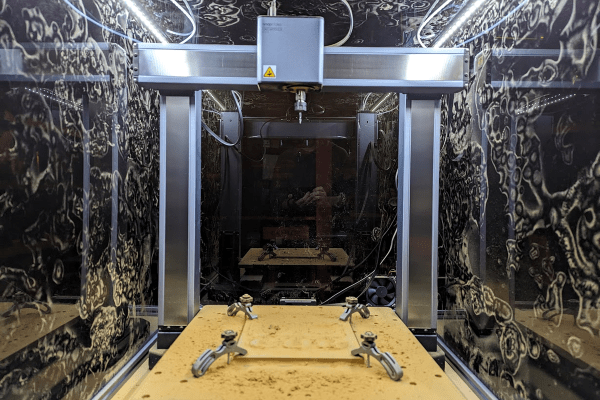
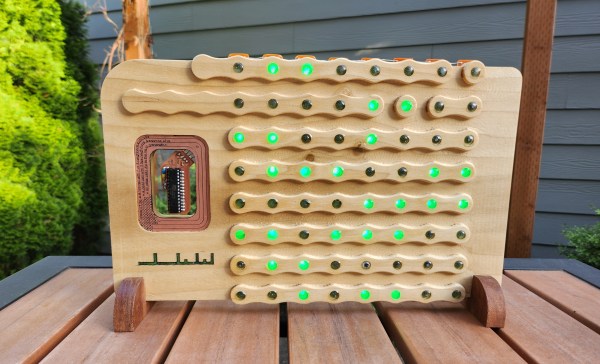
Pizza-Making CNC Machine Is The Only Tool We’ve Ever Dreamed Of

Making pizza is fun, but eating pizza is even better. Ideally, you’ll get to spend much more time doing the latter than the former. If you had a pizza-making CNC machine, that would help you achieve this goal, and thankfully, [Twarner] is working on that very technology.

The Pizza-Pizza CNC Machine is based on Marlin firmware running on a Mini RAMbo 3D printer motherboard, and is a 3-axis CNC machine. At a glance, you could be forgiven for thinking it’s some kind of fancy futuristic vinyl player, but it’s actually intended to cook a tasty delicious pie. It’s a gantry-based machine that uses two tool ends, one charged with distributing sauce, and the other cheese. It’s programmed with G-code to designate areas to coat with sauce and areas to cover with cheese. It can’t create dough from scratch sadly, but instead operates using pre-manufactured pizza bases.

The current level of sophistication is low, and there are issues with cheese clogs and the general messiness of the operation. However, this doesn’t mean there’s no value in automated pizza manufacture. If anything, we want to see the more open-sauce development in this area until we end up with a pizza factory on every kitchen bench worldwide. We’ve already seen that hackers have mastered how to build a good pizza oven, so now we just need to solve this part of the equation. Video after the break.

Continue reading “Pizza-Making CNC Machine Is The Only Tool We’ve Ever Dreamed Of”

Hackaday Podcast 202: CNC Monks, Acrobot, Bootleg Merch, And The Rise And Fall Of Megahex

This week, Editor-in-Chief Elliot Williams and Assignments Editor Kristina Panos stood around and marveled at machinery in its many forms, from a stone-cutting CNC to an acrobatic robot to an AI-controlled Twitch v-tuber. But before all of that, we took a look at the winners of our FPV Vehicle Contest, poured one out for Google Stadia, and Elliot managed to stump Kristina once again with this week’s What’s That Sound. Will you fare better?

Later, we drooled over an open-source smart watch, argued screen printing versus stenciling when it comes to bootleg Hackaday merch, and got into the finer points of punycodes.

Check out the links below if you want to follow along, and as always, tell us what you think about this episode in the comments!

And/or download it and listen offline.

Continue reading “Hackaday Podcast 202: CNC Monks, Acrobot, Bootleg Merch, And The Rise And Fall Of Megahex”

Wireless CNC Pendant Implemented With ESP-NOW

As a fervent fan of twiddly and twirly widgets and tactile buttons in a device’s user interface, [Steve M Potter] created a remote control (pendant) for his CNC machine, which he explains in a recent video that’s also linked down below. In addition to all the tactile goodness, what is perhaps most interesting about this controller is that it uses Espressif’s ESP-NOW protocol. This still uses the same 2.4 GHz as WiFi would, but uses a system more akin to the pairing of a wireless mouse or keyboard.

Advantages of ESP-NOW include the lower power usage, longer range, no requirement for a router and WiFi SSID & password. As far as latency goes, [Steve] measured a round-trip latency of 2.4 ms, which is fast enough for this purpose. Since it does control a potentially dangerous machine, all transmissions are acknowledged and re-transmitted at higher power if needed.

The lower power usage means that the pendant will last a lot longer on a single charge from the 18650 Li-ion cell, while ESP-NOW’s fixed address pairing saves time when turning the pendant on. Meanwhile, on the CNC side, another ESP32 acts as the receiving end for commands, although theoretically an ESP8266 could be used as well, if size or power was a concern there.

As for the transparent enclosure? It’s to make it easier to show it off to interested folk, apparently.

Continue reading “Wireless CNC Pendant Implemented With ESP-NOW”

Watermelon CNC Uses Lazy Susan

It is the time of year when a lot of people in certain parts of the world carve pumpkins. [Gonkee] is carving a watermelon, which we assume is similar. He decided to make a CNC machine to do the carving for him. The unusual part is the use of two lazy Susans to make a rotary carving machine. You can see the result in the video below.

The hardware is clever and there is software that lets you do drawings, although we were hoping for something that would process gcode or slice STL. That would be a worthy add-on project. There were a few iterations required before the Melon Carver 3000 worked satisfactorily. Seeing a carving tool operating on two circles gives us a lot of ideas. We aren’t sure how sturdy the mounts are, so don’t plan on carving aluminum without some changes, but we suspect it is possible.

Then again, a laser head mounted on the frame would have probably made short work of the melon, and wouldn’t require much mechanical stiffness. It would, however, take a little effort to keep it in focus. So many ideas to try!

Watermelon is a popular hacking medium, apparently. There’s even one that holds a GameBoy.

Simple CNC Gear Production With Arduino

We’ve seen plenty of people 3D printing custom gears over the years, but [Mr Innovative] decided against an additive process for his bespoke component. He ended up using a simple CNC machine that makes use of several components that were either salvaged from a 3D printer or produced on one. Using a small saw blade, the machine cuts gear teeth into some plastic material and — presumably — could cut gears into anything the saw blade was able to slice into, especially if you added a little lubrication, cooling, and dust removal.

If you’ve built a 3D printer, you’ll see a lot of familiar parts. Stepper motors, aluminum extrusion, straight rods, bearing blocks, and rod holders are all used in the build. There’s also a lead screw and the associated components you usually see in a printer’s Z-axis. Naturally, an Arduino drives the whole affair.

The saw blade was custom-made from a washer, grinding an edge and using a 3D printed template to cut teeth in it. We might have been more inclined to use a cut-off wheel from a rotary tool, but this certainly did the trick. An LCD accepts the gear diameter and number of teeth. The stepper rotates the correct number of degrees and another stepper lowers the cutting head which is spinning with a common DC motor.

As impressive as this machine is, the fact remains that a 3D printer can produce more complex designs. For example, a herringbone pattern can help with alignment issues. It has been done many times. You can even use a resin printer, although you might prefer to stick with FDM.

Continue reading “Simple CNC Gear Production With Arduino”

Testing An Inexpensive CNC Spindle

The old saying “you get what you pay for” is a cautionary cliché, but is directly contrary to several other common sayings. In the case of [Spikee]’s planned CNC machine build, he took the more adventurous idiom of “no risk, no reward” to heart when he purchased these spindles for the machine from AliExpress. While the delivered product seemed fine, there were some problems that needed investigations.

Upon delivery of the spindle, everything seemed to work correctly out-of-the-box. Even the variable frequency drive, which was programmed at the factory, was working properly. But at around 8000 rpm the machine would begin shaking. The suspected part causing the vibration was the tool holder, so after checking the machine’s runout and also using a specialized vibration sensor this was confirmed to be the case.

Luckily [Spikee] was able to get a refund on the tool holders since they were out of spec, but still has a quite capable spindle on his hands for an excellent price. Without some skills in troubleshooting he might have returned the entire machine unnecessarily. If you are looking for some other ideas in setting up an inexpensive CNC machine, you might also like to look at BLDC motors from a remote control vehicle.

photo of the CNC controller, with the PLCC socket for the CPU, surrounded by driver ICs

Old CNC Brain Swapped With An Arduino

[Sebastian] and [Stefan Shütz] had a ISEL EP1090 CNC machine at home, sitting unused, and they decided to bring it to life. With pretty good mechanical specs, this CNC looked promising – alas, it was severely constrained by its controller. The built-in CPU’s software was severely outdated, had subpar algorithms for motor driving programmed in, and communication with the CNC was limited because the proprietary ISEL communications protocol that isn’t spoken by other devices.The two brothers removed the CPU from its PLCC socket, and went on to wiring a grbl-fueled Arduino into the controller box.

The interposer PCB, with an extra 74HC245 buffer on itThey reverse-engineered the motor driver connections – those go through a 74HC245 buffer between the original CPU and the drivers. Initially, they put an Arduino inside the control box of the CNC and it fit nicely, but it turned out the Arduino’s CPU would restart every time the spindle spun up – apparently, EMC would rear its head. So, they placed the Arduino out of the box, and used two CAT7 cables to wire up the motor and endstop signals to it.

For tapping into these signals, they took the 74HC245 out of its socket, and made an interposer from two small protoboards and some pin headers – letting them connect to the STEP and DIR lines without soldering wires into the original PCB. There’s extensive documentation, GRBL settings, and more pictures in their GitHub repo, too – in case you have a similar CNC and would like to learn about upgrading its controller board!

After this remake, the CNC starts up without hassles. Now, the brothers shall CNC on! Often, making an old CNC machine work is indeed that easy, and old controller retrofits have been a staple of ours. You can indeed use an Arduino, one of the various pre-made controller boards like Gerbil or TinyG, or even a Raspberry Pi – whatever helps you bridge the divide between you and a piece of desktop machinery you ought to start tinkering with.