The Pokémon games have delighted legions of Nintendo gamers over the years, and show no signs of slowing down any time soon. Despite its popularity, there are certain aspects of the games that are unarguably about simply grinding your way to success. For [Mori Bellamy], this simply wouldn’t do – yet their thirst for gold bottlecaps was insatiable. What to do? Automate it, of course.
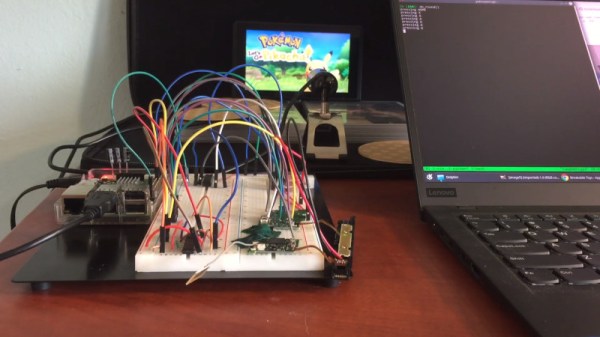
The first step was to hack the Joycons from the Nintendo Switch. A DG333A analog switch IC was hooked up to the buttons inside, and controlled by the GPIO pins of a Raspberry PI. The joystick was then controlled with an MCP4725 DAC, allowing the system to fully emulate control inputs to the console.
With the console now under control by the Raspberry Pi, the next step was to add intelligence. Google’s Tesseract OCR platform was combined with a helping of Python code. This allows the script to read dialog boxes from the game, and use this data to determine which buttons to press to farm items.
[Mori] has provided the code on GitHub for others to use, noting that it should be generalizable to other games with a little work. Fundamentally, the underlying hardware could readily be repurposed to other controllers, too. There’s plenty of other ways to automate the drudgery of gaming, even if you have to use a touch screen. Video after the break.
Continue reading “Farming Items With RasPi-Modified Joycons”