We must all have at some time or another spotted a hack that seems like an incredible idea and which just has to be tried, but turns out to have been stretching the bounds of what is possible just a little too far. A chunk of our time has disappeared without trace, and we sheepishly end up buying the proper part for the job in hand.
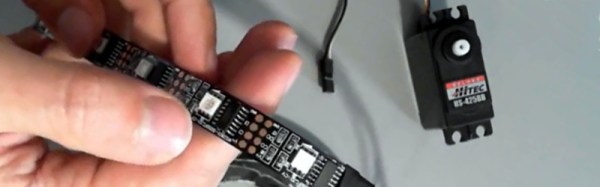
[Orionrobots] had a conversation with a YouTube follower about LED strips. An LED strip contains a length of ready-made PWM drivers, they mused. Wouldn’t it be great then, if each of the drivers on a strip could be connected to a servo, making the strip a ready-made single-stop SPI servo driver. With a large multi-servo robot to build, he set to work on a strip of WS2801s.
If you are in the Soldering Zone and have elite skills at the iron, then soldering a wire to a surface mount driver chip is something entirely possible. For mere mortals though it’s a bit of a challenge, and he notes just how much extra time it’s added to the project. The fun starts though when the servo is hooked up, the best that can be said is that it vibrates a bit. On paper, the LED drivers should be able to drive a servo, because they can create the correct waveform. But in practice the servo is designed to accept a logic level input while the driver is designed to sit in series with an LED and control its current. In practice therefore the voltages required for a logic transition can’t quite be achieved.
He concludes by recommending that viewers splash out on a servo driver board rather than trying an LED strip. We applaud him for the effort, after all it’s a hack any of us might have thought of trying for ourselves.
Continue reading “FoTW: LED Strips Make Awful Servo Drivers”