Modern day video games have come a long way from Mario the plumber hopping across the screen. Incredibly intricate environments of games today are part of the lure for new gamers and this experience is brought to life by the characters interacting with the scene. However the illusion of the virtual world is disrupted by unnatural movements of the figures in performing actions such as turning around suddenly or climbing a hill.
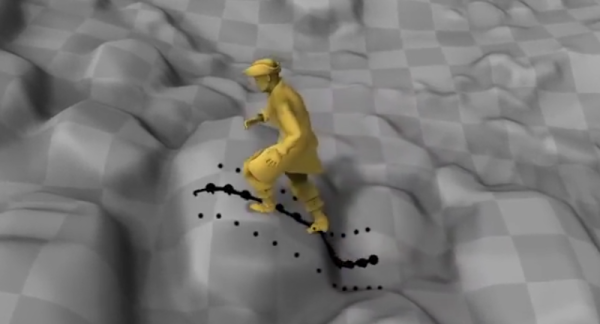
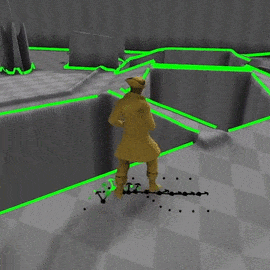 To remedy the abrupt movements, [Daniel Holden et. al] recently published a paper (PDF) and a video showing a method to greatly improve the real-time character control mechanism. The proposed system uses a neural network that has been trained using a large data set of walking, jumping and other sequences on various terrains. The key is breaking down the process of bipedal movement and its cyclic behaviour into a series of sub-steps or phases. Each phase translates to a natural posture for the character while moving. The system precomputes the next-phases offline to conserve computational resources at runtime. Then considering user control, previous pose of the character(including joint positions) and terrain geometry, the consequent frame of the animation is computed. The computation is done by a regression network that calculates future position of the joints and a blending function is used for Motion Matching as described in a presentation (PDF) and video by [Simon Clavet]. Continue reading “Neural Networks Walk Better Than Humans For Game Animation”