Electromagnetism is the most difficult thing teach. Why is electromagnetism hard to teach? Well, when you’re asking a ‘why’ question (obligatory Richard Feynman video)…
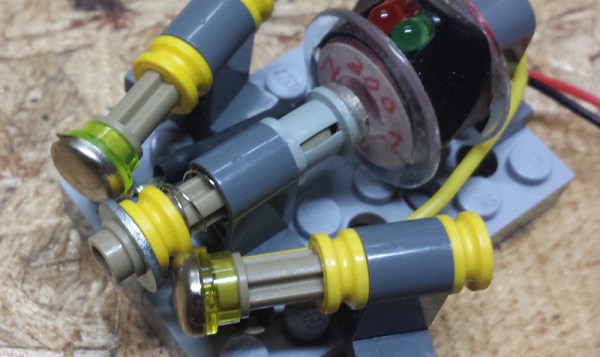
[Adam Smallcomb] might not be able to explain electromagnetism with perfect clarity, but he does have an idea to give students a hands-on feel for electrons and magnets. He’s building an Electromagnetic Teaching Aid that turns 30 gauge wire, springs, Lego, and bits of metal into a toolset for understanding magnets, solenoids, current, and magnetic fields.
The devices explained via [Adam]’s toolkit include a DC motor, stepper motor, speaker, solenoid, relay, transformer, microphone, and generator. That’s not to say [Adam] is building all these devices – a DC motor is just a generator in reverse, a relay is a solenoid with more electrical connections, and everything in this toolkit is basically just wire and magnets.
So far, [Adam] has a bunch of interesting applications for magnets, wire, and Lego including a DIY stepper motor and a nifty little tool that measures magnetic flux with a Hall effect sensor. Will it teach schoolkids electromagnetism? Very few things could, but at least this little toolkit will allow students to intuit electromagnetism a little better.


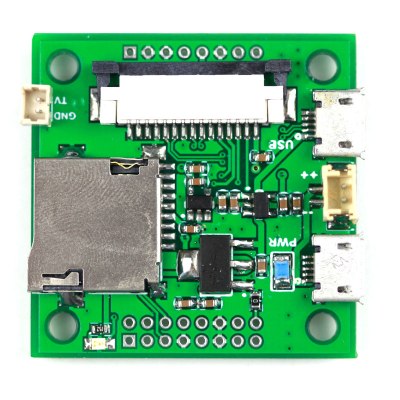 Although this Raspberry Pi-compatible board is not finalized, the specs are what you would expect from what is essentially a Raspberry Pi Zero cut down to a square inch board. The CPU is listed as, “Broadcom BCM2835 ARM11 Processor @ 700 MHz (or 1GHz?)” – yes, even the spec sheet doesn’t know how fast the CPU is running – and RAM is either 256 or 512MB of LPDDR2.

 If your project didn’t make the cut, there’s still an opportunity for you to build the next great piece of hardware for The Hackaday Prize. The


