Microwave Ovens: Need More Power? Use Lasers Instead!

You know how it is, you get in late from work, you’ve been stuck in traffic for what seems like an eternity, and you’re hungry. You reach for the microwave meal, and think, if only I didn’t have to wait that three-and-a-half minutes, 900 watts just isn’t enough power. What you need is a laser microwave, and as luck would have it, [Styropyro] has built one, so you don’t have to. No, really, don’t.

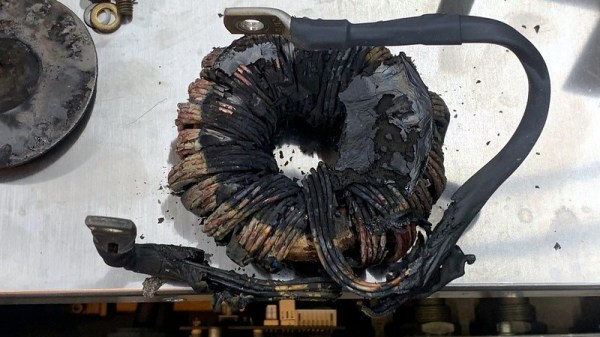
After he observed a microwave only operating on a half-wave basis, and delivering power 50% of the time, he attempted to convert it to full-wave by doubling up the high voltage transformer and rectification diodes. While this worked, the poor suffering magnetron didn’t go the full mile, and died somewhat prematurely.

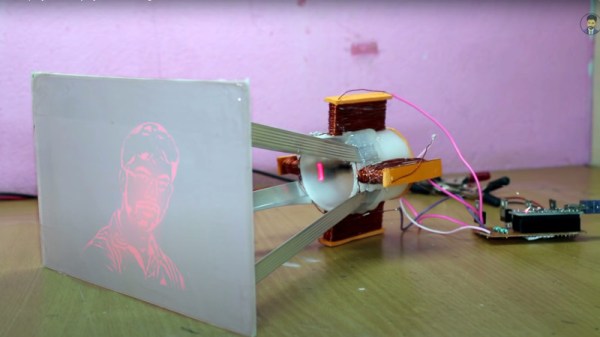
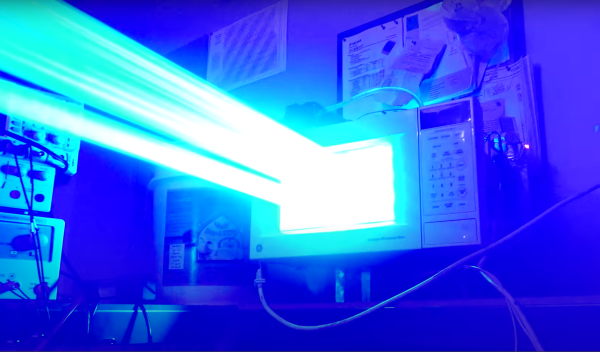
Not to be disheartened, the obvious thing was to ditch the whole concept of cooking with boring old radio waves, and just use a pile of frickin’ lasers instead. Now we’re not sure how he manages to get hold of some of the parts he uses, and the laser array modules look sketchy to say the least, and to be frank, we don’t think they should be easy to get given the ridiculous beam power they can muster.

With the build completed to the usual [Styropryo] level of excellent build quality, he goes on to produce some mouthwatering delicacies such as laser-charred poptart, incinerated steak with not-really-caramelised onions and our favourite laser-popcorn. OK, he admits the beam has way too much power, really should be infrared, and way more diffuse to be even vaguely practical, but we don’t care about practicality round these parts. Who wouldn’t want the excitement of going instantly blind by merely walking into the kitchen at the wrong time?

We’ve covered a fair few microwave oven related hacks before, including a neat microwave kiln, and hacks using microwave parts, such as a janky Jacob’s ladder, but this is probably the first laser microwave we’ve come across. Hopefully the last :)

And remember kids, as [Styropyro] says in pretty much every video on his channel:

All the crazy stuff I’m about to do was done for educational purposes, in fact if you were to try any of this stuff at home, you’d probably die…

Continue reading “Microwave Ovens: Need More Power? Use Lasers Instead!”

Fake: A Laser Display Board Of Your Very Own

Update 6/23/21: Many people have called this out as fake. When viewed at 1/4 speed, you can see the logos in the YouTube video are always full-off or full-on and never caught mid way through a scanned frame. The images may be projected from off-camera to the left, rather than by the diode behind the screen. It’s a neat idea, but on closer review the demo provided smells a bit fishy so we’ve added a “Real or Fake” tag and updated the title. Update #2: [Kanti Sharma] wrote into the tipsline apologizing for the faked video, saying that he tried to get it to work but couldn’t and then “used a phone and a lens to fake the laser”. Thanks for fessing up to this one.

There are some times when an awesome project comes into your feed, but a language barrier intervenes as you try to follow its creator’s description. [Kanti Sharma]’s laser display appears to be a fantastic piece of work, but YouTube’s automatic translations in the video below make so little sense as to leave us Anglophones none the wiser as to what he’s saying. The principle comes across without need for translation though: he’s taken a laser diode module and is using it to create a vector scan by mounting it in the middle of a set of coils driven through beefy FETs by an Arduino. It’s an electromagnetic take on the same principle used in a CRT vector displays such as the famous Vectrex console, with the beam of electrons replaced with laser light.

It’s a technique not unlike what’s  been used for years in the lighting industry, in which much larger laser displays are created with mirrors mounted on galvanometers. There must be a physical limit at which the weight of the laser slows down the movement, but if the video is to be believed it’s certainly capable of displaying graphics on a screen.

People have done a lot of things with lasers on these pages, but there have been surprisingly few vector displays using them. Here’s one from nearly a decade ago.

Continue reading “Fake: A Laser Display Board Of Your Very Own”

Repairing A 300W CO2 Laser, One Toasted Part At A Time

A couple months back, [macona] got his hands on a 300 watt Rofin CO2 laser in an unknown condition. Unfortunately, its condition became all too known once he took a peek inside the case of the power supply and was confronted with some very toasty components. It was clear that the Magic Smoke had been released with a considerable bit of fury, the trick now was figuring out how to put it back in.

The most obvious casualty was an incinerated output inductor. His theory is that cracks in the ferrite toroid changed its magnetic properties, ultimately causing it to heat up during high frequency switching. With no active cooling, the insulation cooked off the wires and things started to really go south. Maybe. In any event, replacing it was a logical first step.

If you look closely, you may see the failed component.

Unfortunately, Rofin is out of business and replacement parts weren’t available, so [macona] had to wind it himself with a self-sourced ferrite and magnet wire. Luckily, the power supply still had one good inductor that he could compare against. After replacing the coil and a few damaged ancillary wires and connectors, it seemed like the power supply was working again. But with the laser and necessary cooling lines connected, nothing happened.

A close look at the PCB in the laser head revealed that a LM2576HVT switching regulator had exploded rather violently. Replacing it wasn’t a problem, but why did it fail to begin with? A close examination showed the output trace was shorted to ground, and further investigation uncovered a blown SMBJ13A‎ TVS diode. Installing the new components got the startup process to proceed a bit farther, but the laser still refused to fire. Resigned to hunting for bad parts with the aid of a microscope, he was able to determine a LM2574HVN voltage regulator in the RF supply had given up the ghost. [macona] replaced it, only for it to quickly heat up and fail.

This one is slightly less obvious.

Now this was getting ridiculous. He replaced the regulator again, and this time pointed his thermal camera at the board to try and see what else was getting hot. The culprit ended up being an obsolete DS8922AM dual differential line transceiver that he had to source from an overseas seller on eBay.

After the replacement IC arrived from the other side of the planet, [macona] installed it and was finally able to punch some flaming holes with his monster laser. Surely the only thing more satisfying than burning something with a laser is burning something with a laser you spent months laboriously repairing.

We love repairs at Hackaday, and judging by the analytics, so do you. One of this month’s most viewed posts is about a homeowner repairing their nearly new Husqvarna riding mower instead of sending it into get serviced under the warranty. Clearly there’s something about experiencing the troubleshooting and repair process vicariously, with our one’s own hardware safely tucked away at home, that resonates with the technical crowd.

3D-Printed Laser Scanning Confocal Microscope Measures Microns

When one thinks about microscopy, it seems to be mostly qualitative. Looking at a slide teeming with bacteria or protozoans is less about making measurements and more about recognizing features and describing their appearance. Not all microscopes are created equal, though, with some being far more optimized for making fine measurements of the microscopic realm.

This 3D-printed confocal laser scanning microscope is a good example of an instrument for measuring really small stuff. As [Zachary Tong] points out, confocal scanning microscopy uses a clever optical setup to collect light from a single, well-defined point within a sample; rather than getting an image of all the points within a two-dimensional focal plane, the scanning function moves the focal point around through the sample in three dimensions, capturing spatial data to go along with the optical information.

The stage of [Zach]’s microscope is based on OpenFlexure’s Delta Stage, an open-source, 3D-printed delta-bot motion control platform that’s capable of positioning samples with sub-micron precision. Above the stage are the deceptively simple optics, with a laser diode light source, an objective lens, and a photodiode detector behind a pinhole. The detector feeds a homebrew trans-impedance amplifier that captures data at millions of points as the sample is moved through a small three-dimensional space. All that data gets crunched to find the Z-axis position corresponding to the maximum intensity at each point.

It takes a while to gather all this data — up to several days for even a small sample — but it works pretty well. [Zach] already has some ideas for reducing noise and speeding up the scan time; perhaps a stage based on DVD parts like this one would be faster than the delta stage. We look forward to seeing his improvements.

Continue reading “3D-Printed Laser Scanning Confocal Microscope Measures Microns”

How Laser Headlights Work

When we think about the onward march of automotive technology, headlights aren’t usually the first thing that come to mind. Engines, fuel efficiency, and the switch to electric power are all more front of mind. However, that doesn’t mean there aren’t thousands of engineers around the world working to improve the state of the art in automotive lighting day in, day out.

Sealed beam headlights gave way to more modern designs once regulations loosened up, while bulbs moved from simple halogens to xenon HIDs and, more recently, LEDs. Now, a new technology is on the scene, with lasers!

Continue reading “How Laser Headlights Work”

Laser Focus Made Easier With IR Filter

If you’ve used a diode laser engraver or cutter, you know that focus is critical. You’d think it would be relatively simple to get a sharp focus, but it isn’t that simple. [Makers Mashup] shows in a video how to use an adjustable IR filter to cut out all the light bleed to get a sharp image to make focusing simpler.

The filter he shows adjusts from 530nm to 750nm and is made to screw into a 72mm lens, but it works fine with your eyeballs, too. [Makers Mashup] says he’ll eventually make a stand for it so he can look through it with both hands free.

Continue reading “Laser Focus Made Easier With IR Filter”

Hands On With The Ortur Laser Cutter

I couldn’t write very much without a computer. Early in my career, I wrote with a typewriter. Unless you are pretty close to perfect — I’m not — it is very frustrating to make edits on typewritten stuff. The equivalent in the real world, for me, has been 3D printers and CNC machines. I can visualize a lot of things that I’m not careful enough to build with normal tools. Despite my 7th-grade shop teacher’s best efforts, everything I did turned out to be a toothpick or a number 7. But I can get my ideas into CAD and from there the machines do the rest. That’s why I was excited to get a laser cutter this past Christmas. You might wonder why I’d need a laser cutter if I have the other tools. Then again, if you read Hackaday, you probably don’t need me to explain why you need a new gadget. I’ve had my eye on a laser for a good long time, but recent developments made it more attractive. I thought I’d share with you some of what I’ve found getting started with the Ortur laser cutter. The cutter is easy to put together and costs somewhere in the $200-$400 range depending on what you get with it. I thought I’d take some time to share what I’ve learned about it.

Why a Laser?

If you haven’t had experience with a laser cutter or engraver before, you might think it is a very specific instrument. Sure, the Ortur is good at engraving some things (but not all things). It can cut some things, too, but not as many things as a big serious laser cutter. However, creative people find lots of ways to use cutting and engraving to produce things you might not expect.

Continue reading “Hands On With The Ortur Laser Cutter”