New Pens For Old Plotters

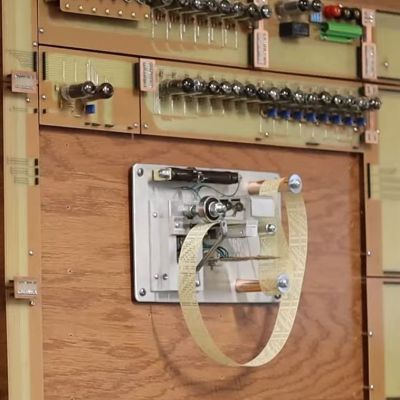
Finding consumables is an ever-present problem facing anyone working with old computer hardware. Many of these devices ceased manufacture decades ago and what old stock remains is invariably degraded by time. [Retrohax] has encountered it with the pens for an Atari plotter, a machine that uses an ALPS mechanism that appears in more than one 1980s machine. The original pens had dried out beyond the ability to refill, so he takes us through the process of finding replacements.

Sadly there are no equivalent modern pens ripe for modification, so whatever replacement he used would have to involve a little lateral thinking. He thought salvation was at hand in the form of multicolor ballpoint refills of the type where the ink is in an easily cuttable plastic tube. [Retrohax] and was able to make a 3D-printed holder for a cut-down ballpoint refill. Sadly the pressure required for a good line from a ballpoint was much higher than the original pens, so he was back to square one. Then he happened upon gel pens and tried the same trick with a gel pen refill. This gave instant success and should provide a valid technique for more than just this ALPS mechanism.

If you haven’t got a classic plotter to hand, never fear. You can have a go at making your own.

It’s About Time

I’m pretty good with time zones. After all, I live in Germany, Hackaday’s server is in Los Angeles, and our writers are scattered all over the globe. I’m always translating one time into another, and practice makes (nearly) perfect. But still, it got me.

I was in the states visiting my parents, when Daylight Saving Time struck, but only in the USA. Now all my time conversions were off by an hour, and once I’d worked through the way the sun travels around the globe, I thought I had it made. And then my cell phone started reporting a time that was neither CEST nor EDT, but a third time zone that was an hour off. Apparently some cell towers don’t transmit time zone information, and my phone defaults to UTC. Who knew? For a short while, my phone lied to me, the microwave oven clock in the hotel lied to me, and I felt like I was going nuts.

But this all got me thinking about clocks and human time, and possibly the best advice I’ve ever heard for handling it in your own programs. Always keep time in something sensible like UNIX time – seconds elapsed since an epoch – because you don’t have to worry about anything more than adding one to a counter every second. When and if you need to convert to or from human times, you can write the function to do that simply enough, if you don’t already have a library function to do so.

Want to set an alarm for 2 hours from now? That’s easy, because you only need to add 7,200 seconds, and you don’t need to worry about 59 wrapping around to 0 or 23:59 to 0:00. Time math is easy in seconds. February 29th? That’s just another 86,400 seconds. It’s only us humans who make it complicated.

A Low-Cost ROM Programmer With An AI Twist

There are 0x10 ways to look at ROM programmers: they’re either relatively low-cost tools that let you quickly get about the business of programming vintage ROMs and get back to your retrocomputing activities, or they’re egregiously overpriced on a per-use basis. [Anders Nielsen] seems to land in the latter camp, firmly enough that he not only designed a dedicated ROM programmer for his 65uino ecosystem, but also suffered the indignities of enlisting ChatGPT to “help” him program the thing.

We’ll explain. [Anders]’ 65uino project has been going on for a while, with low-cost ROM programming only the latest effort. To his way of thinking, a $60 or $70 programmer might just be a significant barrier to those trying to break into retrocomputing, and besides, he seems to be more about the journey than the destination. He recently tackled the problem of generating the right programming voltages; here he turns his attention to putting that to work programming vintage ROMs like the W27C512.

Doing so with a 6502-based Arduino-compatible microcontroller requires some silicon calisthenics, including a trio of shift registers to do the addressing using a minimum of GPIO. As for the ChatGPT part, [Anders] thought asking the chatbot to help write some of the code would be a great way to increase his productivity. We thought so too, at least once, and like us, [Anders] concluded that while perhaps helpful in a broad sense, the amount of work you put into checking a chatbot’s work probably exceeds the work saved. But no matter, because in the end the code and the hardware came together to create a prototype ROM programmer for only about $10 worth of parts.

True, the resulting circuit is a bit complex, at least on a breadboard. It should clean up nicely for an eventual PCB version, though, one that plugs right into the 65uino board or even other microcontrollers. Either way, it could make creating custom ROMs for the 65uino a little more accessible.

Continue reading “A Low-Cost ROM Programmer With An AI Twist”

The Electromagnetic Field 2024 Badge Is A Little Different

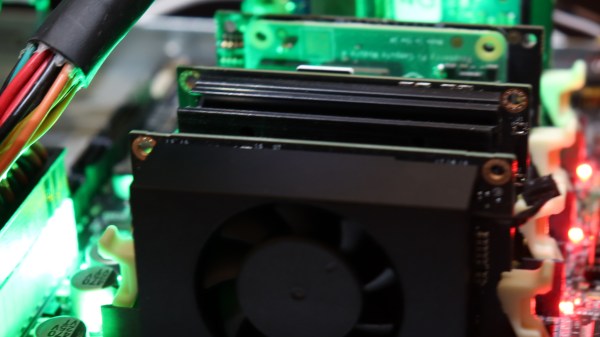
It’s a problem that faces every designer of an event badge: how to make something that won’t simply become a piece of e-waste once the last attendee has gone home. Various events have had badges with extra sensors, ones designed to be dev boards, and ones that try to do useful software tasks, but this year’s Electromagnetic Field in the UK has a different take. Its badge is designed to be used across multiple events, with the badge itself being a hub for event-specific add-ons.

To achieve this feat, the Tildagon badge is a hexagonal hub with an expansion port on every side. Each of these sports an edge connector, and the corresponding part of the add-on is simply part of the PCB. The ‘hexpansions’ as the add-ons are called, don’t even have to have electronics, at their simplest they can even be cut from a piece of card. The brain of the outfit is an ESP32-C3 sporting a round LCD. Of course, and it has the usual buttons and LEDs.

We applaud the sentiment behind making a badge live beyond the event, and we expect that this won’t be the only take on a reusable badge we’ll see over the coming events. We’re guessing those edge connectors will add to the BoM cost though, which is why this probably will be the first EMF badge for which there will be a modest charge. We look forward to seeing it for real, meanwhile, they also published some technical info alongside the announcement linked above.

Wico Boss Joystick Modded To Use Cherry MX Keyboard Switches

The Wico Boss joystick was one of the better designs of the 1980s. Yours truly had one, and put it through many brutal hours of Amiga-based gameplay. [Drygol] was recently asked if he could alter some of these sticks to be even clickier than stock, and jumped at the change to do some modding.

[Drygol]’s idea was to swap out the original microswitches in the sticks for keyboard switches instead. In particular, the idea was to use the Cherry MX Blues which have a particularly nice click to them. But this wasn’t just going to be a straight swap. Instead, since the hardware was retro and preservation was desired, the modification had to be reversible.

The result was a drop-in 3D-printed bracket that holds four Cherry switches around the joystick’s central bauble. Thus, when the stick is moved, it actuates the keyboard switches with a satisfying click. A 12mm tactile switch was also installed in the base to be activated by the fire button. Then, it was a simple matter of  tidying up some of the sticks during reassembly and wiring up the original cables to the new switches.

It’s a neat way to give an old-fashioned digital joystick a new lease on life. This would be a particularly great mod for tired sticks with worn out microswitches, too. Hilarious archaic marketing video after the break. They really are whacko for Wico.

Continue reading “Wico Boss Joystick Modded To Use Cherry MX Keyboard Switches”

Generative AI Now Encroaching On Music

While it might not seem like it to a novice, music turns out to be a highly mathematical endeavor with precise ratios between chords and notes as well as overall structure of rhythm and timing. This is especially true of popular music which has even more recognizable repeating patterns and trends, making it unfortunately an easy target for modern generative AI which is capable of analyzing huge amounts of data and creating arguably unique creations. This one, called Suno, does just that for better or worse.

Unlike other generative AI offerings that are currently available for creating music, this one is not only capable of generating the musical underpinnings of the song itself but can additionally create a layer of intelligible vocals as well. A deeper investigation of the technology by Rolling Stone found that the tool uses its own models to come up with the music and then offloads the text generation for the vocals to ChatGPT, finally using the generated lyrics to generate fairly convincing vocals. Like image and text generation models that have come out in the last few years, this has the potential to be significantly disruptive.

While we’re not particularly excited about living in a world where humans toil while the machines create art and not the other way around, at best we could hope for a world where real musicians use these models as tools to enhance their creativity rather than being outright substitutes, much like ChatGPT itself currently is for programmers. That might be an overly optimistic view, though, and only time will tell.

A raspberry pi-based digital readout above an old lathe

Roll Your Own DRO With An Added Twist

When using a manual machine tool such as a lathe or milling machine, there can be a lot of pressure to read the position and feed the axes at the correct rate. That’s why modern machines typically have some form of digital read-out (DRO). [Stefano Bertelli] has created a simple Raspberry Pi based DRO with an additional twist, that of a linked motor drive output.

A view of the custom RS485 interfaced DRO readout and motor controller
Realtime encoder position reading and motor control are best done with a dedicated microcontroller, ideally with a proper RTOS.

The axes that need to be monitored should be mechanically attached to a position sensor like a linear encoder or a rotary type. Using a linear sensor with a linear axis instead of a rotary encoder on the downstream dial is better. For the readout unit, [Stefano] used a WaveShare 7-inch touchscreen module with a Raspberry Pi 3 for the UI of the readout unit. The Pi has a custom-designed HAT, that performs power conditioning and provides a robust RS485 interface. Connected via that RS485 link is another custom PCB based on an STM32F411 with a few supporting power supplies and interfacing components. The job of this board is to interface to the position encoders, reading positioning pulses using interrupts. There is an additional stepper motor drive courtesy of a ULN2003 Darlington driver to allow the control of a single motorised axis. An additional motor driver module is required, which should be no surprise since driving a milling machine axis will require a fairly beefy motor. This GitHub repo contains the FreeRTOS-based firmware for this board. This motor drive has the ability to be connected to a measuring axis in a programmable way, enabling one axis to be adjusted to follow or jump in controlled steps with another. This feature can significantly simplify certain types of machining operations, as [Stefano] elaborates in the video.

Lastly, the Raspberry Pi runs a simple Python application with Kivy for the GUI. As [Stefano] explains in the video below, this makes debugging and modification quite simple.

Adding DROs to an older machine is an obvious but valuable hack. Here’s another way to do it. If that’s too much work, then you could just hack a digital readout calliper in there.

Continue reading “Roll Your Own DRO With An Added Twist”