PCBs With Powder Coat

pcb

The toner transfer method of PCB production should be a staple in every maker’s bag of tricks. That being said, it’s a far from ideal solution with a lot of things that can go wrong, ruining hours of work. [Ryan] thinks he has a better solution up his sleeve, still using heat activated toner, but replacing the laser printer with a powder coating gun and a laser engraver.

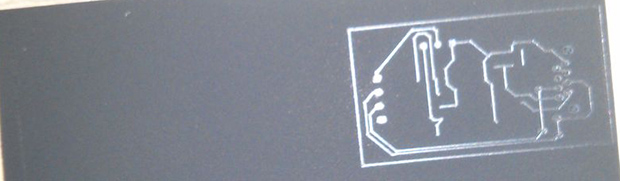
[Ryan] is using a powder coating gun he picked up from Amazon for about $100. The theory behind it is simple: particles of toner coming out of the gun are statically charged, and bonded to the grounded copper clad board. In real powder coat shops, this coating is baked, resulting in a perfectly hard, mirror-like finish. [Ryan] skipped the baking step and instead through the powder coated board into a laser engraver where the PCB design is melted onto the copper. After that, wash the board off, etch it, and Bob’s your uncle.

What’s really interesting about this method of PCB production is that it doesn’t require a very high power laser. [Ryan] was actually having a problem with the toner burning with his laser engraver, so it might be possible to fab PCBs with a high power handheld laser, or even a Blu Ray laser diode.
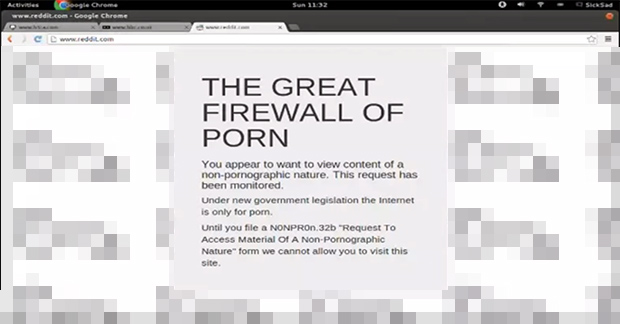
Finally, A Firewall For All The Porn On The Internet

porn

The current UK government is proposing an Internet porn firewall. Unlike other countries with Internet firewalls, such as North Korea, China, Iran, Saudi Arabia, and Syria, the citizens of the UK are so especially helpful some of them decided to help code the new porn filter. The idea behind the Great Firewall of Porn is simple: if a user wants to visit a NSFW website, let them. If, the user wants to visit the other 19% of the Internet, block it, and forward them to a page with hand drawn cockswains a baubles as the background.

The way the firewall works is actually pretty clever – it checks each request against the OpenDNS FamilyShield filter. If the request is denied, load the page, and if the OpenDNS request is allowed, block the page.

The genius behind this filter, [sicksad], provided all the tools required to get your own porn filter up and running over on his git. There’s also a great setup tutorial video available below, with a little social commentary thrown in for free.

Continue reading “Finally, A Firewall For All The Porn On The Internet”

Hackaday Links: Sunday, July 28th, 2013

hackaday-links-chain

[Chris Gammell] tipped us off that he’s building an online training program for learning electronics. The ten session course will cost money to take but you can get the goods for free if you’re one of the beta testers. We love to listen to The Amp Hour podcast which is just one of [Chris’] many endeavors.

Did you buy a Chromecast this week? We did, but we don’t have it in hand yet (ordered through Amazon). You can still get a look inside from the iFixit teardown.

Practice your Processing skills by using it to code a game of Pong.

A bit of lighter fluid and a hacked insert will get you a flaming wallet. We guess this is a different type of an anti-pickpocket device. [Thanks Stephen]

[Brain] used a $1.50 magnifying lens to help his Raspberry Pi camera module read QR codes better.

We really like [Aaron Christophel’s] LED matrix clock (translated). He started from a marquee that must be at least a decade old. He stripped it down and figured out how to drive it using a Sanguino as a controller.

GRBL Compatible Arduino CNC Shield

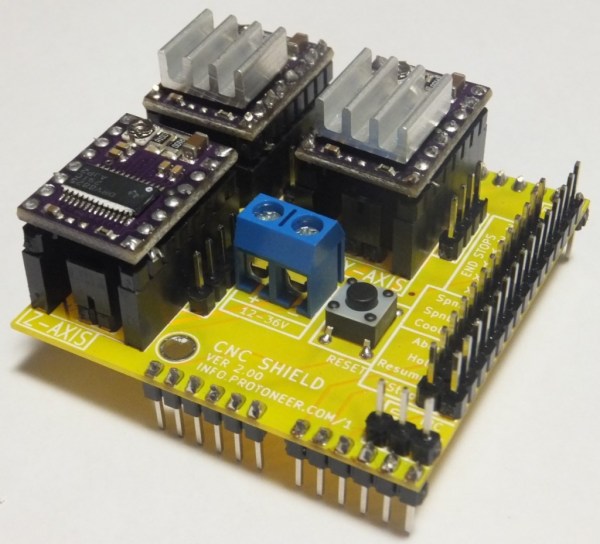
By the time you get to the point in a home CNC build where you’re adding control electronics you may be ready for the simplest means to an end possible. In that case, grab your Arduino and heat up that etching solution to make your own GRBL compatible shield.

This familiar footprint manages to contain everything you need for a three-axis machine. The purple boards slotted into the pairs of SIL headers are Pololu Stepper motor drivers. Going this route makes replacing a burnt out chip as easy as plugging in a new module. The terminal block in the center feeds the higher voltage rail necessary for driving the motors. The DIL header on the right breaks out all of the connections to the limiting switches (two for each axis), spindle and coolant control, as well as three buttons for pause, resume, and abort. There’s even a header for SPI making it easier to add  custom hardware if necessary.

This is a dual-layer board which may not be ideal for your own fabrication process. [Bert Kruger] posted his Gerber files for download if you want to put in a small run with OSH Park or a similar service.


Rekindling Forth With A Propeller Jupiter Ace

Jupiter

The Jupiter Ace was a small membrane keyboard, cassette tape drive computer akin to the ZX Spectrum released in 1982. Priced at £90, it was a little more expensive than its home computer contemporaries, but had a very interesting feature: instead of BASIC, the Ace ran Forth. This interpreted stack-based language is far more capable than the BASIC variants found on home computers of the day, but unfortunately the Ace failed simply because Forth was so foreign to most consumers.

Not wanting to let a good idea die, [prof_braino] is bringing Forth back into the modern age. He’s using a Parallax Propeller to emulate a simple home computer running Forth. Instead of a book-sized computer, the new Propeller version runs on a single chip, with 8 CPU cores running 24 times faster than the original, with 32 times more RAM and an SD card for basically unlimited storage.

Electric Skillet Reflow Soldering Guide

skillet-reflow-tutorial

It’s no secret that we’re bizarrely drawn to macro videos showing solder paste during the reflow process. This electric skillet reflow guide provides the fix we’ve been jonesin’ for while including some helpful tips for first-timers and veterans alike. Not sure what we’re talking about? Look at the grey paste at the top of this image. As it heats up it’s drawn under each component as seen in the lower half of the image.

This particular guide is aimed at one-off assembly so a solder paste stencil is not used (we learned a lot about those earlier in the month). It instead uses the painstaking toothpick application technique. It takes time but the upside is that once you get the hang of it you’ll apply the perfect amount of solder each time. After placing all of the components [Count Spicy] carefully transfers the board to an electric skillet, covers it with the glass lid (so he can see what’s going on), and sets the temperature just above the solder’s specified melting point.

Since the skillet is cheap and easy to find you really just have to order the solder paste to get into this type of assembly. Our only gripe is that you can’t really follow a temperature profile with this rig. For that you need to move up to some PID controlled hardware.

Continue reading “Electric Skillet Reflow Soldering Guide”