Driving A T6963C Based Graphic LCD

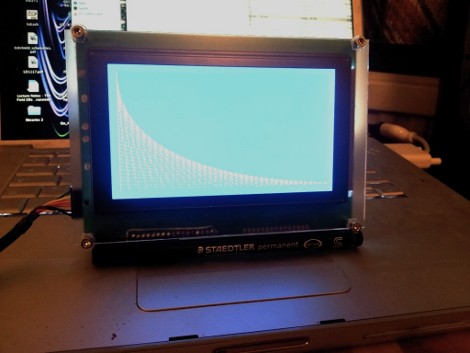
[Tom Fleet] spent the dreary weekend inside learning how to drive this T6963C based graphic LCD controller. Although this is his first time venturing away from HD44780 character displays, the availability of an Arduino library helped him go from being a newbie to coding his own animated graphics.

The hardware setup is straight-forward. The screen has a 20-pin connector and operates at 5V. We don’t see it on his protoboard, but usually these displays also need a potentiometer which serves as a voltage divider for the screen contrast. The data and control pins eat up most of the available I/O on the ATmega328 chip he used, but the I2C and SPI pins are still open and he plans a future project to make this a wireless display for his PC using one of those protocols.

As for fonts and animation, [Tom] links to several tools which will come in handy. There’s a font program that will convert Windows system fonts into a C file for use on the Arduino. The animations start with a 1:1 ratio animated graphic drawn with his favorite image editing software. He then converts those to monochrome bmp files and used bmp2c to convert each frame to a C array. After the break there’s a seven second example that would work well as a boot screen for his project.

Continue reading “Driving A T6963C Based Graphic LCD”

Cardboard Hexapod Gets Around With Three Motors

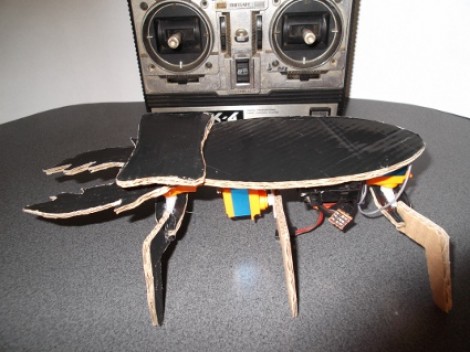
Here’s a lesson in doing a lot with very little. [Oldrobot] built this hexapod using cardboard for most of the pieces. He still had the box from his vacuum clear and it just happened to have a large black area the makes the top of the beetle look like it’s been painted.

The control board is from an old radio controlled airplane. Since RC airplanes used servos for flight control, it was a snap to hook up the three that make the bug go. One controls the set of middle legs which lift the body and change which of the propulsion legs are in contact with the ground. The other two servers move pairs of the front or back legs. It uses the same concept as this other RC controller hexapod, but much less time went into crafting the chassis and legs.

As you can see in the video after the break, the control scheme isn’t the most intuitive. But once you get a hang of which stick orientation affects each leg movement the bot ends up having fairly precise steering.

Continue reading “Cardboard Hexapod Gets Around With Three Motors”

Cabbage Haters Can Turn Their Leftovers Into Litmus Paper

[William Finucane] is making his own litmus paper by harnessing the power of cabbage. The process is much easier than the faux gunpowder he made, as it take just the one ingredient and a few kitchen tools.

In case you’ve forgotten your High School chemistry, Litmus is a set of dyes that change color when exposed to basic or acidic materials. It is common in liquid form, or as a paper. [William] is getting his dye from the leaves of red cabbage by running half a head through a blender with just a bit of water. Once that is reduced to pulp and boiled in the microwave (mmm, must smell great!) he separates the liquid using a coffee filter. A fresh coffee filter serves as a donor for the substrate, just dip some strips in the cabbage juice and let them dry. You can test them with some Ammonia as seen in the video after the break, or just start grabbing whatever is under the sink and see what happens.

Continue reading “Cabbage Haters Can Turn Their Leftovers Into Litmus Paper”

MIT Students Take Tetris To A Grand Scale

Careful, this hack might foster doubts about the level of fun you’re having at you own Computer Science department. Last weekend a group of students at MIT pulled off a hack of great scale by turning a building into a Tetris game board.

The structure in question is the Green Building on the Massachusetts Institute of Technology Campus. It houses the Earth, Atmospheric, and Planetary Sciences Departments, but was chose based on the size and regularity of the grid formed by the windows on one side. The group hasn’t provided much in the way of details yet, but the video after the break shows the game play and start-up screen. The middle portion of the building is used as a scrolling marquee to display the word “Tetris” before the game pieces start falling. We’re only guessing (and we hope you will add your conjecture in the comments section) but we’d bet they assembled a set of wireless RGB LED lamps and set one on the sill of each window. There does seem to be a number of ‘dead’ pixels, but it doesn’t diminish the fun of the overall effect.

If you don’t have your own building to play on, you should go small-scale and implement Tetris on a character display.

Continue reading “MIT Students Take Tetris To A Grand Scale”

Cheap And Easy Linear Supported Rail

Some of the very largest – and coolest – CNC machines use supported linear rail for their movement axes. For any home tinkerer trying to reproduce these supported rails, the problem of cost comes up very quick; these rails can run over $100 for just a few feet. [Michael] came up with a great way to build his own supported rail so he can build his very large CNC router.

There aren’t many tools needed to build [Michael]’s rail. He put a 90° notch in a 2×4 to support his 25mm rail, and clamped it down with a piece of plywood. After drilling a 5/16″ hole every 12 cm, he tapped these holes out to receive 3/8″ threaded rod. Yes, we also hate the mix of metric and imperial units in that description, but the results speak for themselves.

The now-supported rail was mounted to a piece of MDF with a few bolts and washers. MDF isn’t the most dimensionally stable material, so [Michael] will be covering the whole thing in a coat of epoxy very soon. Now, he’s one step closer to his gigantic CNC gantry router.

You can check out [Michael]’s demo video after the break.

Continue reading “Cheap And Easy Linear Supported Rail”

Tank Wars: A Video Game Controlling A Physical Bot

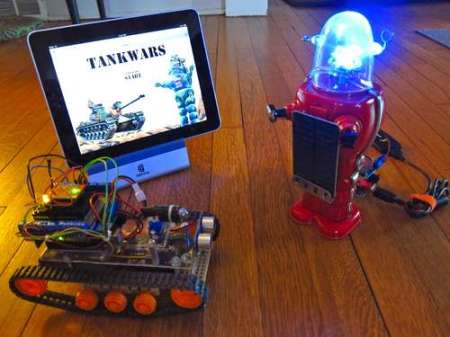
[Joe] sent us an email to show off his latest build. Tank Wars is the beginning of a video game/robot hybrid. You control the tank via an iPad, telling it where to go and how to fire. You have real life targets, in this case another robot. When you hit your target, the interface is updated with game stats.  Currently, this is only a step past being a wifi controlled robot. [Joe] is working on making the game part of it a little more interactive.

The tank and the target are both run by Arduinos with RN-XV WiFly modules.  The tank has obstacle avoidance both forward and backward, which, from the video,  seems like it might make navigating a bit challenging at times. The iPad interface is just a web page, so it could really be used on any device. This is pretty cool, we can’t wait to see how he proceeds from here.

Continue reading “Tank Wars: A Video Game Controlling A Physical Bot”

Finding Your Keys With Bluetooth

[doragasu]’s wife is always misplacing her keys. To solve this problem, [doragasu] created a small Bluetooth-enabled key fob that is able to remotely sound an alarm when commanded to by a cell phone.

The case and LiPo battery of [doragasu]’s project comes from a small photo frame key fob. The LCD display and PCB of the photo frame were tossed aside for a future project, and the design of the circuit started. The Bluetooth buzzer key fob is based around an MSP430 microcontroller because of their extremely low power requirements.

On the software side of things, [doragasu] built a J2ME app to connect to the key fob and turn the buzzer on. His app is portable to any Android phone, and versions can be ported to Windows, OS X and iOS devices.

How does it work? Well, [doragasu]’s wife sometimes forgets to charge her key fob, rendering the whole project useless. There are ideas for  updating the device to a Bluetooth 4.0 Low Energy device, but no actionable plans. Still, very good work. You can check out [doragasu]’s walkthrough and demo video after the break.

Continue reading “Finding Your Keys With Bluetooth”