Importing PCB Layout Into Google Sketchup

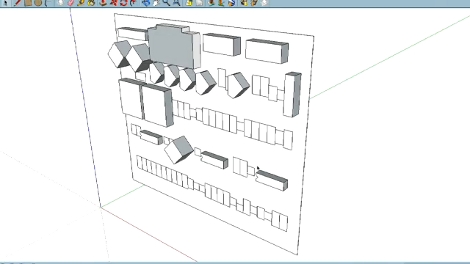
If you’ve been spending hours with the digital calipers while designing enclosures for your circuit boards there may be a better way. [Phil] tipped us off about a new software package that will let you import PCB layout files into Google Sketchup. This way you can start working on the enclosure in CAD before you’ve populated your first board. Of course this adds to the pain of realizing there’s an error in your layout, but what are you going to do?

The free software was developed by RS Components, a European component distributor. It takes IDF files, which can be exported from most PCB design software, and converts them to a format compatible with Sketchup, Google’s 3D design software. For those who enjoy a very dry demonstration video you won’t want to skip seeing what we’ve embedded after the jump.

We’re kind of surprised that this hasn’t already been done. If it has, leave a link in the comments.

Continue reading “Importing PCB Layout Into Google Sketchup”
External Text Display For Nexus One

Nexus One External Display

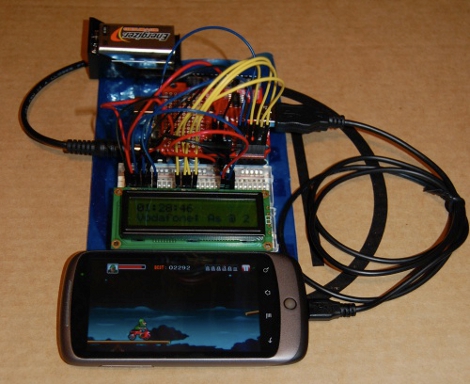
[follower] prototyped a 2-line external display for his Nexus One using an Arduino with a USB Host Shield, and the Android Open Accessory Protocol. There are two basic software pieces at work: an Arduino sketch that handles displaying data sent from the phone, and a lightweight android app to detect the presence of the external screen and send data to it. As shown here, it diplays the time and the beginning of the most recently received SMS message.

This project coalesced from several other things [follower] had been working on with regards to USB accessories, background services, interfacing with the Arduino and handling SMS messages, so it’s modular and open-source.  If you’re interested in mashing up microcontroller projects and your android phone, there’s plenty of stuff in this project to help you get off the ground.

As hacks go, this is very much a “because you can” sort of deal that’s designed to tie a bunch of cool things together. You’re unlikely to catch us carrying an LCD and breadboard around in our pockets any time soon, but it paves the way for some potentially fun phone accessories.

New Conductive Ink Allows Circuit Prototyping With A Pen And Paper

roller_ball_circuit_drawing

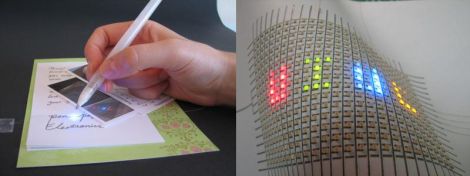
Why spend time etching circuit boards and applying solder masks when all you really need is a rollerball pen and some paper? That’s what University of Illinois professors [Jennifer Lewis and Jennifer Bernhard] were asking when they set off to research the possibility of putting conductive ink into a standard rollerball pen.

The product of their research is a silver nanoparticle-based ink that remains liquid while inside a pen, but dries on contact once it is applied to a porous surface such as paper. Once dry, the ink can be used to conduct electricity just like a copper trace on a circuit board, making on the fly circuit building a breeze.

Previous ink-based circuit construction was typically done using inkjet printers or airbrushing, so removing the extra hardware from the process is a huge step forward. The team even has some news for those people that think the writable ink won’t hold up in the long run. The ink is surprisingly quite resilient to physical manipulation, and they found that it took folding the paper substrate several thousand times before their ink pathways started to fail.

While we know this is no substitute for a nicely etched board, it would be pretty cool to prototype a simple circuit just by drawing out the connections on a piece of paper – we can’t wait to see this come to market.

Androcade Is A Controller And Stand In One

We remember when retro-gaming required a lot of equipment and a serious time commitment to put together a gaming interface. [Scooter2084] proves that we’ve come a long way with this gaming controller built to complement Android hardware.

It’s not immediately obvious from the image above, but the controller itself looks just like Andy the Android. His head is tilted upward and acts as the tablet stand, while his torso hosts the controls. We don’t the arms and legs have a functional use but they are necessary to complete the look.

Traditionally arcade controls have used a hacked gamepad, or dedicated hardware like the MAME cabinets that use iPac control boards. But this rendition interfaces the joystick and four buttons using an Arduino. A Bluetooth shield lets you control the Android device wirelessly, and opens up the possibility to use this as a controller for laptop-based emulators and the like. Don’t miss the video after the break.

Continue reading “Androcade Is A Controller And Stand In One”

Driving And Old Receipt Printer

It seems like receipt printers are pretty popular as hacking targets lately. Aside from the wasted paper, they cooler than plain old blinking LEDs and we’d image there’s a ton of them floating around out there as advances in technology have prompted retailers to trade in the bulky dinosaurs for slimmer thermal printers. [Philip Hayton] picked up this Epson model at some type of equipment sale and set to work figuring out how to control it.

This unit is addressed via a parallel interface. After assessing the pinout and searching a bit for protocol information [Philip] hooked up his Arduino and printed out a fitting first message that reads: “Hello World”. He’s got a few tricks you can learn from when trying to talk to hardware with which you are not well acquainted.

Need a reason to go out and find your own receipt printer? Check out this paper-based gaming system for some inspiration. Now develop your own paper recycling setup and we can file this one under ‘green hacks‘.

[Thanks Andy]

Tweeting Home Alarm System

tweeting_home_alarm_system

Instructables user [willnue] wanted to build a DIY Tweeting alarm system from the ground up, but reconsidered after taking a close look at the scope of such a project. He settled on using an off the shelf security system, taking care of the Twitter interface on his own. He bought a GE 45142 Wireless alarm and promptly disassembled it to see how he might retrieve status messages from the unit.

He figured that monitoring the alarm’s LEDs would make the most sense, so he used a bit of Ethernet cable and wired all of the system’s indicators to his Arduino board. He hooked up an Ethernet shield to the Arduino, then wrapped the pair up in a plastic project box that closely matched the look of the security system. Once that was done, he wrote some simple code for the Arduino that monitors each of the alarm system’s six status lights, sending updates to Twitter via the ThingTweet service.

With this system you might not get your status messages in time to foil whoever is carrying off your plasma TV, but at least you will know what to expect once you get home!

If you want to keep tabs on [Will’s] security system to find out the best time to rob him see how things are going, check out his Twitter feed here.

DIY Servo Activated Door Lock With Capacitive Touch Keypad

diy_servo_activated_door_lock_capacitive_touch

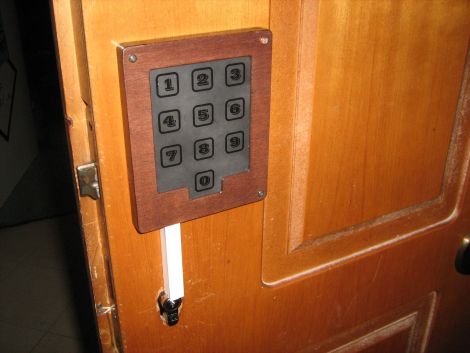
Since he was a kid [Giorgos Lazaridis] has always loved the idea of having an electronic door locking mechanism, and now that he has the means, he’s decided to construct one for securing the door to his apartment. He calls the project “simple and cheap”, though we’re not sure about the first part. Taking a look at his very detailed build log, you can see that he has invested quite a bit of time and effort into this impressive project.

Buying an off the shelf product was expensive and not a whole lot of fun, so [Giorgos] disassembled his door’s locking mechanism to see how he might be able to actuate the lock electronically himself. With minimal modifications to the lock, he was able to add a servo which reliably opens the it when triggered.

With the mechanical portion of the project out of the way, he spent a great deal of time working on the door’s electronic components, including the PIC-based controller and capacitive keypad. The keypad proved to be a bit of a problem, but after a few revisions he found a design that was both reliable and pleasing to the eye.

The locking mechanism works pretty well, as you can see in the video below, and [Giorgos] is quite pleased with the results.

Continue reading “DIY Servo Activated Door Lock With Capacitive Touch Keypad”