AVR Microcontroller Doubles Up As A Switching Regulator

[SM6VFZ] designed, built and tested a switched-mode DC-DC boost regulator using the core independent peripherals (CIP) of an ATtiny214 micro-controller as a proof of concept, and it looks pretty promising!

A Buck, Boost, or Buck-Boost switching regulator topology usually consists of a diode, a switching element (MOSFET) and an energy storage device (inductor/capacitor) in the power path, and a controller that can measure the output voltage, control the switching element and add safety features such as current limiting and temperature shutdown. A search for switching regulators or controllers throws up thousands of parts, and it’s possible to select one specifically well suited for any desired application. Even so, the ability to use the micro-controller itself as the regulator can have several use cases. Such an implementation allows for a software configurable switch-mode regulator and easy topology changes (boost, buck, fly back etc.).

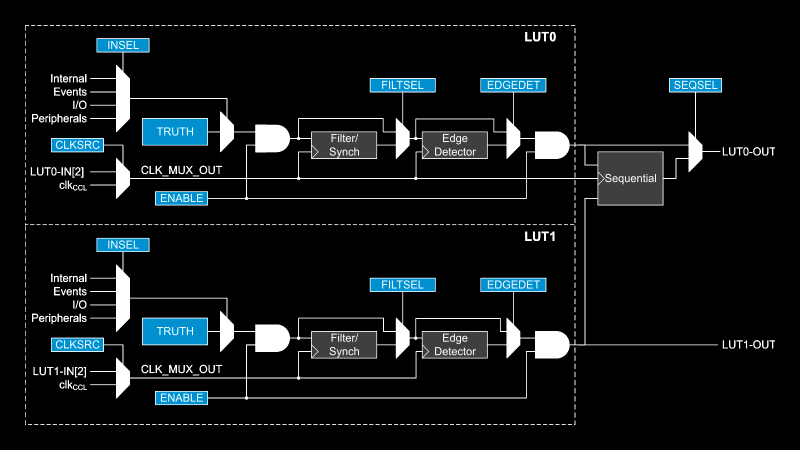
The “Getting Started with Core Independent Peripherals on AVR®” application note is a good place to get an overview of how the CIP functionality works. Configurable Custom Logic (CCL) is among one of the powerful CIP peripherals. Think of CCL as a rudimentary CPLD — a programmable logic peripheral, which can be connected to a wide range of internal and external inputs such as device pins, events, or other internal peripherals. The CCL can serve as “glue logic” between the device peripherals and external devices. The CCL peripheral offers two LookUp Tables (LUT). Each LUT consists of three inputs, a truth table, a synchronizer, a filter, and an edge detector. Each LUT can generate an output as a user programmable logic expression with three inputs and any device that have CCL peripherals will have a minimum of two LUTs available.

This napkinCAD sketch shows how [SM6VFZ] implemented the boost regulator in the ATtiny214. The AND gate is formed using one of the CCL LUT’s. The first “timer 1” on the left, connected to one input of the AND gate, is free running and set at 33 kHz. The analog comparator compares the boosted output voltage against an internally generated reference voltage derived from the DAC. The output of the comparator then “gates” timer 1 signal to trigger the second “timer 2” — which is a mono-shot timer set to max out at 15 us. This makes sure there is enough time left for the inductor to completely release its energy before the next cycle starts. You can check out the code that [SM6VFZ] used to built this prototype, and his generous amounts of commenting makes it easy to figure out how it works.

Based on this design, the prototype that he built delivers 12 V at about 200 mA with an 85% efficiency, which compares pretty well against regular switching regulators. Keep in mind that this is more of a proof-of-concept (that actually works), and there is a lot of scope for improvement in terms of noise, efficiency and other parameters, so everyone’s comments are welcome.

In an earlier blog post, we looked at how ATmegas with Programmable Logic came about with this feature that is usually found in PIC micro-controllers, thanks to Microchip’s acquisition of Atmel a few years back. But we haven’t seen any practical example of the CCL peripheral in an Atmel chip up until now.

Squeezing Every Bit From An ATMega

While the ATMega328 is “mega” for a microcontroller, it’s still a fairly limited platform. It has plenty of I/O and working memory for most tasks, but this Battleship game that [thorlancaster328] has put together really stretches the capabilities of this tiny chip. Normally a Battleship game wouldn’t be that complicated, but this one has audio, an LED display, and can also play a fine rendition of Nyan Cat to boot, which really puts the Atmel chip through its paces.

The audio is played through a 512-byte buffer and an interrupt triggers the microcontroller when to fill the buffer while it works on the other processes. The 12×12 LED display is also fed through a shift register triggered by the same interrupt as the audio, and since the build uses so many shift registers the microcontroller can actually output four separate displays (two players, each with a dispaly for shots and one for ships). It will also eventually support a player-vs-computer mode for the battleship game, and also has a mode where it plays Nyan cat just to demonstrate its own capabilities.

We’re pretty impressed with the amount of work this small microcontroller is doing, largely thanks to code optimization from its creator [thorlancaster328]. If there’s enough interest he also says he will provide the source code too. Until then, be sure to check out this other way of pushing a small microcontroller to its limits.

Thanks to [Thinkerer] for the tip!

Teardown: Siemens 8mm SMD Parts Feeder

Many of Hackaday’s readers will be no stranger to surface mount electronic components, to the extent that you’ll likely be quite comfortable building your own surface-mount projects. If you have ever built a very large surface-mount project, or had to do a number of the same board though, you’ll have wished that you had access to a pick-and-place machine. These essential components of an electronics assembly line are CNC robots that pick up components from the reels of tape in which they are supplied, and place them in the appropriate orientation in their allotted places on the PCB. They are an object of desire in the hardware hacker community and over the years we’ve seen quite a few home-made examples. Their workings are easy enough to understand, but there is still much to gain by studying them, thus it was very interesting indeed to see a friend acquiring a quantity of surplus Siemens component feeders from an older industrial pick-and-place machine. A perfect opportunity for a teardown then, to see what makes them tick.

Continue reading “Teardown: Siemens 8mm SMD Parts Feeder”

Minimal TinyAVR 0 Programming

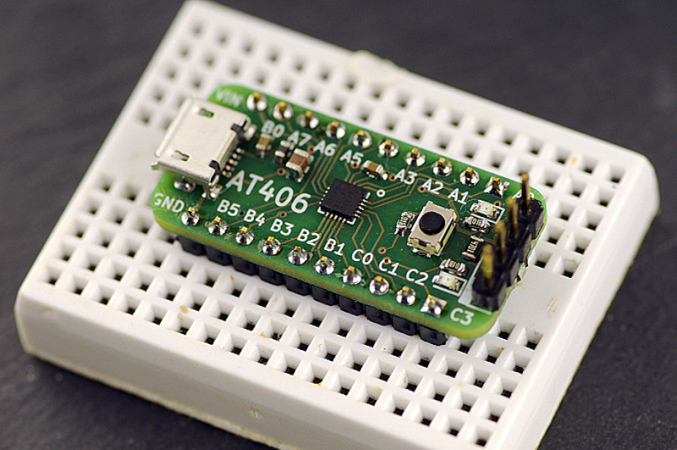
When [Alain] wanted to use some of the new TinyAVR 0 chips — specifically, the Attiny406 — it seemed overkill to use the Windows IDE. There are plenty of sources of information on programming other AVR chips using simple command line tools, but not for these newer 0-series parts which use a new programming protocol known as UPDI. That led to a deep diving into how to program a TinyAVR 0 with a text editor, makefile, and USB-to-serial cable.

The Attiny406 has 4K of flash, 256 bytes of RAM and can run at 20 MHz with no external clock. You might think programming would be similar to a regular AVR part, but these tiny devices use UPDI (Unified Programming and Debug Interface) which uses 3 pins for programming. Older devices used different protocols.

It is very easy to create a UPDI programmer. A USB to logic-level serial cable and a 4.7K resistor is all it takes. There’s Python code that knows how to drive the protocol, too. You can also use the logic-level serial port on the Raspberry Pi with some device tree modifications explained in the code’s documentation.

[Alain] made a nice breakout board for the device. It fits a breadboard, allows for 5V or 3.3V operation, and has an LED and switch. Nothing fancy, but handy. Once you know how to ship a hex file to the chip, the rest is pretty standard. While the AVR version of gcc doesn’t cross-compile for the ATTiny out of the box, there is a device pack from Microchip that enables that feature.

The trend is to go to bigger processors, not smaller, but when you need to cram something in a small space, save a few pennies per unit, or draw very little power, these tiny processors can be just the ticket. The processors may be small, but if you work you can do some pretty big things with them.

Deep-Sleep Problems Lead To Forensic Investigation Of Troublesome Chip

When you buy a chip, how can you be sure you’re getting what you paid for? After all, it’s just a black fleck of plastic with some leads sticking out of it, and a few laser-etched markings on it that attest to what lies within. All of that’s straightforward to fake, of course, and it’s pretty easy to tell if you’ve got a defective chip once you try it out in a circuit.

But what about off-brand chips? Those chips might be functionally similar, but still off-spec in some critical way. That was the case for [Kevin Darrah] which led to his forensic analysis of potentially counterfeit MCU chips. [Kevin] noticed that one of his ATMega328 projects was consuming way too much power in deep sleep mode — about two orders of magnitude too much. The first video below shows his initial investigation and characterization of the problem, including removal of the questionable chip from the dev board it was on and putting it onto a breakout board that should draw less than a microamp in deep sleep. Showing that it drew 100 μA instead sealed the deal — something was up with the chip.

[Kevin] then sent the potentially bogus chip off to a lab for a full forensic analysis, because of course there are companies that do this for a living. The second video below shows the external inspection, which revealed nothing conclusive, followed by an X-ray analysis. That revealed enough weirdness to warrant destructive testing, which showed the sorry truth — the die in the suspect unit was vastly different from the Atmel chip’s die.

It’s hard to say that this chip is a counterfeit; after all, Atmel may have some sort of contract with another foundry to produce MCUs. But it’s clearly an issue to keep in mind when buying bargain-basement chips, especially ones that test functionally almost-sorta in-spec. Caveat emptor.

Counterfeit parts are depressingly common, and are a subject we’ve touched on many times before. If you’d like to know more, start with a guide.

Continue reading “Deep-Sleep Problems Lead To Forensic Investigation Of Troublesome Chip”

Open Source VR Headset For $200

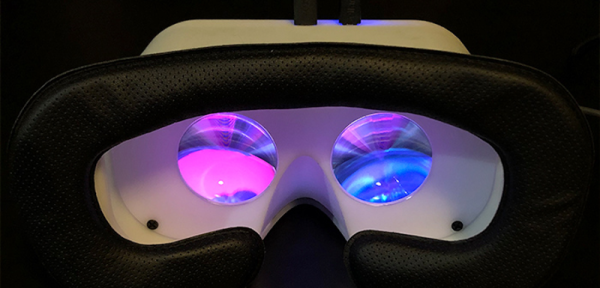
We’ve seen homemade VR headsets before, but, often they are dependent on special software or are not really up to par with commercial products. Not so with Relativity, an open source project from [Max Coutte] and [Gabriel Combe]. [Max] says it best:

Relativty is not a consumer product. We made Relativty in my bedroom with a soldering iron and a 3D printer and we expect you to do the same: build it yourself.

Unlike some homebrew gear, Relativity has full Steam VR support. It also has experimental support for positional scaling that tracks your body based on video input.

Continue reading “Open Source VR Headset For $200”

Degrees Of Freedom: Booting ARM Processors

Any modern computer with an x86 processor, whether it’s Intel or AMD, is a lost cause for software freedom and privacy. We harp on this a lot, but it’s worth repeating that it’s nearly impossible to get free, open-source firmware to run on them thanks to the Intel Management Engine (IME) and the AMD Platform Security Processor (PSP). Without libre firmware there’s no way to trust anything else, even if your operating system is completely open-source.

The IME or PSP have access to memory, storage, and the network stack even if the computer is shut down, and even after the computer boots they run at such a low level that the operating system can’t be aware of what they’re really doing. Luckily, there’s a dark horse in the race in the personal computing world that gives us some hope that one day there will be an x86 competitor that allows their users to have a free firmware that they can trust. ARM processors, which have been steadily increasing their user share for years but are seeing a surge of interest since the recent announcement by Apple, are poised to take over the personal computing world and hopefully allow us some relevant, modern options for those concerned with freedom and privacy. But in the real world of ARM processors the road ahead will decidedly long, windy, and forked.

Even ignoring tedious nitpicks that the distinction between RISC vs CISC is more blurred now than it was “back in the day”, RISC machines like ARM have a natural leg up on the x86 CISC machines built by Intel and AMD. These RISC machines use fewer instructions and perform with much more thermal efficiency than their x86 competitors. They can often be passively cooled, avoiding need to be actively cooled, unlike many AMD/Intel machines that often have noisy or bulky fans. But for me, the most interesting advantage is the ability to run ARM machines without the proprietary firmware present with x86 chips.

Continue reading “Degrees Of Freedom: Booting ARM Processors”