Stomp Switches Let You Skip Tracks Hands-Free

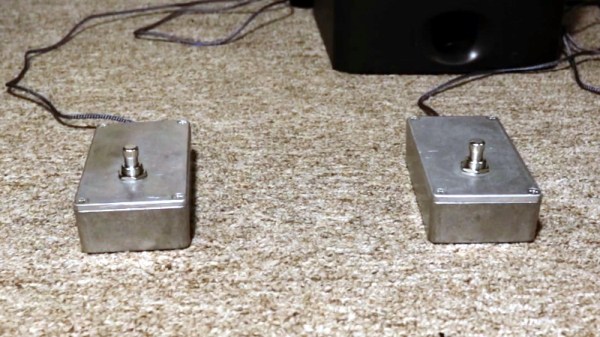
You’ve (probably) got four limbs, so why are you only using half of them when you’re working on the computer? Just because your toes don’t have the dexterity to type (again, probably) doesn’t mean your feet should get to just sit there doing nothing all day. In a recent project, [MacCraiger] shows you just how easy it can be to put some functionality under foot by building a pair of media control stomp switches.
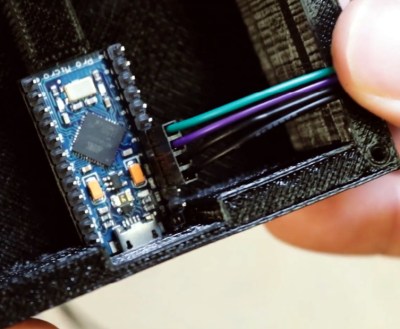
Crimp pin connectors grant +50 professionalism.

If the devices pictured above look a lot like guitar effects, that’s because they share a lot of parts. [MacCraiger] used the same sort of switch and aluminum case that you might see on a pedal board, as he figured they’d be better suited to a lifetime of being stepped on than something he 3D printed.

Up on the desk, and this time in a printed case, is the Arduino Leonardo that they connect to. The wiring for this project is very straightforward, with the switches connected directly to the GPIO pins. From there, the Arduino firmware emulates a USB Human Interface Device and fires off the appropriate media control keystrokes to skip to the next track or pause playback depending on which switch has been engaged.

This hardware isn’t exactly breaking any new ground here, but we did like how [MacCraiger] used standard 3.5 mm audio cable and the associated jacks to connect everything up. It’s obviously on-theme for what’s essentially a music project, but more importantly, gives the whole thing a very professional look. Definitely a tip to mentally file away for the future.

For the more accomplished toe-tapper, our very own [Kristina Panos] recently recently took us through the construction of her macro slinging footstool. Between these two examples of bespoke peripherals, you should have everything you need to create your own custom input devices. We suppose you could even make one that’s hand operated if you’re into that sort of thing.

Continue reading “Stomp Switches Let You Skip Tracks Hands-Free”

BBQ Burners Built From Scratch

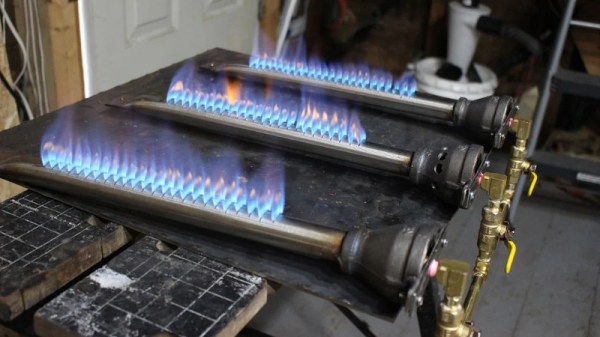
Building a barbecue is a common DIY pursuit, and one that comes with a tasty payoff at completion. While many projects focus on charcoal or wood-fired designs, [Andrew] is more of a gas man. Not one to simply buy off the shelf, he designed his own burners from scratch.

This quest wasn’t just unnecessary yak shaving; burners to suit [Andrew]’s desired size and power simply weren’t available. The burner is designed around the Venturi effect, wherein the propane gas is passed through a small orifice, creating a jet and pulling air along with it as it enters the burner tube. This causes the gases to mix, and they can then be ignited when passing through the outlet holes of the burner. Get the orifice and outlet holes sized just right, and you’ll have a burner that produces a hot, blue flame, perfect for efficient cooking.

The orifice was produced with brass plumbing components, and hooked up to a valve rated for use with gas lines. The burner tube itself was created from stainless steel tube, with slots cut to act as outlet holes and with the end crimped and welded shut. A black iron pipe reducer was then used as the air inlet and orifice mount.

The final result is a powerful barbecue burner that is perfectly sized to [Andrew]’s needs. If you’re keen to build your own custom rig, you may find this a useful and cheap way to go versus sourcing parts off the shelf. We’ve seen [Andrew]’s work before, too. Video after the break.

Continue reading “BBQ Burners Built From Scratch”

The $50 Ham: Going Mobile

So far in this series, everything we’ve covered has been geared around the cheapest and easiest possible means of getting on the air: getting your Technician license, buying your first low-end portable transceiver, and checking in on the local repeater nets. That’s all good stuff, and chances are you can actually take all three of those steps and still have change left over from your $50 bill. Like I said, amateur radio doesn’t have to be expensive to be fun.

But at some point, every new ham is going to yearn for that first “real” rig, something with a little more oomph in terms of power, and perhaps with a few more features. For many Technicians, the obvious choice is a mobile rig, something that can be used to chat with fellow hams on the way to work, or to pass the time while on long road trips. Whatever your motivation is, once you buy a radio, you have to install it, and therein lie challenges galore, both electrical and mechanical.

I recently took the plunge on a mobile rig, and while the radio and antenna were an order of magnitude more expensive than $50, the process of installing it was pretty cheap. But it’s not the price of the thing that’s important in this series; rather, it’s to show that ham radio is all about doing it yourself, even when that means tearing your car apart from the inside out and rebuilding it around a radio.

Continue reading “The $50 Ham: Going Mobile”

This Crossbow Fires Cannonballs!

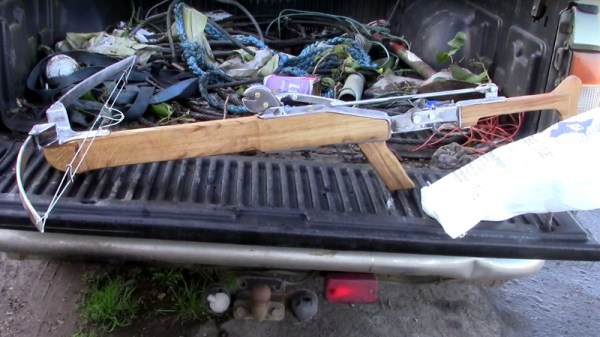
The would-be invader of a mediaeval kingdom could expect to face some stern opposition from a variety of formidable weaponry. Making modern versions of these deadly curiosities seems to be a popular pursuit, and the bug has bitten [Turbo Conquering Mega Eagle], who’s created what he calls a “Stonebow”, a crossbow on steroids that fires stones or large ball bearings with considerable force.

It uses a couple of leaves from automotive springs, mounted in a welded steel riser with two strings and a pouch for the projectile. The barrel is an oak fencing post, and at its other end is a cocking lever which also forms a stock, and a cleverly designed trigger mechanism. The projectile is loaded, the bow is cocked, and it is fired at a scrap Land Rover radiator in which it places a satisfying impact mark.

Despite two successful firings it’s evident that so much force isn’t easy to contain. The crimps that secure the strings aren’t up to the job, and neither is the oak fence post, which has cracked at the end. We trust that our Essex hacker friend will return having fixed these flaws, and more defenceless scrap car parts will be sacrificed for our entertainment.

We’ve featured [Turbo Conquering Mega Eagle] before, most recently building a mini-bike for his youngsters. Meanwhile, enjoy the Stonebow in the video below the break.

Continue reading “This Crossbow Fires Cannonballs!”

Creating A Custom Engagement Ring With 3D-Printing

Even if you’re pretty sure what the answer will be, a marriage proposal is attended by a great deal of stress to make the event as memorable and romantic as possible. You’ve got a lot of details to look after, not least of which is the ring. So why not take some of the pressure off and just 3D-print the thing?

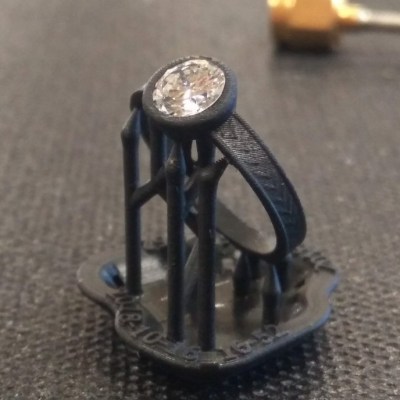
No, a cheesy PLA ring is probably not going to cut it with even the most understanding of fiancees, and that’s not at all what [Justin Lam] did with this DIY engagement ring. He took an engineer’s approach to the problem – gathering specs, making iterative design changes in Fusion 360, and having a prototype ring SLA printed by a friend. That allowed him to tweak the design before sending it off to Shapeways for production. We were surprised to learn that jewelry printing is a big deal, and Shapeways uses a lost-wax process for it. First a high-resolution wax SLA printer is used to make a detailed positive, which is then used to make a plaster mold. The mold is fired to melt the wax, and molten gold is poured in to make the rough casting, which is cleaned and polished before shipping.

Once he had the ring, [Justin] watched a few jewelry-making videos to learn how to set the family heirloom stone into the bezel setting; we admit we cringed a bit when he said he used the blade shaft of a screwdriver to crimp the edge of the bezel to the stone. But it came out great, even if it needed a bit of resizing. The details of the proposal are left to the romantically inclined, but TL;DR – she said yes.

Congratulations to the happy couple, and to [Justin] for pulling off a beautiful build. Most of our jewelry hacks are of the blinkenlight variety rather than fine jewelry, although we have featured a machinist’s take on the subject before.

Supercon SMD Challenge Gets 3D Printed Probes: Build Your Own

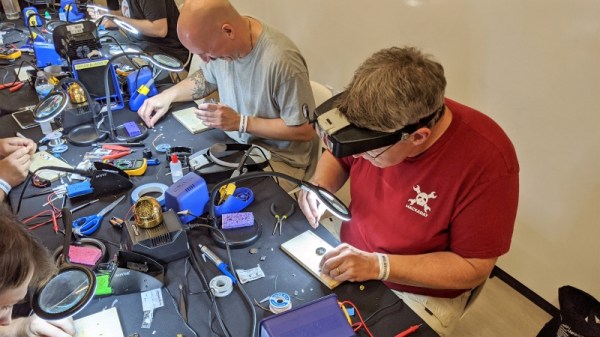
This year was the second SMD challenge at Supercon, so it stands to reason we probably learned a few things from last year. If you aren’t familiar with the challenge, you are served some pretty conventional tools and have to solder a board with LEDs getting progressively smaller until you get to 0201 components. Those are challenging even with proper tools, but a surprising number of people have managed to build them even using the clunky, large irons we provide.

During the first challenge, we did find one problem though. The LEDs are all marked for polarity. However, since we don’t provide super high power magnification, it was often difficult to determine the polarity, especially on the smaller parts. Last year, [xBeau] produced some quick LED testers to help overcome this problem. This year we refined them a bit.

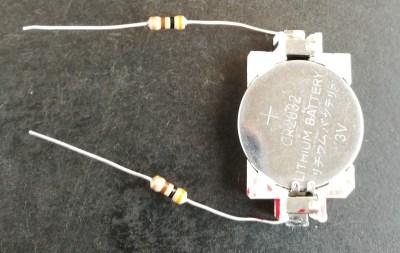
As you can see, the 2018 model was a very clever use of what was on hand. A CR2032 holder powered the probes and the probes themselves were two resistors. If you can get the LED to light with the probes you know which lead is the anode and which is the cathode. A little red ink makes it even more obvious. Continue reading “Supercon SMD Challenge Gets 3D Printed Probes: Build Your Own”

Conductive Tape Current Capacity Comparison

The world of DIY circuits for STEM and wearables has a few options for conductors. Wire with Dupont connectors is a standard, as is adhesive copper tape. There’s also conductive nylon/steel thread or ribbon. Which you choose depends on your application, of course, but as a general rule wire is cheap and ubiquitous while making connections is more challenging; copper tape is cheap and simple to use, but delicate and rips easily, so is best used for flat surfaces that won’t see a lot of stress or temporary applications; and conductive nylon thread or tape is better for weaving into fabrics.

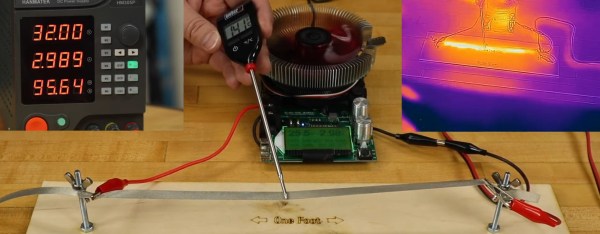
The Brown Dog Gadgets team wanted to respond to a frequent question they are asked, what are the current limits for their Maker Tape (nylon/steel ribbon), so they ran some experiments to find out. In the name of Science you’ll see some flames in the video below, but only under extreme conditions.
Continue reading “Conductive Tape Current Capacity Comparison”