When one of your design goals for a 3D printer is “fits through standard doors,” you know you’re going to be able to print some pretty big stuff. And given that the TAUT ONE printer by [Nathan Brüchner] could easily be mistaken for a phone booth, we’d say it’ll be turning out some interesting prints.
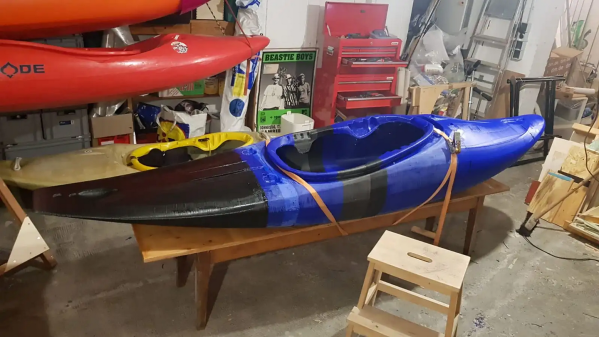
The genesis for this beast of a printer came from the Before Times, with the idea of printing a kayak. [Nathan] leveraged his lowdown time to make it happen, going through three prototypes. Each featured a print bed of 1,000 mm x 550 mm with 1,100 mm of Z-height, and the overall footprint fits a standard Euro-pallet. It uses a CoreXY design to move the dual-filament hot end, which has ducting for taking cooling air from outside the cabinet. And the machine has all the bells and whistles — WiFi, an internal camera, filament sensors, and a range of environmental controls.
In a nod to making it easier to build, [Nathan] kept all the custom parts either laser cut or 3D-printed — no mill or lathe required. He also points out that he used only quality components, which shows in the price — about 3,000€. That seems like a lot to be able to print kayaks that you can buy for fraction of that amount, but we certainly appreciate the potential of this printer, and the effort that went into making it work.