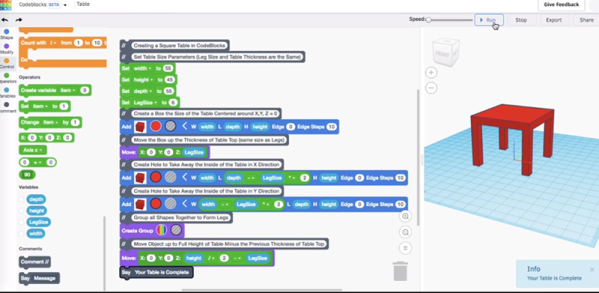
If you want to do a quick design for 3D printing, Tinkercad is pretty easy to use. Although it was briefly in danger of going out of business, it was bought by AutoDesk who have made a lot of improvements. It is possible to program and simulate an Arduino in the same tool — which always strikes us as an odd juxtaposition. However, [Chuck] shows us in the video below how you can use the same Codeblocks to automate Tinkercad 3D modeling thanks to a beta feature in the software. Think of it as a GUI-based OpenSCAD in your browser.
You have to start a Codeblocks project, and when you do you can pick a starter design or just press the button for a new design to get a blank slate. The blocks look like other Scratch-related programming languages. You can create variables, repeat groups of commands, and create items. [Chuck] mentions the starter codes have no comments in them, which is a fair critique. There is a comment block you can use.
Continue reading “Tinkercad Coding Tricks To Automate Modeling”
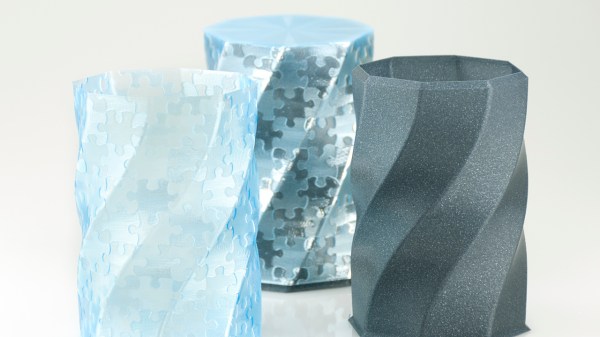
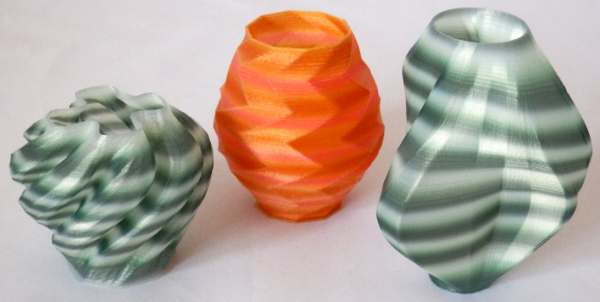
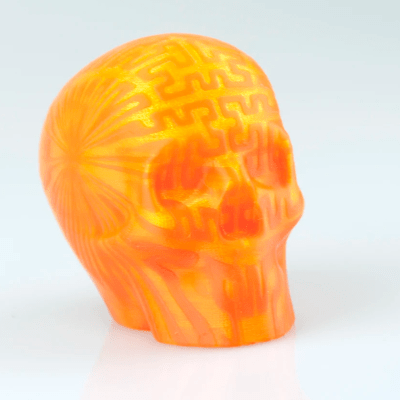 At its core, the technique is straightforward: skin an image onto a 3D print by varying the print speed in specific locations and, thereby, varying just how much plastic oozes out of the nozzle. While the concept seems simple, the result is stunning.

 While the core functionality of Octoprint is fantastic alone, its true power is unlocked through the plugin system and the community that’s sprung up around it. With plugins, Octoprint can do everything from control RGB light strips in your printer’s enclosure to sending status messages via Discord. One particularly popular plugin that has been making the rounds lately is


