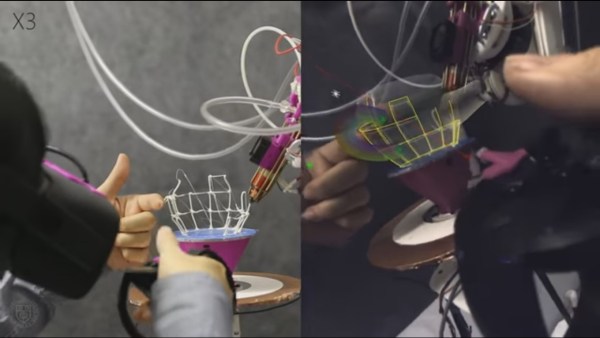
[Huaishu Peng] and a group of other researchers have come up with a system that allows them to use virtual reality (VR) to model an object in a space in front of them while a robot simultaneously 3D prints that object in that same space, a truly collaborative effort they call the RoMA: Robotic Modelling Assistant. This is a step toward fixing the problem of designing something and then having to wait for the prototype to be made before knowing how well it fits the design goals.
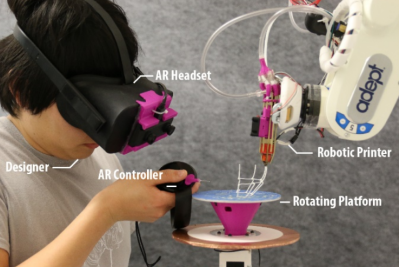
How does the designer/robot collaboration work? The designer wears an Oculus Rift VR headset with a camera mounted to the front, turning it into an AR (Augmented Reality) headset. In front of the designer is a rotating platform on which the object will be 3D printed. And on the other side of the platform is the 3D printing robot. In the AR headset, the designer views the platform, the object, and the robot as seen by the camera but with the model he’s working on overlayed onto the object. An AR hand controller allows him to work on the model. Meanwhile, the robot 3D prints the model. See it in action in the video below.
Continue reading “3D Printing And Modelling With A Robot Assistant”