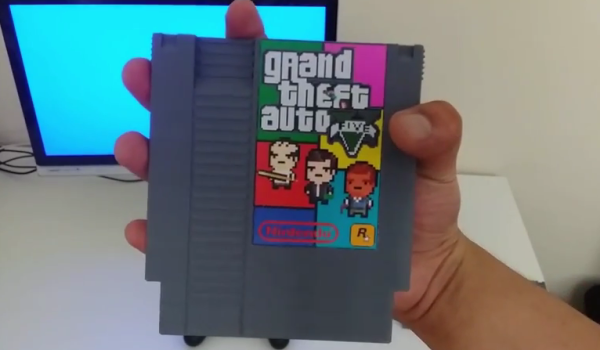
[Frank] came up with a clever way to extend the storage of his PS4. He’s managed to store his digital PS4 games inside of storage devices in the shape of classic NES cartridges. It’s a relatively simple hack on the technical side of things, but the result is a fun and interesting way to store your digital games.
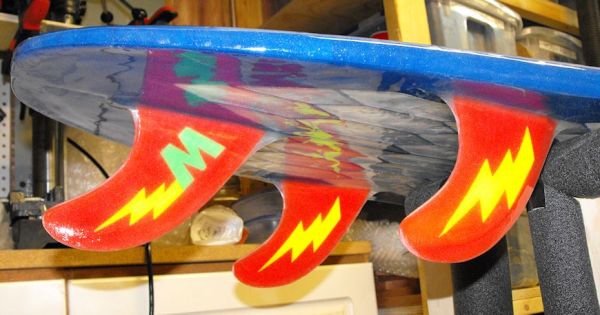
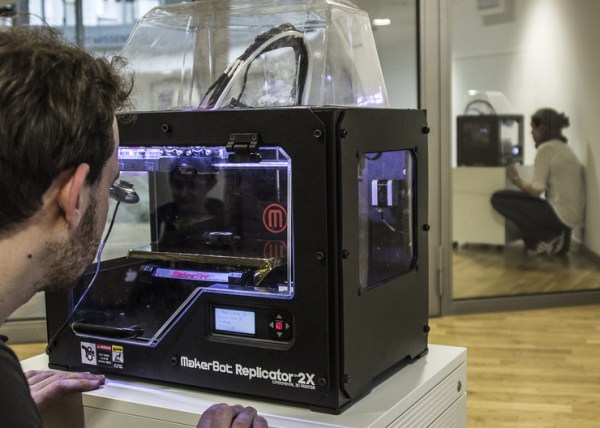
He started out by designing his own 3D model of the NES cartridge. He then printed the cartridge on his Ultimaker 3D printer. The final print is a very good quality replica of the old style cartridge. The trick of this build is that each cartridge actually contains a 2.5″ hard drive. [Frank] can store each game on a separate drive, placing each one in a separate cartridge. He then prints his own 80’s style labels for these current generation games. You would have a hard time noticing that these games are not classic NES games at first glance.
Storing the game in cartridge form is one thing, but reading them into the PS4 is another. The trick is to use a SATA connector attached to the PS4’s motherboard. [Frank’s] project page makes it sound like he was able to plug the SATA cable in without opening the PS4, by attaching the connector to a Popsicle stick and then using that to reach in and plug the connector in place. The other end of the SATA cable goes into a custom 3D printed housing that fits the fake NES cartridges. This housing is attached to the side of the PS4 using machine screws.
Now [Frank] can just slide the cartridge of his choice into the slot and the PS4 instantly reads it. In an age where we try to cram more and more bits into smaller and smaller places, this may not be the most practical build. But sometimes hacking isn’t about being practical. Sometimes it’s simply about having fun. This project is a perfect example. Continue reading “Add Extra Storage To Your PS4 With Retro Flair”