Splitting 3D Prints Into Parts Can Add Strength

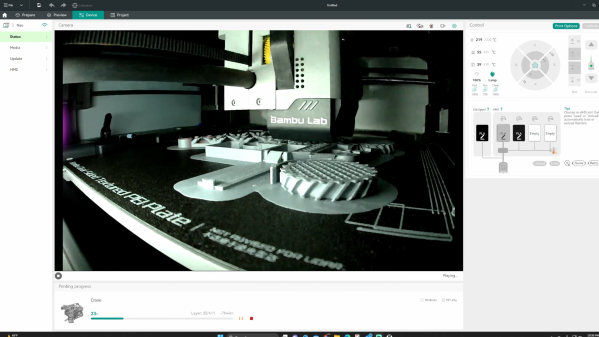
One of the great things about 3D printers is their ability to make a single part all at once. Separating a part into multiple pieces is usually done to split up objects that are too big to fit on the 3D printer’s print bed. But [Peter] at Markforged (manufacturers of high-end 3D printers) has a video explaining another reason: multi-part prints can benefit from improved strength.

This part can be easily printed as a single piece, but it can be made nearly twice as strong when printed as two, and combined.

The idea is this: filament-based 3D printers generally create parts that are strongest along their X-Y axis (relative to their manufacture) and weakest in the Z direction. [Peter] proposes splitting a part into pieces with this in mind. Not because the part is inconveniently large or has tricky geometry, but so the individual pieces can be printed in orientations that provide the best mechanical strength.

This is demonstrated with the simple part shown here. The usual way to print this part would be flat on a print bed, but by splitting the parts into two and printing each in their optimal orientation, the combined part withstands nearly twice as much force before failing.

[Peter]’s examples use Markforged’s own filaments, but gives advice on more common polymers as well and the same principles apply. This idea is one worth keeping in mind the next time one is seeking to optimize strength. because of how simple it is.

We’ve seen a variety of methods to toughen up or ruggedize prints in the past, but they’re usually more complex (or at least messier.) Examples include embedding braided steel cable, embedding fiberglass mesh, applying electroplating to a printed structure, and plain old embedding some bolts and washers to buffer load-bearing areas.

Continue reading “Splitting 3D Prints Into Parts Can Add Strength”

Giant 3D Printer Can Print Life-Sized Human Statues

We’ve seen a few makers 3D scan themselves, and use those to print their own action figures or statuettes. Some have gone so far as building life-sized statues composed of many 3D printed parts. [Ivan Miranda] is no regular maker though, and his custom 3D printer is big enough that he can print himself a life-sized statue in one go.

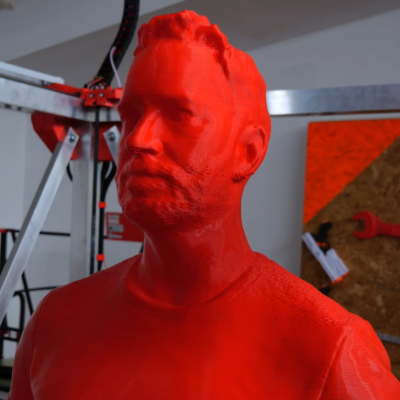
The printer is a gargantuan thing, using an aluminium frame and a familiar Cartesian layout. It boasts a build volume of 1110 mm x 1110 mm x 2005 mm, making it more than big enough to print human-sized statues. Dogs, cats, and some great apes may be possible, too.

Many of the components are 3D printed, including the various braces and adapters that hold the frame together. The build uses NEMA 23 stepper motors, with Duet3D hardware running the show. Notably, it uses V-wheels for the Z-axis, as linear rails would be prohibitively expensive at the sizes required.

[Ivan] shows off the printer by having it produce a statue of his body at 1:1 scale. It’s not a perfect print, with some layer shifts and an awkward moments where the filament supply was interrupted. It took 108 hours in total, with 76 hours of that being actual print time, and is made up of 4375 layers. Despite its flaws, its an incredibly impressive way to demonstrate the capabilities of the machine.

Eager to build such a printer for yourself? [Ivan] will sell you the design files for a reasonable fee.

[Ivan]’s giant printer was once a large tabletop affair; just look how far it’s come. He’s even come up with a system for using smaller printers to create large-scale construction kits, too. We can’t wait to see what mad project he comes up with next. Video after the break.

Continue reading “Giant 3D Printer Can Print Life-Sized Human Statues”

3D Printer Recognizes Third-Party Build Plates, Just Make Your Own ID Codes

The Bambu X1C 3D printer is a machine known for its speed, and it has a number of useful features like automatic build platform recognition. Factory build platforms are marked with an identifier code, and thanks to [elumspe] it’s now possible to make your own identifiers to stick onto third-party platforms and have the printer recognize them as though they were factory offerings. There’s even a super handy 3D-printable alignment tool that ensures the identifier goes in the correct spot, which is a nice touch.

These codes aren’t DRM so much as they are used by the printer to automatically verify that the installed build plate matches the slicer settings before a job begins. Printing one and sticking it in the right place is an easy way to get third-party plates recognized the same as factory offerings.

The identifier codes aren’t DRM so much as they are a way for the printer to verify that the installed build platform matches the slicer settings before a print begins, and throw up a warning if it doesn’t. The printer is perfectly happy to use third-party build surfaces, but since they lack an identifier, the printer will throw a warning each time. One solution is to simply disable checking the build platform before a print, but for those who would prefer to have the printer see what it expects to see, printing a small 2D barcode to stick on is an easy way to do it.

We see these sometimes called QR codes, but they look more like AprilTags. Both are types of 2D barcode, but while QR codes can encode a variety of information types, AprilTags are simpler and usually represent identifiers. In this case, they’re an appropriate way to let a camera-enabled printer know what kind of build plate is installed.

AprilTags are common in computer vision applications, and even relatively modest hardware can detect and decode them almost in real time. AprilTags are convenient and easy to use, as this gate access system demonstrates.

Sweet Hacks

While talking about a solar powered portable Bluetooth speaker project on the podcast, I realized that I have a new category of favorite hacks: daily-use hacks.

If you read Hackaday long enough, you’ll start to categorize everything. There are the purely technical hacks, beautiful hacks, minimalist hacks, maximalist hacks, and then the straight-up oddball hacks. Sometimes what strikes us is the beauty of the execution. Sometimes it’s clever choice of parts that were designed to do exactly the right thing, and simply watching them do their job well is satisfying, and other times we like to see parts fooled into doing something they have no right to.

While I really like the above speaker build because it’s beautiful, and because it uses a clever choice of audio amplifier to work with the supercapacitors’ wild voltage swings, what really struck me about the project is that [Jamie Matthews] has been using it every day for the last nine months. It’s on his desk and he uses it to listen to music.

That’s a simple feat in a way, but it’s a powerful one. Some of my absolutely favorite projects of my own are similar – they are ones that I use all the time. Not the cliche “life hack”, which are usually like a clever way to peel a grapefruit, but rather hacks that become part of daily life. So look around you, and if you’re anything like me, you’ll find a number of these “daily driver” hacks. And if you do, celebrate them.

(And maybe even send ’em in to the tips line to share!)

Sloth Door Greeter Uses Neat Fold-Up Electronics Enclosures

[Alan Reiner] is building a sloth-like door greeter for his house. Sloxel, as he is affectionately known, can move around and even talk, with [Alan] using some nifty tricks in the design process

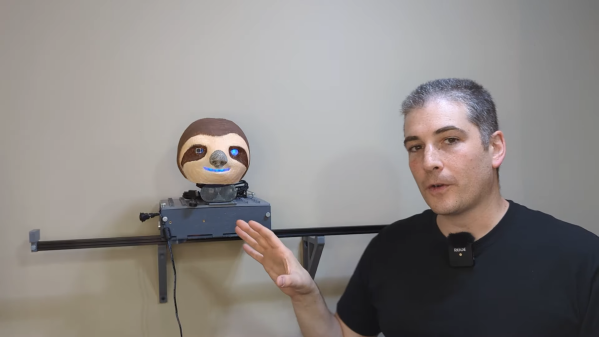
Sloxel’s job is to vet visitors to [Alan’s] house, before inviting them to knock on the door or to leave their details and go away. There’s still plenty of work to do on that functionality, which [Alan] plans to implement using ChatGPT. In the meantime, though, he’s been working hard on the hardware platform that will power Sloxel. A Raspberry Pi 3B+ is charged with running the show, including talking to the ChatGPT API and handling Sloxel’s motion along a linear rail with a number of stepper motors.

What we really love about this build, though, is the enclosure. [Alan] designed a housing for everything that can be 3D printed as a single part with print-in-place hinges. The four sides of the enclosure can then be folded up and into place with a minimum of fuss. Plus, the enclosure has plenty of nifty features that makes it easy to mount all the required hardware. It’s a neat design that we’d love to repurpose for some of our own projects.

We’ve seen other neat ideas in this area before, like using PCBs themselves as an enclosure. Video after the break.

Continue reading “Sloth Door Greeter Uses Neat Fold-Up Electronics Enclosures”

Orca Slicer Is The New Game In Town

Slicers are the neat little tools that take your 3D models and turn them into G-code that your 3D printer can actually understand. They control the printing process down to the finest detail, and determine whether your prints are winners or binners. Orca Slicer is the new tool on the block, and [The Edge of Tech] took a look at what it can do.

The video explores the use of Orca Slicer with the Bambu Lab P1P and X1 Carbon. [The Edge of Tech] jumps into the feature set, noting the rich calibration tools that are built right into the software. They work with any printer, and they’re intended to help users get perfect prints time and time again, with less messy defects and print failures. It’s also set up out of the box for network printing and live updates, which is super useful for those with multiple printers and busy workflows. You can even watch camera feeds live in the app from duly equipped printers. It’s even got nifty features for calculating your filament cost per print.

If you’re not happy with your current slicer, give Orca Slicer a go. Let us know what you think in the comments. Video after the break.

Continue reading “Orca Slicer Is The New Game In Town”

Discussing The Tastier Side Of Desktop 3D Printing

Not long after the first desktop 3D printers were created, folks started wondering what other materials they could extrude. After all, plastic is only good for so much, and there’s plenty of other interesting types of goop that lend themselves to systematic squirting. Clay, cement, wax, solder, even biological material. The possibilities are vast, and even today, we’re still exploring new ways to utilize additive manufacturing.

Ellie Weinstein

But while most of the research has centered on the practical, there’s also been interest in the tastier applications of 3D printing. Being able to print edible materials offers some fascinating culinary possibilities, from producing realistic marbling in artificial steaks to creating dodecahedron candies with bespoke fillings. Unfortunately for us, the few food-safe printers that have actually hit the market haven’t exactly been intended for the DIY crowd.

That is, until now. After nearly a decade in development, Ellie Weinstein’s Cocoa Press chocolate 3D printer kit is expected to start shipping before the end of the year. Derived from the Voron 0.1 design, the kit is meant to help those with existing 3D printing experience expand their repertoire beyond plastics and into something a bit sweeter.

So who better to host our recent 3D Printing Food Hack Chat? Ellie took the time to answer questions not just about the Cocoa Press itself, but the wider world of printing edible materials. While primarily designed for printing chocolate, with some tweaks, the hardware is capable of extruding other substances such as icing or peanut butter. It’s just a matter of getting the printers in the hands of hackers and makers, and seeing what they’ve got an appetite for.

Continue reading “Discussing The Tastier Side Of Desktop 3D Printing”