New Pens For Old Plotters

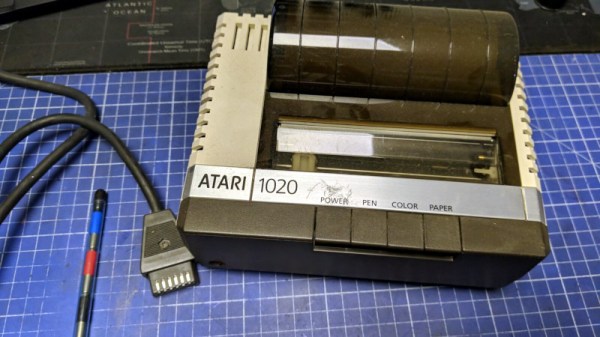
Finding consumables is an ever-present problem facing anyone working with old computer hardware. Many of these devices ceased manufacture decades ago and what old stock remains is invariably degraded by time. [Retrohax] has encountered it with the pens for an Atari plotter, a machine that uses an ALPS mechanism that appears in more than one 1980s machine. The original pens had dried out beyond the ability to refill, so he takes us through the process of finding replacements.

Sadly there are no equivalent modern pens ripe for modification, so whatever replacement he used would have to involve a little lateral thinking. He thought salvation was at hand in the form of multicolor ballpoint refills of the type where the ink is in an easily cuttable plastic tube. [Retrohax] and was able to make a 3D-printed holder for a cut-down ballpoint refill. Sadly the pressure required for a good line from a ballpoint was much higher than the original pens, so he was back to square one. Then he happened upon gel pens and tried the same trick with a gel pen refill. This gave instant success and should provide a valid technique for more than just this ALPS mechanism.

If you haven’t got a classic plotter to hand, never fear. You can have a go at making your own.

Wico Boss Joystick Modded To Use Cherry MX Keyboard Switches

The Wico Boss joystick was one of the better designs of the 1980s. Yours truly had one, and put it through many brutal hours of Amiga-based gameplay. [Drygol] was recently asked if he could alter some of these sticks to be even clickier than stock, and jumped at the change to do some modding.

[Drygol]’s idea was to swap out the original microswitches in the sticks for keyboard switches instead. In particular, the idea was to use the Cherry MX Blues which have a particularly nice click to them. But this wasn’t just going to be a straight swap. Instead, since the hardware was retro and preservation was desired, the modification had to be reversible.

The result was a drop-in 3D-printed bracket that holds four Cherry switches around the joystick’s central bauble. Thus, when the stick is moved, it actuates the keyboard switches with a satisfying click. A 12mm tactile switch was also installed in the base to be activated by the fire button. Then, it was a simple matter of  tidying up some of the sticks during reassembly and wiring up the original cables to the new switches.

It’s a neat way to give an old-fashioned digital joystick a new lease on life. This would be a particularly great mod for tired sticks with worn out microswitches, too. Hilarious archaic marketing video after the break. They really are whacko for Wico.

Continue reading “Wico Boss Joystick Modded To Use Cherry MX Keyboard Switches”

Illustrated Kristina with an IBM Model M keyboard floating between her hands.

Keebin’ With Kristina: The One With The Offset-Stem Keycaps

Image by [Leo_keeb] via reddit
Love it or hate it, I think this is a really cool idea. [Leo_keeb] has designed a new set of keycaps for the Happy Hacking Keyboard (HHKB). The keycaps’ stems are offset to the left or right in order to turn this once-staggered keyboard into an ortholinear object.

So, how do they feel? There is a slight wobble to them, according to [Leo_keeb] — it’s a bit like pressing the left or right side of Tab. But the actuation is smooth, they say.

As you can see, these resin keycaps weren’t designed with the typical Cherry MX profile in mind, they are made for the Topre capacitive key switches of the HHKB. (No, those aren’t weird rubber domes.)

When I asked about sharing the STLs, [Leo_keeb] advised me that they might be willing to release STLs for  Cherry MX switches in the US layout if there is enough interest.

Continue reading “Keebin’ With Kristina: The One With The Offset-Stem Keycaps”

Illustrated Kristina with an IBM Model M keyboard floating between her hands.

Keebin’ With Kristina: The One With The Pocket Cyberdeck

When you find something you love doing, you want to do it everywhere, all the time. Such is the case with [jefmer] and programming. The trouble is, there is not a single laptop or tablet out there that really deals well with direct sunlight. So, what’s a hacker to do during the day? Stay indoors and suffer?

Image by [jefmer] via Hackaday.IO
The answer is a project like Pocket Pad. This purpose-built PDA uses a Nice! Nano and a pair of two very low-power ST7302-driven monochrome displays. They have no backlight, but they update much faster than e-paper displays. According to [jefmer], the brighter the ambient light, the more readable the displays become. What more could you want? (Besides a backlight?)

The miniature PocketType 40% is a little small for touch typing, but facilitates thumbs well. [jefmer] added those nice vinyl transfer legends and sealed them with clear nail polish.

All of the software including the keyboard scanner is written in Espruino, which is an implementation of JavaScript that targets embedded devices. Since it’s an interpreted language, [jefmer] can both write and execute programs directly on the Pocket Pad, using the bottom screen for the REPL. I’d sure like to have one of these in my pocket!
Continue reading “Keebin’ With Kristina: The One With The Pocket Cyberdeck”

Unusual Port Combines DisplayPort And HDMI

Everyone knows you can’t plug an HDMI cable into a DisplayPort… port, and yet a recent video from [Jon Bringus] challenges that seemingly obvious assumption. The hardware in question is a variant of the 2013-era Xi3 X7A mini PC, code-named ‘Piston’ and also known as a ‘Steambox’, from back when that was still something that Valve was working on. Although the physical format here is definitely quaint, it might be implementing DisplayPort Dual-Mode (DP++), which was introduced around the same time.

With DP++ the DP port can detect when a DVI or HDMI adapter is connected and then transmit DVI/HDMI TMDS signals rather than DP signals. Since DP and HDMI/DVI use a different signaling scheme, normally an active adapter would be required. One disadvantage of DP++ is that the HDMI signal will be limited to e.g. 1920×1080 @ 120 Hz and 4K only at 30 Hz.

Normally a DP++ port is marked as such, and requires an adapter that works with the DP++ port. What Xi3 did in this case to make regular DP and HDMI connectors work seems to be somewhat of a mystery, with any information on this type of port being rather scarce. [Jon] thinks he may have found the part itself listed on Mouser, but isn’t completely sure.

Feel free to leave your thoughts and any information you have on this oddity in the comments.

Continue reading “Unusual Port Combines DisplayPort And HDMI”

Custom Mouse-Making: Clay Is The Way

For something that many of us handle all day long, it sure would be nice if mice came in more sizes and shapes, wouldn’t it? Until that day, we’ll just have to find something passable or else design and build a custom-shaped mouse from scratch like [Ben Makes Everything] did.

First, [Ben] played around with some modelling clay until he had a shape he was happy with, then took a bunch of pictures of it mounted on a piece of wood for easy manipulation and used photogrammetry to scan it in for printing after cleaning it up in Blender. About six versions later, he had the final one and was ready to move on to electronics.

That’s right, this isn’t just mouse guts in an ergonomic package. Inside is Arduino Pro Micro and a PMW 3389 optical sensor on a breakout board. [Ben] was going to use flexible 3D printed panels as mouse buttons, but then had an epiphany — why not use keyboard switches and keycaps instead? He also figured he could have two buttons per finger if he wanted, so he went with Kailh reds for the fingers and and whites in the thumb.

Speaking of the thumb, there was no room for a mouse wheel in between those comparatively huge switches, so he moved it to the the side to be thumb-operated. [Ben] got everything working, and after all this, decided to make it wireless. So he switched to an Adafruit Feather S3 and designed his first PCB for both versions. Ultimately, he found that the wireless version is kind of unreliable, so he is sticking with the wired one for now.

Continue reading “Custom Mouse-Making: Clay Is The Way”

A Better Use For The AGP Slot, Decades Later

For a while around a quarter century ago PC motherboards came with a special slot, a little shorter than the PCI slots which ruled the roost back then, and offset from them further into the case. This was the Accelerated Graphics Port, or AGP, a standard created to more quickly serve the 3D graphics cards which were then taking the world by storm. It was everywhere for a few years, then in the mid-2000s it was replaced by PCI Express and faded into obscurity. [Peter] has a Socket 7-based NAS with an AGP slot, and was left wondering whether the unused port could be put to a worthwhile purpose.

AGP is a superset of PCI clocked at 66 MHz, and usually benefiting from having its own exclusive bridge to the processor bus. Thus he reasoned that he could make an AGP to PCI adapter and it might work, as the right connections are all there. A hacked-together version was made by butchering two riser cards, and when a network card worked quite happily he knew he was on to something and made a PCB. There’s a caveat that it only works with 66-MHz capable PCI cards so not everything will work, but if you’re one of the very few people who must be in the market for one, he can do you a PCB.

We’d normally end with a link to a related project here, but we must instead congratulate [Peter]. As far as we can find, this is Hackaday’s first AGP hack, two decades later. Continue reading “A Better Use For The AGP Slot, Decades Later”