Transparent PCBs Trigger 90s Nostalgia

What color do you like your microcontroller boards? Blue? Red? Maybe white or black? Sadly, all of those are about to look old hat. Why? Well, as shared by [JLCPCB], this transparent Arduino looks amazing.

The board house produced this marvel using its transparent flexible printed circuit (FPC) material. Basically, the stuff they use for ribbon cables and flex PCBs, just made slightly differently to be see-through instead of vaguely brown.

The circuit in question is a Flexduino, an Arduino clone specifically designed to work on flexible substrates. It looks particularly good on this transparent material, with the LEDs glowing and the white silkscreen for contrast. If you like what you see, you can order your own circuits using this material directly from JLCPCB’s regular old order form.

Most of all, this project reminds us of the 1990s. Back then, you could get all kinds of games consoles and other electronics with transparent housings. There was the beloved PlayStation Crystal, while Nintendo did something similar with the N64 while adding a whole line of tinted color and charcoal versions too. Somehow seeing a bit of the inside of things is just cool. Even if, in some cases, it’s just to avoid smuggling in prisons.

It took decades before you could get custom PCBs quickly and easily. Now, board houses are competing for the enthusiast (consumer?) market, and competition is spurring development of crazy stuff like transparent and even glow in the dark PCBs. What next? We’re thinking edible, ROHS and WEEE be damned. Drop your thoughts in the comments.

Thanks to [George Graves] for the tip!

Arduino Saves Heat Pump

For home HVAC systems, heat pumps seem to be the way of the future. When compared to electric heating they can be three to four times more efficient, and they don’t directly burn fossil fuels. They also have a leg up over standard air conditioning systems since they can provide both cooling and heating, and they can even be used on water heating systems. Their versatility seems unmatched, but it does come at a slight cost of complexity as [Janne] learned while trying to bring one back to life.

The heat pump here is a Samsung with some physical damage, as well as missing the indoor half of the system. Once the damage to the unit was repaired and refilled with refrigerant, [Janne] used an Optidrive E3 inverter controlled by an Arduino Mega to get the system functional since the original setup wouldn’t run the compressor without the indoor unit attached. The Arduino manages everything else on the system as well including all of the temperature sensors and fan motor control.

With everything up and running [Janne] connected the system to a swimming pool, which was able to heat the pool in about three hours using 60 kWh of energy. The system is surprisingly efficient especially compared to more traditional means of heating water, and repairing an old or damaged unit rather than buying a new one likely saves a significant amount of money as well. Heat pump projects are getting more common around here as well, and if you have one in your home take a look at this project which adds better climate control capabilities. to a wall mount unit.

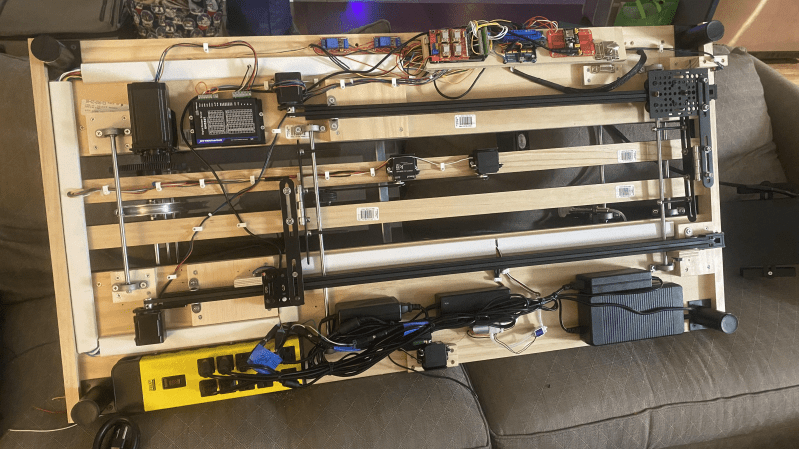
The underside of the scanner is shown. Four power supply units are visible on the lower side, and assorted electronics are visible on the top side. In the middle, two linear tracks adapted from a 3D printer run along the length of the scanner, and several motors can be seen mounted between the rails.

A Scanner For Arduino-Powered Book Archiving

Scanners for loose papers have become so commonplace that almost every printer includes one, but book scanners have remained frustratingly rare for non-librarians and archivists. [Brad Mattson] had some books to scan, but couldn’t find an affordable scanner that met his needs, so he took the obvious hacker solution and built his own.

The scanning process starts when a conveyor belt removes a book from a stack and drops it onto the scanner’s bed. Prods mounted on a rail beneath the bed straighten the book and move it into position for the overhead camera to take a picture of the cover. Next, an arm with a pneumatic gripper opens the cover, and a metal bar comes down to hold it in place.

The page-turning mechanism uses two fans: one fan blows from the side of the book to ruffle the pages and separate them, while the other is mounted on a swiveling arm. This fan blows away from the page, providing a gentle suction that holds the page to the arm as it turns the page over. Finally, a glass plate descends over the book to hold the pages flat, the camera takes a picture, the glass plate retracts, and the scanner moves on to the next page.

It is hard to imagine, but have a look at the video in the post if you really want to see it in action.

Continue reading “A Scanner For Arduino-Powered Book Archiving”

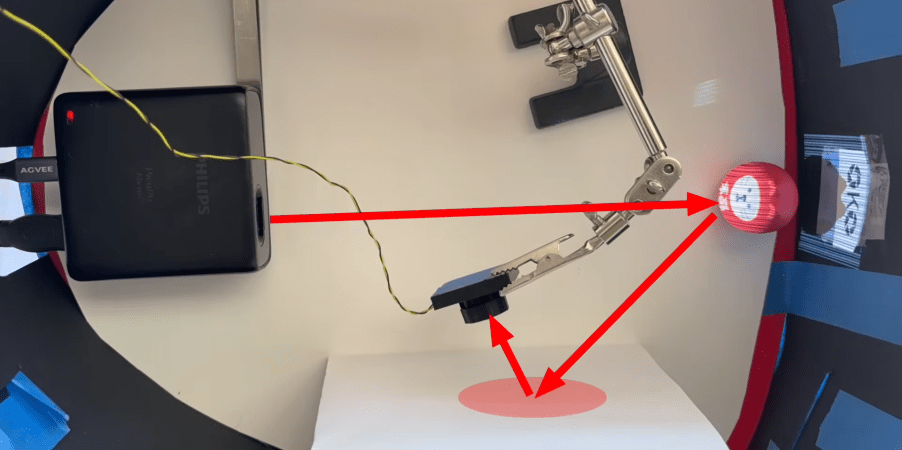
Projector on left with red arrow pointing towards object, another red arrow points towards a piece of paper and then camera.

Pictures From Paper Reflections And A Single Pixel

Taking a picture with a single photoresistor is a brain-breaking idea. But go deeper and imagine taking that same picture with the same photoresistor, but without even facing the object. [Jon Bumstead] did exactly that with compressed sensing and a projector. Incredibly, the resulting image is from the perspective of the projector, not the “camera”.

This camera setup is very similar to one we’ve seen before, but far more capable. The only required electronics are a small projector and a single photodiode. The secret sauce in this particular design lies in the pattern projected and the algorithm to parse the data.

Continue reading “Pictures From Paper Reflections And A Single Pixel”

The Most Satisfying Way To Commit

Have you ever finished up a bit of code and thought that typing “git push” in a terminal is just not a satisfying finish? So did [penumbriel], so he built a big red button he could smash instead.

This is a very simple hack: an Arduino sits inside a 3D-printed case that holds a big, red button. The case itself is very sturdily made to withstand a good satisfying smack: it has thick walls, brass insets, and rubber feet to protect the de The code for the Arduino is very, very simple: it spoofs a USB HID using the standard keyboard library, and automatically types out “git push” whenever the button is pressed. Or smashed, because you know you’re going to want to slam that thing. So far, so good– very innovative for 2006, right?

The detail that made this project stand out in 2025 was the technique [penumbriel] used for lettering– we’re always looking

With a simple soap-and-water mask, the cured silicone peels right off, leaving a clean label.

for new ways to make a good front panel. In this case, the letters were printed as a valley and filled with silicone adhesive. To protect the top surface of the print, soapy water was used as a mask. The silicone would not adhere to the wet plastic, so all [penumbriel] had to do was peel it off after it had cured, leaving solid white inside. It’s a neat trick, and a great way to use up an old tube of silicone before it goes hard. You could also use it for injection molding, but this is a great use for the dregs.

This might go well next to the programmer’s macro pad we featured a while back, but it really needs to stay as a big red button for maximum satisfaction.


Photo of AlphaPhoenix looking at an airplane flying through the air

Weighing An Airplane As It Flies Overhead

Recently, [AlphaPhoenix] weighed an airplane. Normally, that wouldn’t be much of an accomplishment. Except in this case, the airplane happened to be in flight at the time. In fact we’re not sure what is more remarkable, as he not only weighed real actual airplanes but a paper airplane too!

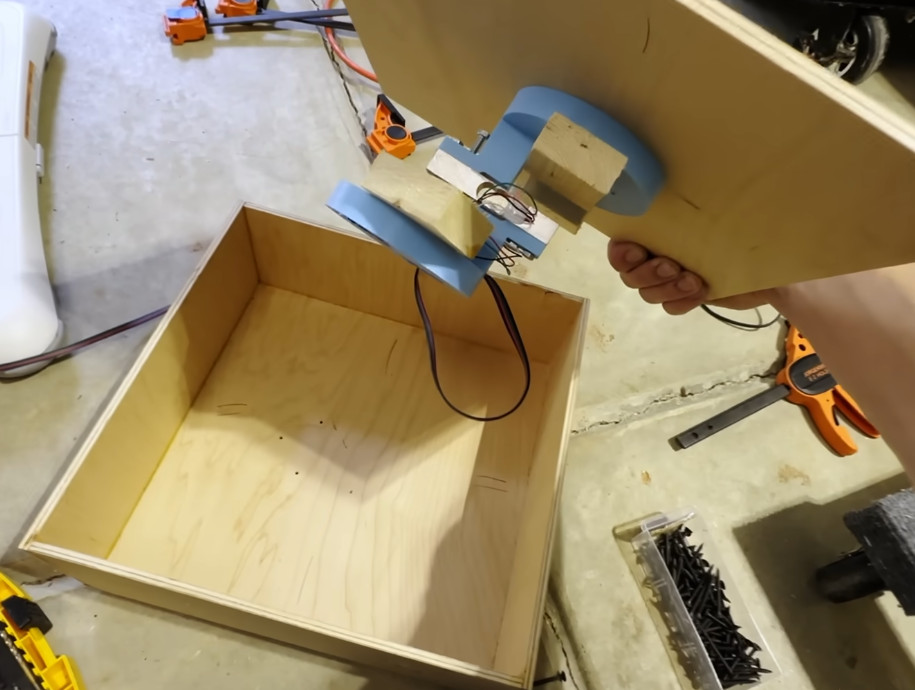
The sealed box essentially acts as a pressure sensor.

To test the concept, a large scale is made from foamcore and four load cells which feed into an Arduino which in turn is connected to a laptop for a visualization. After a brief test with a toy car, [AlphaPhoenix] goes on to weigh a paper airplane as it flies over the scale. What we learn from the demonstration is that any weight from a flying object is eventually transferred to the ground via the air.

In the second part of the video a new, smaller, type of scale is created and taken to the airport where airplanes flying overhead are weighed over the course of three days. This new apparatus is basically a pressure sensor enclosed in a nominally air-tight box, essentially a fancy type of barometer. Measurements are taken, assumptions are made, and figures are arrived at. Unfortunately the calculated results are off by more than one order of magnitude, but that doesn’t stop this experiment from having been very cool!

If you’re interested in weighing things for fun or profit be sure to check out Hackaday Prize 2022: Arduino-Powered Weighing Scale Has A Real Analog Display or Reverse Engineering A Bathroom Scale For Automated Weight Tracking.

Continue reading “Weighing An Airplane As It Flies Overhead”

A black PCB is shown, with an Arduino Nano mounted in the bottom left corner. The rest of the space on the PCB is used up by ten DIP integrated circuits and a few resistors and diodes. Several black and red wires connect different parts of the PCB.

Meowsic Keyboard MIDI Adapter Aims For Purrfection

Both small children and cats have a certain tendency to make loud noises at inopportune times, but what if there were a way to combine these auditory effects? This seems to have been the reasoning behind the creation of the Meowsic keyboard, a children’s keyboard that renders notes as cats’ meows. [Steve Gilissen], an appreciator of unusual electronic instruments, discovered that while there had been projects that turned the Meowsic keyboard into a MIDI output device, no one had yet added MIDI input to it, which of course spurred the creation of his Meowsic MIDI adapter.

The switches in the keys of the original keyboard form a matrix of rows and columns, so that creating a connection between a particular row and column plays a certain note. [Steve]’s plan was to have a microcontroller read MIDI input, then connect the appropriate row and column to play the desired note. The first step was to use a small length of wire to connect rows and columns, thus manually mapping connections to notes. After this tedious step, he designed a PCB that hosts an Arduino Nano to accept input, two MCP23017 GPIO expanders to give it enough outputs, and CD4066BE CMOS switches to trigger the connections.
Continue reading “Meowsic Keyboard MIDI Adapter Aims For Purrfection”