What could be more thrilling than launching a complex rocket that you built yourself? For starters, launching it with literally anything better than the stock ignition system would be a step in the right direction. How about a briefcase full of fantastically fun overkill?
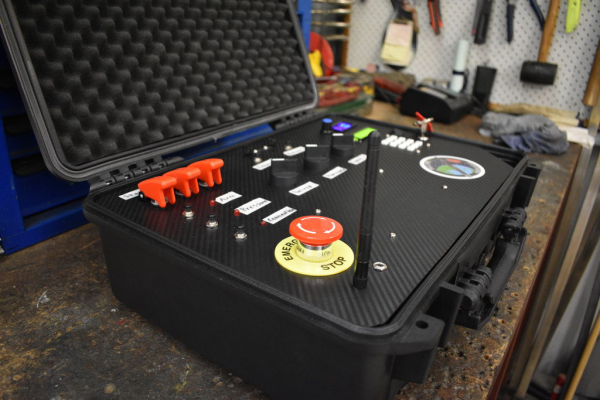
[FastEddy59] is in the middle of building a model rocket complete with a Thrust Vector Control (TVC) system to help with stabilization. Much to our delight, he’s designed an equally ambitious controller to spice up the launch sequence with security codes and a physical key. And what’s a launch controller without a giant emergency stop button to shut down everything? Incomplete, if you ask us.
Under the carbon fiber-wrapped acrylic hood, there’s an Arduino MEGA engine and an NRF24 LoRa module for transmission to the rocket. There’s even a DHT11 temperature sensor to verify that launch conditions are ideal. It’s still a work in progress with plenty of features to come, like fancier labels and plenty of launch-appropriate sound files for the hidden speaker. There’s a lot to this case, and [FastEddy59]’s video brief is ready and waiting on the pad after the break.
[FastEddy59] plans to hold the first launch in a few months, and we sincerely hope he outfits the rocket with a camera.
Continue reading “Model Rocket Launcher Is So Serious, It Has A Briefcase”