A Cortex M4 Based Platform With ETH, USB, BT And Many On-board Peripherals

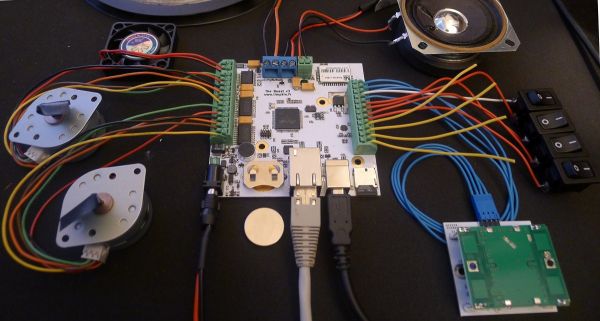
Here is a very time consuming project that I worked on during last summer: an ARM Cortex M4 based platform with plenty of communication interfaces and on-board peripherals. The particular project for which this board has been developed is not really HaD material (one of my father’s funny ideas) so I’ll only describe the platform itself. The microcontroller used in the project is the ATSAM4E16C from Atmel, which has 1Mbyte of flash and 128Kbytes of SRAM. It integrates an Ethernet MAC, a USB 2.0 Full-speed controller, a sophisticated Analog to Digital Converter and a Digital to Analog Converter (among others).

Here is a list of the different components present on the board so you can get a better idea of what the platform can do: a microphone with its amplifier, a capacitive touch sensor, two unipolar stepper motors controllers, two mosfets, a microSD card connector, a Bluetooth to serial bridge, a linear motor controller and finally a battery retainer for backup power. You can have a look at a simple demonstration video I made, embedded after the break. The firmware was made in C and uses the Atmel Software Framework. The project is obviously open hardware (Kicad) and open software.

Continue reading “A Cortex M4 Based Platform With ETH, USB, BT And Many On-board Peripherals” →
The Raspberry Pi Becomes A Form Factor

Despite the cries for updated hardware, the Raspberry Pi foundation has been playing it cool. They’re committed to getting the most out of their engineering investment, and the current board design for the Raspi doesn’t support more than 512Mb of memory, anyway.

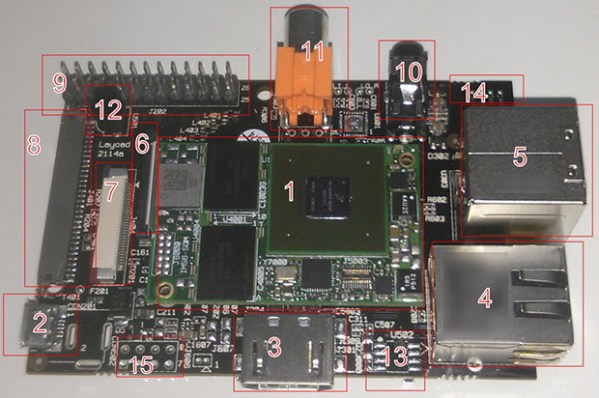
What you see above isn’t a Raspberry Pi, though. It’s the Carrier-one from SolidRun. All loaded out, it has a system-on-module with a quad core ARM Cortex-A9, 2GB of RAM, 1000 Mbps Ethernet, USB host ports, eSATA, and LVDS display connector, a real time clock, and everything else you get with a Raspberry Pi, header pins included. It’s all the awesomesauce of the newer ARM boards that will still work with all your Raspberry Pi hardware.

If you’re thinking this is a product announcement, though, think again. The folks at SolidRun are merely using this Raspberry Pi form factor board as a prototyping and development platform for their CuBox-i device, In its lowest configuration, the CuBox-i1 is still no slouch and would be more than able to keep up with the most demanding Raspberry Pi applications.

Still, though, a hugely powerful board with lots of I/O is something we’d all love, and if SolidRun gets enough complaints praise, it seems like they might be willing to release the Carrier-one as an actual product.

Building A Ball-Balancing Robot

robotBallBalance

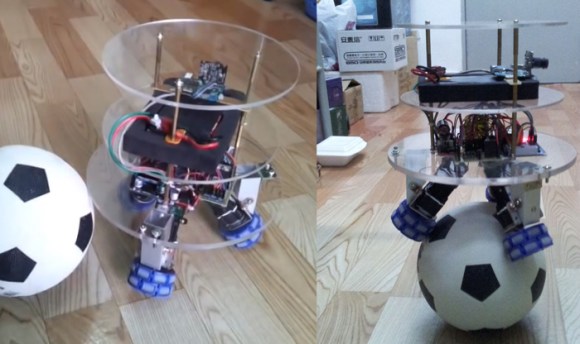
If you want a different kind of feedback systems challenge, ditch the Segway-style robots and build one that can balance on a ball. UFactory is a startup in Shenzhen, and this impressive little guy is a way of showing their skills applied to the classic inverted pendulum. At nearly 18 inches tall and weighing just over six pounds, the robot boasts a number of features beyond an accelerometer and gyroscope: it has both a WiFi module and a camera, and can be controlled via a homemade remote control or a Kinect.

The build uses plastic omni-directional wheels attached to 3 brushed dc motors, which attach to the base of the robot with custom-made aluminum brackets. The UFactory gang constructed the robot’s body out of three acrylic discs, which hold the electronics directly above the wheels. The brain seems to be an STM32 microcontroller that connects up to the motors and to the sensors.

You won’t find the code on their Instructable yet, but according to the comments they have plans to make the entire project open source. If you’re desperate for more details, the UFactory team seems willing to provide source code and other information via email. Make sure you see the video after the break, particularly the end where they demonstrate interference and carrying loads. This isn’t the first ball pendulum we’ve seen; take a trip down memory lane with the BallP ball balancing robot from 2010.

Continue reading “Building A Ball-Balancing Robot” →

Easy-phi: An Open Source Platform For Experimenters

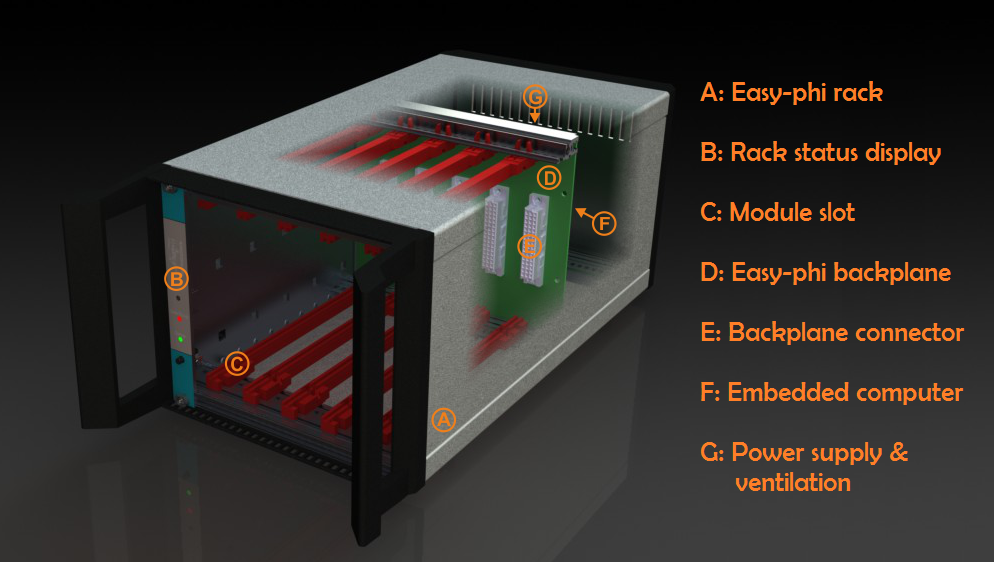
As a few of Hackaday readers may already know, my day job involves working with high speed electronics. For the last few months, my team at [Université de Genève] in Switzerland has been working on an open source platform (mostly) targeted for experimenters: the easy-phi project. The main idea is to build a simple, cheap but intelligent open hardware/software platform consisting of a 19″ frame (or smaller), which can house a big variety of electronic modules. Hobbyist would therefore only make/buy the modules that would suit their needs and control them through a web page / standalone application / Labview module.

I detailed in more depth on my website the technical aspects of the project. To give you a quick and simple overview, the rack is essentially a USB hub that connects all the modules to a Cubieboard. It also integrates a few synchronization signals, a clock and a monitoring system for voltages, temperatures, power consumption. The modules are made of template + module specific electronics. The template electronics are part of the ‘easy-phi standard’, they consist of the Arduino compatible SAM3X8E microcontroller and of a few other power related components. This ensures electrical and firmware compatibility between the rack and modules that you guys may develop. It is important to note that the modules are enumerated on the USB bus as composite CDC (communication device) and MSC (mass storage). The CDC is used to configure the module while the MSC allows you to grab its documentation, resources, and standalone application in case you use the module without the rack.

The chosen schematics / layout software is Kicad, and all current files can be found on our github. Others will be uploaded once we have tested the other modules currently in the pipe. As the ones we’re developing are physics oriented, we hope that enthusiasts will bring easy-phi to other domains. Don’t hesitate to contact us if you have any question or if you’d like to contribute.

Breadboarding With A ARM Microcontroller

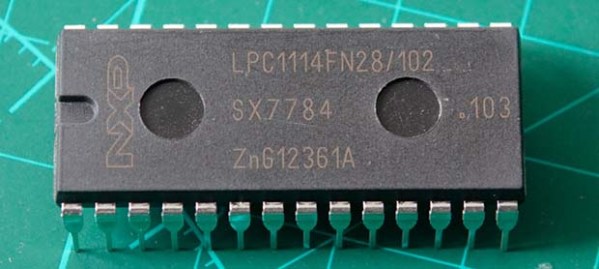
NXP’s LPC1114 ARM microcontroller is in a class all of it’s own. ARM microcontrollers are a dime a dozen, but this fabulous chip is the only one that’s housed in a hacker and breadboard friendly PDIP package. However, breadboard setups usually won’t have the luxuries of a true development platform such as flashing the part, single stepping through the code, and examining memory. [Steve] found an interesting solution to this problem that involves a Dremel and hacking up even more hardware.

[Steve] found a few LPC1769 dev boards that include a debugger and a way to program these chips. Simply by hacking off the programmer and debugger portion of this dev board with a Dremel tool, [Steve] had an easy to use interface for his breadboardable ARM.

After connecting the power rails to his breadboarded chip, [Steve] connected his programmer up and set up a gcc toolchain. For about $25, he has a breadboard friendly ARM microcontroller with full debugging capabilities.

This isn’t the first time we’ve seen a few people play with this DIP28 ARM chip; someone even milled this 600 mil chip down to 300 mils for even easier prototyping. Still, this is the best and cheapest way we’ve seen yet to turn this ARM into a proper prototyping platform.

Advanced Transcend WiFi SD Hacking: Custom Kernels, X, And Firefox

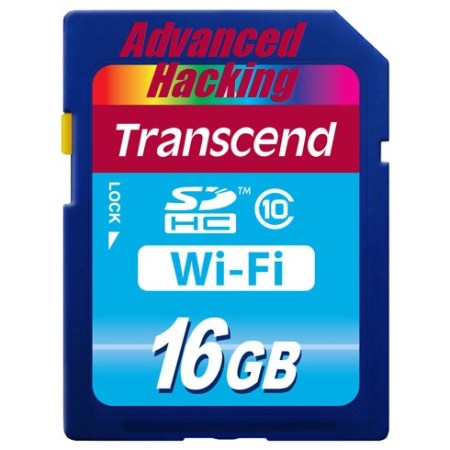
[Dmitry] read about hacking the Transcend WiFi cards, and decided to give it a try himself.   We already covered [Pablo’s] work with the Transcend card. [Dmitry] took a different enough approach to warrant a second look.

Rather than work from the web interface and user scripts down, [Dmitry] decided to start from Transcend’s GPL package and work his way up. Unfortunately, he found that the package was woefully incomplete – putting the card firmly into the “violates GPL” category. Undaunted, [Dmitry] fired off some emails to the support staff and soldiered on.

It turns out the card uses u-boot to expand the kernel and basic file system into a ramdisk. Unfortunately the size is limited to 3MB. The limit is hard-coded into u-boot, the sources of which transcend didn’t include in the GPL package.

[Dmitry] was able to create his own binary image within the 3MB limit and load it on the card. He discovered a few very interesting (and scary) things. The flash file system must be formatted FAT32, or the controller will become very upset. The 16 (or 32)GB of flash is also mounted read/write to TWO operating systems. Linux on the SD card, and whatever host system the card happens to be plugged in to. This is dangerous to say the least. Any write to the flash could cause a collision leading to lost data – or even a completely corrupt file system. Continue reading “Advanced Transcend WiFi SD Hacking: Custom Kernels, X, And Firefox” →

The Bitbox Console: An Open Source Gaming Rig

Bitbox Console

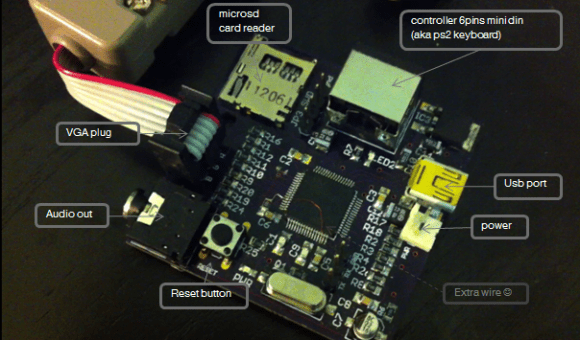
A simple resistive DAC is all you need to drive a VGA display. Combining that with an on-chip DAC for audio, the STM32F405RGT6 looks like a good choice for a DIY game console. [Makapuf’s] Bitbox console is a single chip gaming machine based on the STM32 ARM processor.

We’ve seen some DIY consoles in the past. The Uzebox is a popular 8 bit open source game system, and [makapuf] was inspired by its design. His console’s use of a more powerful 32 bit processor will allow for more complex games. It will also provide more colors and higher quality audio.

One of the keys of the Uzebox’s success is the development tools around it. There’s a full emulator which allows for debugging with GDB. [Makapuf] has already built an SDL based emulator, and can debug the target remotely using GDB. This will certainly speed up game development.

After the break, check out a demo of the first game for the Bitbox: JUMP. Also be sure to read through [makapuf]’s blog for detailed information on the build.

Continue reading “The Bitbox Console: An Open Source Gaming Rig” →