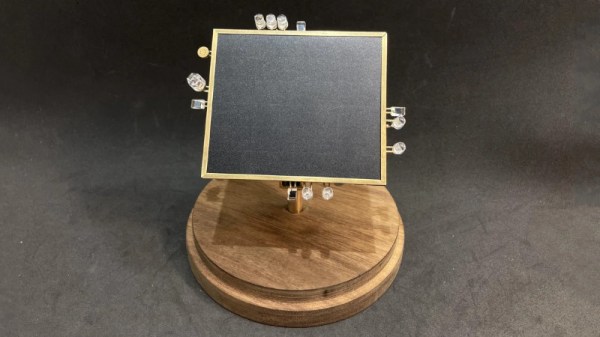
BEAM robotics, which stands for Biology, Electronics, Aesthetics, and Mechanics, is an ethos that focuses on building robots with simple analog circuits. [NanoRobotGeek] built a great example of the form, creating a light-tracking robot that uses no batteries and no microcontrollers.
The robot aims to track the brightest source of light it can see. This is achieved by feeding signals from four photodiodes into some analog logic, which then spits out voltages to the two motors that aim the robot, guiding it towards the light. There’s also a sound-detection circuit, which prompts the robot to wiggle when it detects a whistle via an attached microphone.
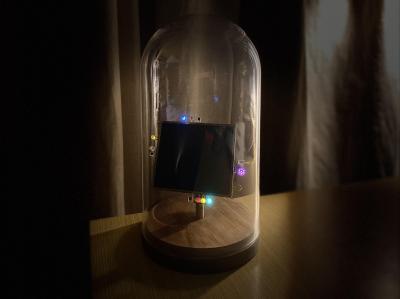
The entire circuitry is free-formed using brass wire, and the result is an incredibly artful build. Displayed in a bell jar, the build looks like some delicate artifact blending the past and future. Neither steampunk nor cyberpunk, it draws from both with its combination of vintage brass and modern LEDs.
It’s a great build that reminds us of some of the great circuit sculptures we’ve seen lately. Video after the break.
Engineering is all about making a design that conforms to a set of requirements. Usually those are boring things like cost, power consumption, volume, mass or compatibility with existing systems. But sometimes, you have to design something with restrictions you might have never considered. [Devon Bray] was tasked with designing a system that could dispense single drops of water, while making absolutely no noise. [Devon]’s blog describes in detail the process of making The Silent Dripper, which was needed for an art installation called The Tender Interval by [Sara Dittrich].
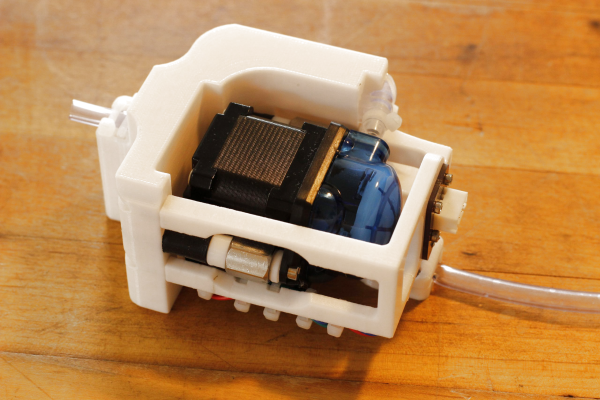
The design process started with picking a proper pump. Centrifugal pumps can be very quiet due to their smooth, continuous motion, but are not suitable for moving small quantities of liquid. Peristaltic pumps on the other hand can generate single drops of liquid very accurately, but their gripping-and-squeezing motion creates far more sound. [Devon] still went for the latter type, and eventually discovered that filling up the pumping mechanism with lithium grease made it quiet enough for his purpose.
The pump was then mounted on a 3D-printed bracket that also contained the water feeding tube and electrical connections to the outside world. The tubing was fastened with zip ties to stop it from moving when the pump was running, and the pump itself was isolated from the bracket with rubber dampening mounts.
Another trick to silence the pump was the motor driver circuit: standard PWM drivers often cause audible whine from the motor coils because of their abrupt switching, so [Devon] went for a Trinamic SilentStepStick that regulates the current much more smoothly. The end result is a water dripper that makes less noise than a piece of tissue paper being crumpled, as you can observe in the video (embedded below) which also demonstrates the complete art installation.
Who are you? No, who are you really? You’re an amalgamation of influences from your family, your friends, the media, and the parasocial relationships you have with fictional characters. It’s okay; we all are. It can’t be helped that there’s a lot of it about.
[Kim Pimmel]’s YOU examines this question of identity in the form of projected typography. YOU are solidly laser-cut at birth, but then come the influences — the water of everyday life that surrounds you, the lights that mask your dread or lay you bare, and the prisms of circumstance that twist the light into brilliant patterns that burn memories into your brain.
In this case, the light comes from a hacked camping headlamp that was past its prime. [Kim] laser-cut the letters from acrylic and submerged them in water, which can be manipulated to enhance the effect and mimic the turmoil of life. For added effect, [Kim] held prisms in the light’s path to refract it and cause the patterns to dance. Be sure to check it out after the break, and don’t forget to turn on the sound so you can hear [Kim]’s original composition.
We’ve seen a lot of environmental monitoring projects here at Hackaday. Seriously, a lot. They usually take the form of a microcontroller, a couple sensors, and maybe a 3D printed case to keep it all protected. They’re pretty similar functionally as well, with the only variation usually coming in the protocol used to communicate their bits of collected data.
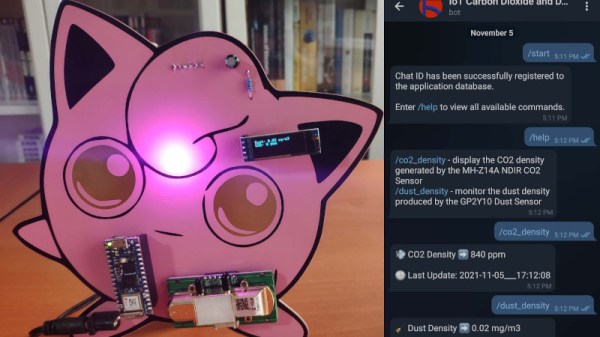
But even when compared with such an extensive body of previous work, this Jigglypuff IoT environmental monitor created by [Kutluhan Aktar] is pretty unusual. Sure, the highlights are familiar. Its MH-Z14A NDIR CO2 sensor and GP2Y1010AU0F optical dust detector are read by a WiFi-enabled microcontroller, this time the Arduino Nano RP2040 Connect, which ultimately reports its findings to the user via Telegram bot. There’s even a common SSD1306 OLED display on the unit to show the data locally. All things we’ve seen in some form or another in the past.
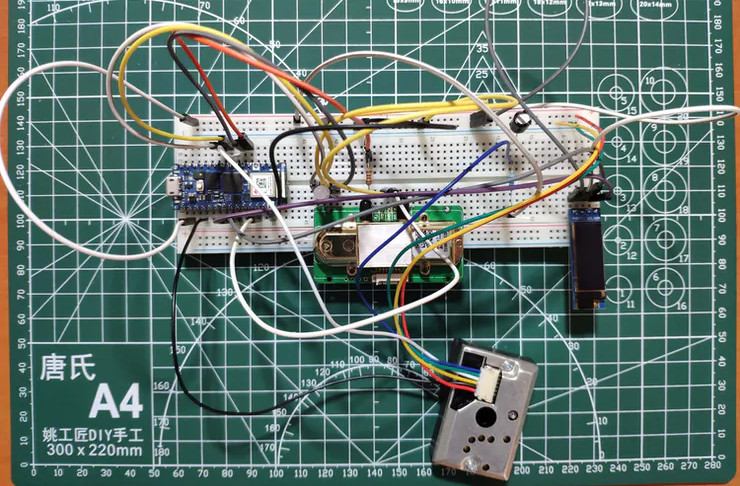
Testing the electronics on a bread board.
So what’s different? Well, it’s all been mounted to a huge Pokémon PCB, obviously. Even if you aren’t a fan of the pocket monsters, you’ve got to appreciate that bright pink solder mask. Honestly, the whole presentation is a great example of the sort of PCB artwork we rarely see outside of the BadgeLife scene.
Admittedly, there’s a lot easier ways to get notified about the air quality inside your house. We’re also not saying that haphazardly mounting your electronics onto a PCB designed to look like a character from a nearly 20+ year old Game Boy game is necessarily a great idea from a reliability standpoint. But if you were going to do something like that, then this project is certainly the one to beat.
Circuit sculpture is engineering and art all at play together. One must combine the functional with the aesthetically appealing. [EdwardA61] did just that with this enchanting lamp build.
Like many other circuit sculptures, the build relies on the aesthetic qualities of brass, though [EdwardA61] notes that copper wire can be used as well. Four WS2812B LEDs, in their bare PCB-mount form, are soldered into a circuit using the brass to carry the power and data signals as needed.
A Seeduino Xiao microcontroller is responsible for controlling the show, though relies on a typical PCB rather than a circuit sculpture in and of itself. It does provide for easy powering and programming however, with the benefit of its USB-C connector.
It’s a simple skeleton design, as so many circuit sculptures are, but it’s a form that we’ve come to love and appreciate. [EdwardA61] did a great job of photographing the build, too, showing how the colors on each LED interplay with each other as they’re cast on the table.
It’s a lamp we’d love to build ourselves, and we hope that [EdwardA61] follows through on plans to cast a similar design in clear resin, as well. If you’ve built your own artistically electrical sculptures, be sure to let us know!
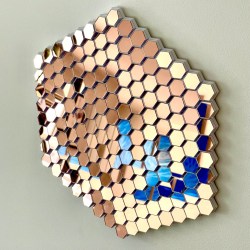
[Ben Bartlett] recently got engaged, and the proposal had a unique bit of help in the form of a 3D-printed hexagonal mirror array, whose mirrors are angled just right to spell out a message with the reflections. A small test is shown above projecting a heart, but the real deal was a bigger version reflecting the message “MARRY ME?” into sand at sunset. Who could say no to something like that? Luckily for all of us, [Ben] shared all the details of what went into designing and building such a thoughtful and fascinating device.
Mirrors on the 3D-printed array are angled just right to reflect light into a message.
Essentially, the array of mirrors works a bit like a projector. Each individual reflection can be can be thought of as a pixel, and the projected position of each can be modified by the precise angle of each mirror. With the help of some Python code, [Ben] calculated the exact angles needed to spell out “MARRY ME?” and generated the necessary 3D model. A smaller-scale test (shown in the header image above) was successful, and after that it was just a matter of printing the array and gluing on some mirrors.
Of course, that’s the short version. In practice there were quite a few troublesome issues that demonstrated the value of using early tests to discover hidden problems. For one thing, mirror angle and alignment is crucial, which meant that anything that could affect the shape of the array was a potential problem. Glue that expands or otherwise changes shape as it dries or cures could slightly change a mirror’s angle, so cyanoacrylate (CA) glue was preferred. However, the tiniest bit of CA glue will mess up a mirror’s surface in a hurry, so care was needed during assembly.
Another gotcha was when [Ben] suddenly realized, twenty hours into printing the final assembly, that the message needed to be reversed! As designed, the array he was printing would project “?EM YRRAM” and this wasn’t caught during testing because the test pattern (a heart) was symmetrical. Fortunately there was time to correct the error and start again, but it was close. [Ben]’s code has an optional visualization function, which was invaluable for verifying that things would actually turn out as expected. As it happens, the project took right up to the last minute to complete and there wasn’t quite time to check everything 100% before the big moment, but it all turned out alright. What’s life without a little mystery and danger, anyway?
The pictures are great, but you won’t regret taking the time to read through the project page (don’t miss the annotated Python code) because [Ben] goes into just the right level of detail. The end result looks fantastic, and makes an excellent keepsake with a charming story.
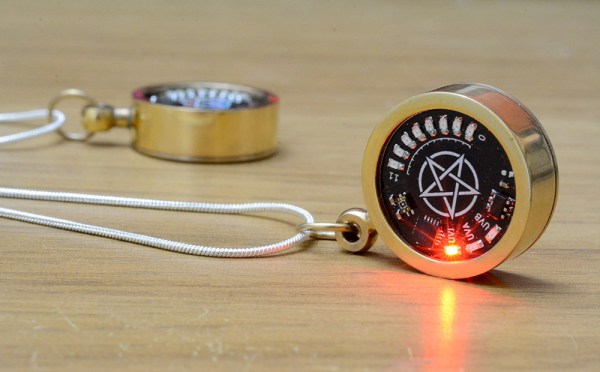
Given how important our Sun is, our ancestors can be forgiven for seeing it as a god. And even now that we know what it actually is and how it works, it’s not much of a reach to think that the Sun pours forth evil spirits that can visit disease and death on those who bask too long in its rays. So an amulet of protection against the evil UV rays is a totally reasonable project, right?
As is often the case with [mitxela]’s projects, especially the more bedazzled ones, this one is approximately equal parts electronics and fine metalworking. The bulk of the video below focuses on the metalwork, which is pretty fascinating stuff. The case for the amulet was made from brass and sized to fit a CR2032 coin cell. The back of the amulet is threaded to act as a battery cover, and some fancy lathe work was needed there. The case was also electroplated in gold to prevent tarnishing, and lends a nice look when paired up with the black solder mask of the PCB.
On the electronics side, [mitxela] took pains to keep battery drain as low as possible and to make the best use of the available space, choosing an ATtiny84 to support a TTP223 capacitive sensing chip and a VEML6075 UV sensor. The touch sensor allows the wearer to wake the amulet and cycles through UV modes, which [mitxela] learned were not exactly what the sensor datasheet said they were. This required a few software hacks, but in the end, the amulet does a decent job of reporting the UV index and looks fantastic while doing it.
 The robot aims to track the brightest source of light it can see. This is achieved by feeding signals from four photodiodes into some analog logic, which then spits out voltages to the two motors that aim the robot, guiding it towards the light. There’s also a sound-detection circuit, which prompts the robot to wiggle when it detects a whistle via an attached microphone.