The Timecraft project by [Amy Zhao] and team members uses machine learning to figure out a way how an existing painting may have been originally been painted, stroke by stroke. In their paper titled ‘Painting Many Pasts: Synthesizing Time Lapse Videos of Paintings’, they describe how they trained a ML algorithm using existing time lapse videos of new paintings being created, allowing it to probabilistically generate the steps needed to recreate an already finished painting.
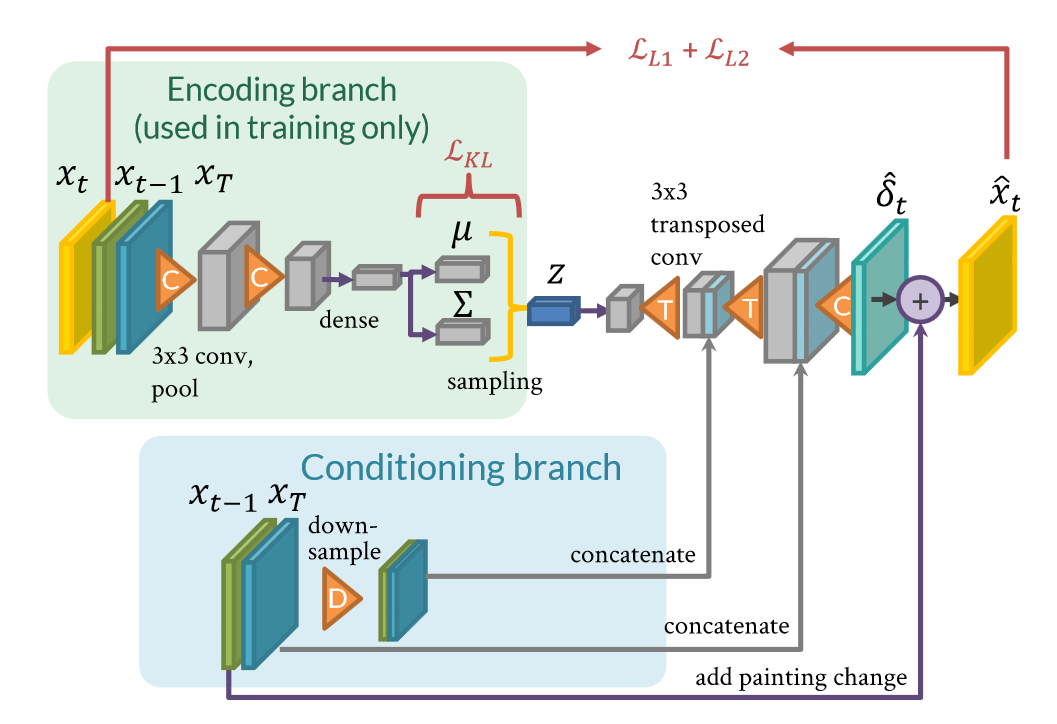 The probabilistic model is implemented using a convolutional neural network (CNN), with as output a time lapse video, spanning many minutes. In the paper they reference how they were inspired by artistic style transfer, where neural networks are used to generate works of art in a specific artist’s style, or to create mix-ups of different artists.
A lot of the complexity comes from the large variety of techniques and materials that are used in the creation of a painting, such as the exact brush used, the type of paint. Some existing approaches have focused on the the fine details here, including physics-based simulation of the paints and brush strokes. These come with significant caveats that Timecraft tried to avoid by going for a more high-level approach.
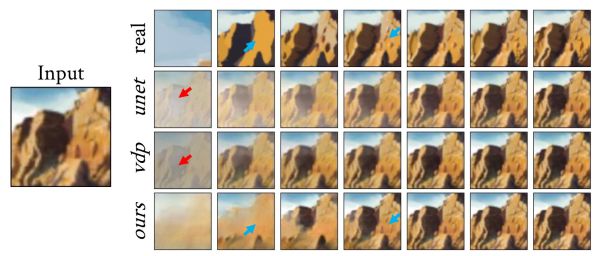
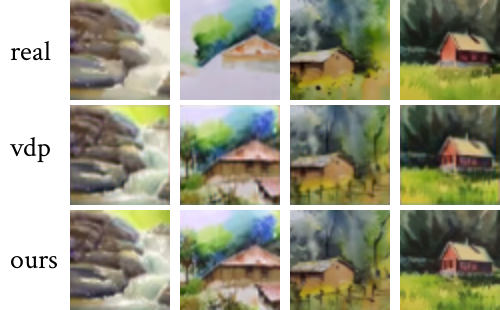 The time lapse videos that were generated during the experiment were evaluated through a survey performed via Amazon Mechanical Turk, with the 158 people who participated asked to compare the realism of the Timecraft videos versus that of the real time lapse videos. The results were that participants preferred the real videos, but would confuse the Timecraft videos for the real time lapse videos half the time.
Although perhaps not perfect yet, it does show how ML can be used to deduce how a work of art was constructed, and figure out the individual steps with some degree of accuracy.
Continue reading “Recreating Paintings By Teaching An AI To Paint”