Fueling With Ammonia

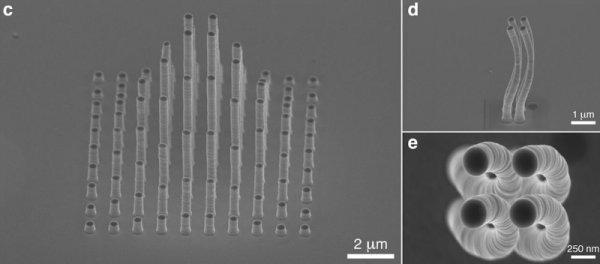
There’s a major push now to find energy sources with smaller carbon footprints. The maritime shipping industry, according to IEEE Spectrum, is going towards ammonia. Burning ammonia produces no CO2 and it isn’t hard to make. It doesn’t require special storage techniques as hydrogen does and it has ten times the energy density of a modern lithium-ion battery.

You can burn ammonia for internal combustion or use it in a fuel cell. However, there are two problems. First, no ships are currently using the fuel and second most ammonia today is made using a very carbon-intensive process. However it is possible to create “green” ammonia, and projects in Finland, Germany, and Norway are on schedule to start using ammonia-powered ships over the next couple of years.

Continue reading “Fueling With Ammonia”

Ben Krasnow Measures Human Calorie Consumption By Collecting The “Output”

It’s a bit icky reading between the lines on this one… but it’s a fascinating experiment! In his latest Applied Science video, [Ben Krasnow] tries to measure how efficient the human body is at getting energy from food by accurately measuring what he put in and what comes out of his body.

The jumping off point for this experiment is the calorie count on the back of food packaging. [Ben] touches on “bomb calorimetry” — the process of burning foodstuff in an oxygen-rich environment and measuring the heat given off to establish how much energy was present in the sample. But our bodies are flameless… can we really extract similar amounts of energy as these highly controlled combustion chambers? His solution is to measure his body’s intake by eating nothing but Soylent for a week, then subjects his body’s waste to the bomb calorimetry treatment to calculate how much energy was not absorbed during digestion. (He burned his poop for science, and made fun of some YouTubers at the same time.)

The test apparatus is a cool build — a chunk of pipe with an acrylic/glass laminated window that has a bicycle tire value for pressurization, a pressure gauge, and electrodes to spark the combustion using nichrome wire and cotton string. It’s shown above, burning a Goldfish® cracker but it’s not actually measuring the energy output as this is just a test run. The actual measurements call for the combustion chamber to be submerged in an insulated water bath so that the temperature change can be measured.

Now to the dirty bits. [Ben] collected fecal matter and freeze-dried it to ready it for the calorimeter. His preparation for the experiment included eating nothing but Soylent (a powdered foodstuff) to achieve an input baseline. The problem is that he measures the fecal matter to have about 75% of the calories per gram compared to the Soylent. Thinking on it, that’s not surprising as we know that dung must have a high caloric level — it burns and has been used throughout history as a source of warmth among other things. But the numbers don’t lead to an obvious conclusion and [Ben] doesn’t have the answer on why the measurements came out this way. In the YouTube comments [Bitluni] asks the question that was on our minds: how do you correlate the volume of the input and output? Is comparing 1g of Soylent to 1g of fecal matter a correct equivalency? Let us know what you think the comments below.

The science of poop is one of those 8th-grade giggle topics, but still totally fascinating. Two other examples that poop to mind are our recent sewage maceration infrastructure article and the science of teaching robot vacuums to detect pet waste.

Continue reading “Ben Krasnow Measures Human Calorie Consumption By Collecting The “Output””

Spinach Photo Prints

Some people like spinach in their salads. Others would prefer it if it never gets near their fork. Still, other folks, like [Almudena Romero], use it for printing pictures, and they’re the folks we’ll focus on today.

Anthotypes are positive images made from plant dyes that fade from light exposure. Imagine you stain your shirt at a picnic and leave it in the sun with a fork covering part of the stain. When you come back, the stain not sheltered by cutlery is gone, but now you have a permanent fork shape logo made from aunt Bev’s BBQ sauce. The science behind this type of printmaking is beautifully covered in the video below the break. You see, some plant dyes are not suitable for light bleaching, and fewer still if you are not patient since stains like blueberry can take a month in the sun.

The video shows how to make your own plant dye, which has possibilities outside of anthotype printing. Since the dye fades in sunlight, it can be a temporary paint, or you could use samples all over your garden to find which parts get lots of sunlight since the most exposed swatches will be faded the most. Think of a low-tech UV meter with logging, but it runs on spinach.

If the science doesn’t intrigue you, the artistic possibilities are equally cool. All the pictures have a one-of-a-kind, wabi-sabi flare. You take your favorite photo, make it monochrome, print it on a transparent plastic sheet, and the ink will shield the dye and expose the rest. We just gave you a tip about finding the sunniest spot outdoors, so get staining.

Anthotype printing shares some similarities with etch-resist in circuit board printing processes, but maybe someone can remix spinach prints with laser exposure!

Continue reading “Spinach Photo Prints”

Cooking Eggs With Hand Warmers

Handwarmers are great to keep your fingers functional in icy weather, but can they do more? [Greg] wondered if they could be put to good use cooking an egg, and got down to work.

The handwarmers in question are the HotHands brand, based on an iron chemistry. The warmers create their heat from the exothermic reaction between iron and oxygen that creates rust. Thus, these handwarmers need plenty of airflow to heat up. To enable this, [Greg] 3D printed a small crate with plenty of vents, into which he stacked six hand warmer sachets. An egg was nestled in the center – a perfect choice as it can be cooked in its own packaging. The pile reached temperatures of 160 F and was able to maintain that level for an hour, important as egg proteins tend to start coagulating and denaturing around 150 F. Once removed, [Greg] hoped to find a solid egg, but instead was rewarded with a somewhat gooey, semi-solid result instead. Regardless, the egg had reached an elevated temperature and shown some signs of cooking, and as [Greg] appears to be still putting out videos, we’ll assume he hasn’t yet died of salmonella.

We’d love to see this turn into an engineering competition, though, with prizes for the best cooked egg with the least amount of handwarmers. We’ve featured other egg cooking apparatus before, too. Video after the break.

Continue reading “Cooking Eggs With Hand Warmers”

A Deep Dive Into The Chemistry Of Retrobright

Considerable effort is often required to rejuvenate the yellowed and grungy plastic cases of retrocomputing gear. One generally does well to know their enemy in order to fight it, though, which is where this guide to the chemistry of plastic yellowing and whitening (PDF) comes in handy.

“The Retrobright Mystery” was written and sent in to us by [Caden Xu], a high school student who also goes by the alias [Saltypretzel]. The paper begins with an excellent description of the chemistry of plastic yellowing. We had always heard that the yellowing in ABS, or acrylonitrile-butadiene-styrene, the plastic most commonly used for cases back in the day, was primarily caused by brominated compounds added to the plastic as flame retardants. It turns out that’s only a minor contributor, with the bulk of yellowing occurring thanks to a complex chain of reactions starting with free radicals liberated from the butadiene copolymer through a reaction requiring oxygen and energy.

Reactive radicals from the decomposing synthetic rubber, added to ABS to increase its flexibility, unroll the benzene ring in styrene copolymers to form a conjugated compound called 2-hydroxymuconic acid. The alternating double and single bonds in this compound tend to absorb light towards the blue end of the spectrum strongly, so the accumulation of 2-HMA in the plastic over time thus makes it reflect more and more yellow and red wavelengths, giving aged ABS its unhealthy bronze glow.

Luckily, just as ketchup smears and grass stains, both rich in conjugated compounds like lycopene and chlorophyll, can be bleached out of existence, so too can yellowed plastics. [Caden] notes that Retrobright, which contains a powerful dose of hydrogen peroxide, does its whitening trick by breaking the UV-absorbing double bonds in 2-HMA. There’s little that can be done about the embrittlement of the ABS caused by the breakdown of butadiene copolymers, but at least it’ll look good.

We found this guide quite comprehensive and instructive, and it should only help retrocomputing fans in their restoration efforts. For those less interested in the chemistry, [Bob Baddeley] published an overview of the yellowing of plastic and manufacturing steps to avoid it, and we covered the more practical considerations of Retrobright treatment too.

It Isn’t Rocket Science — Wait, Maybe It Is

We don’t know why, but for some reason, the more dangerous something is, the more hacker appeal it seems to have. We like to deal with high temperatures, high voltages, dangerous chemicals, and powerful lasers. So [Tech Ingredient’s] recent video about homemade rocket motors certainly caught our attention. You may need a little commitment, though. The first video (yes, there isn’t just one) is over an hour long.

Turns out, [Tech] doesn’t actually want to use the rockets for propulsion. He needed a source of highly-ionized high-velocity plasma to try to get more power from his magnetohydrodynamic project. Whatever you want to use it for, these are serious-sized motors. [Tech] claims that his design is both powerful and easy to build. He also has a “secret” rocket fuel that he shares. What is it? We won’t spoil the video for you, but it is a sweet surprise.

Continue reading “It Isn’t Rocket Science — Wait, Maybe It Is”

Metal Plating Plastic Or Metal Parts

Like most of us, [Clem] wants to 3D print in metal. Metal 3D printers do exist, but they are generally way out of reach for most of us garage hackers. As an alternative, [Clem] uses a homebrew electroplating system to get prints with a metallic coating.

The setup is quite simple. Small glass jars to act as the plating tanks and the machine uses an Arduino controller along with a PCB to hold things like a relay to control the 24V used for electroplating. To keep everything tidy, [Clem] designed a 3D printed box that stores all the cables and chemicals when you aren’t using them. Since the parts might get hot, the plastic is PETG.

The trick is that parts need to be conductive in order to use electroplating — typically plastic isn’t conductive. [Clem] paints the plastic parts to grant them conductivity. Graphite paint didn’t give great results. However, an iron-based paint worked better but obscures detail on the print. In addition to galvanization (plating with zinc or steel) you can see copper plating of a nail at around the 12 minute mark, with a plastic plating demo a minute later. The machine can even plate gold using an expensive gold-bearing electrolyte. In the video comments, someone also mentioned that it would be interesting to try plating conductive filament without using the paint. [Clem] tried to remove rust from a big part, but the power supply wasn’t up to the task.

Copper plating is often used as a step to make a part conductive so you can then plate with another metal. In addition to copper sulfate, you can use copper acetate. Sometimes, getting metal into fine details can be tough and it is easier to use a pen to plate those areas directly.

Continue reading “Metal Plating Plastic Or Metal Parts”