An Amiga 500 For The 21st Century

There was a period in the late 1980s when the home computer to own did not come with an Apple logo and was not an IBM, Compaq, or any of the other clones, but instead sported a Commodore logo. The Amiga 500 was an all-in-one console-style cased machine that maybe wasn’t quite the computing powerhouse you might have wished it to be, but gave you enough of the capabilities of the more accomplished 16-bit machines of the day to be an object of desire while also having a games catalogue second to none.

A500s have survived in reasonable numbers, but inevitably working A500s haven’t. Fortunately there are decent emulators, and it was for one of these that [intric8] has produced an extremely well-done installation of a Raspberry Pi 3 in an Amiga case. The intention has been throughout to avoid modification or damage to the Amiga case, and eventually to have all Amiga internal peripherals including the floppy drive in a fully working condition.

The result has a Tynemouth Software USB adaptor for the Amiga keyboard, and a set of nicely designed 3D printed backplates to bring the extended Raspberry Pi ports to the back of the case. The floppy isn’t yet interfaced and there isn’t a socket for the quadrature mouse, but otherwise it’s a very tidy build. He might be interested in one of the several USB to quadrature interfaces we’ve featured over the years.

You might ask why so much effort should be put in for an emulation of an A500, and in a sense you’d be right to do so. The Pi will run the emulator from any case or none. But if you happen to have a spare A500 case, why not give this one a go!

Converting Power Supplies For Antique Computers

Just because something is “never used” doesn’t mean it’s good. [Inkoo Vintage Computing] learned that lesson while trying to repair an Amiga 500 and finding parts online that were claimed to be “new” in that they were old stock that had never been used. The problem was that in the last 30 years the capacitors had dried out, rendering these parts essentially worthless. The solution, though, was to adapt a modern PSU for use on the old equipment.

The first hurdle to getting this machine running again was finding the connector for the power supply. The parts seemed to have vanished, with some people making their own from scratch. But after considering the problem for a minute longer they realized that another Commodore machine used the same parts, and were able to source a proper cable.

Many more parts had to be sourced to get the power supply operational, but these were not as hard to come across. After some dedicated work with the soldering iron, the power supply was put to use running the old Amiga. Asture readers will know that [Inkoo Vintage Computing] aren’t strangers to the Amiga. They recently were featured with a nondestructive memory module hack that suffered from the same parts sourcing issues that this modification had, but also came out wonderfully in the end.

Neon Lamps Make For The Coolest Of Nixie Clocks

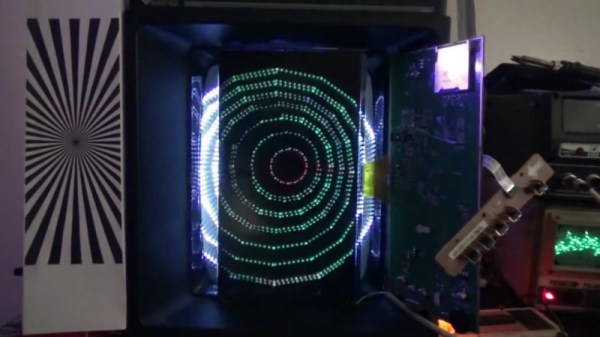
Revisiting old projects is always fun and this Nixie Clock by [pa3fwm] is just a classic. Instead of using transistors or microcontrollers, it uses neon lamps to clock and drive the Nixie Displays. The neon lamps themselves are the logic elements. Seriously, this masterpiece just oozes geekiness.

Inspired by the book “Electronic Counting Circuits” by J.B. Dance(ZIP), published in 1967, we covered the initial build a few years back. The fundamental concept of operation is similar to that of Neon Ring Counters. [Luc Small] has a write-up explaining the construction of such a device and some math associated with it. In this project, [pa3fwm] uses modern day neons that you find in indicators, so his circuit is also updated to compensate for the smaller difference in striking and maintaining voltages.

The original project was done in 2007 and has since undergone a few upgrades. [Pa3fwm] has modified the construction to make it wall mounted. Even though it’s not a precise timekeeper, the project itself is a keeper from its time. Check out the video below for a demonstration.

Feel inspired yet? Take a peek at the White Rabbit Nixie Clock and you are looking for a low voltage solution to powering Nixies then check out the 5-volt Nixie Power supply.

Continue reading “Neon Lamps Make For The Coolest Of Nixie Clocks”

Building A Tricorder Prop Worthy Of Mr Spock

We’ve all been there. You want to assemble a proper Star Trek: The Original Series landing party prop set, but the TOS tricorders you can find on the market are little more than overpriced toys. Imagine the embarrassment of beaming down to Cestus III with a plastic tricorder. The Metrons wouldn’t have even bothered with the trial by combat with such a sorry showing.

Unhappy with the state of Star Trek props, [Dean O] decided to take matters into his own hands. He purchased a TOS tricorder from Diamond Select Toys and set out to modify it into something a bit closer to Starfleet standards. Anything painted metallic silver on the toy was replaced with a machined aluminum duplicate, adding some much needed heft. He even spruced up the controls and display.

To start, [Dean] stripped the tricorder down, separating all of the silver plastic parts and finding aluminum stock that was close enough to the desired dimensions. This ended up being .125″ plate for the sides, and .500″ bars for the horizontal dividers. To make the side panels he placed the original plastic parts over the aluminum, marked the mounting holes with a punch, and used the belt sander to shape them.

[Dean] then put in a more screen accurate Moire disc, and went as far as to get real watch crowns for the buttons (just like the prop used in the show). In a particularly bold move, he even drilled out the center of watch crowns to install plastic light pipes for LED illumination.

Last year we saw a build that crammed a Raspberry Pi into the same Diamond Select tricorder toy to excellent effect. Now somebody just needs to combine both projects and they’ll have the slickest tricorder in the Alpha Quadrant.

Making Fancy Dice PCBs At Home

These days, it’s easy to get high-quality custom PCBs made and shipped to your door for under $50. It’s something that was unfathomable only a decade ago, but now it’s commonplace. However, it doesn’t mean that the techniques of home PCB production are now completely obsolete. Maybe you live somewhere a little off the beaten track (Australia, even!) and need to iterate quickly on a project, or perhaps you’d like to tinker with the chemical processes involved. For your learning pleasure, [Emiliano] decided to share some tips on making SMD-ready PCBs with the TinyDice project.

The actual project is to create a small electronic dice, and [Emiliano] touches on the various necessary considerations such as how to decrease power consumption, and how to source good quality, organic random numbers from your local microcontroller. Though its far from an exhaustive discussion on either topic, it shows an understanding of the deeper factors at play here.

However, the real meat of the write-up is the PCB production process. The guide goes through several stages of etching to not only prepare the PCB but also to add solder mask and produce a solder paste stencil as well using an aluminum can. This gives the boards that colored finish we’re all used to and lets the boards be reflowed for easy SMD assembly.

It’s a tidy guide as to how to approach producing your own boards to be used with SMD components, and it’s complete with clear photos and instructions throughout. If you want to take your designs up another notch, why not consider putting your components inside the circuit board?

From Cop Car Data Terminal, To Retro Computer

It is possible that you will have lived your life without ever coming into contact with a Motorola MDT9100-T. The data terminal of choice for use in police cars across the globe was a computer with a full-sized QWERTY keyboard, a small CRT display, a mainboard sporting an Intel 386SX processor, and a custom version of Windows 3.1. [Trammell Hudson] and some friends from NYC Resistor scored some MDT9100s in an online auction and found them to be just too good an opportunity not to crack them open and see what could be done.

The custom Windows install could be bypassed with a DOS prompt for some period demoscene action, but [Trammell] wanted more. The 386SX wasn’t even quick when it was new, and this computer deserved the power of a BeagleBone! A custom cape was created on a prototyping cape to interface with the MDT9100 header carrying both keyboard and video. A bit of detective work revealed the display to be a 640×480 pixel mono VGA. The ‘Bone’s LVDS output can drive VGA through a resistor ladder DAC with the aid of an appropriate device tree overlay. The keyboard was then taken care of with a Teensy working as a USB device, resulting in a working Linux computer in the shell of an MDT9100.

It’s always good to see old technology brought up to date. Amusingly a couple of years ago we reported on the death of VGA, but retro projects like this one mean it’ll be a long time before we’ve heard the last of it.