When A CRT Isn’t Retro Enough: LEDs

When we think of an old-style computer terminal, it has a CRT screen: either one of the big 1970s VDUs with integrated keyboard, or maybe one from a later decade with more svelte styling. You would have found other displays in use in previous decades though, and one of them came our way that we think it worthy of sharing.

16 segments in action. (PD) Wikimedia Commons.

[Dan Julio] was given several tubes of Siemens DL1416B 4-digit 17-segment LED displays by a friend, and decided to use them as an unusual retro display for his terminal project. These devices are an alphanumeric display with a parallel interface that can show a subset of the ASCII character set as well as a cursor. He had 213 of them, so made plans for a 64 character by 16 line display, however on discovering a quantity of the parts were non-functional he had to scale back to 12 lines of 48 characters.
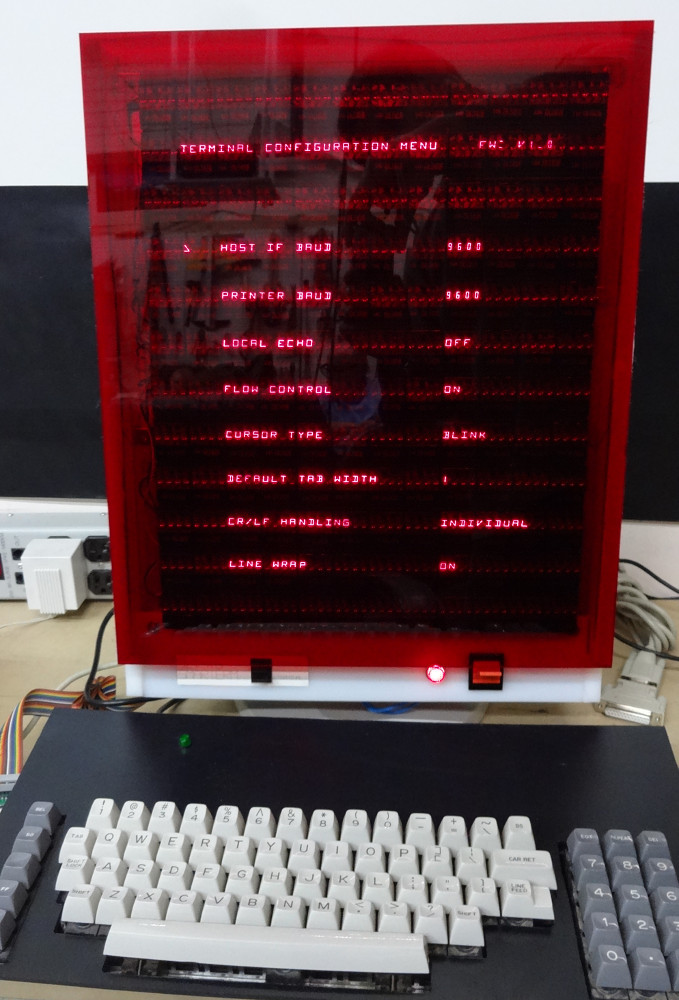
The terminal in action.

The displays are mounted on PCBs in groups of four, controlled by a PIC16F1459 and some shift registers. These boards are then daisy-chained via a TTL serial line. The whole display shares one of the three serial ports on a Teensy 3.1 with his retro keyboard that has its own PIC controller, the others serving a serial printer port and the terminal serial port. The Teensy software has two modes: serial terminal or a Tiny Basic interpreter, and the relevant repositories are linked from the project page.

Since each set of DL1416Bs takes 250 mA, the whole display consumes about 9 A at 5 volts. On top of that the keyboard uses another 500 mA, so a sufficiently powerful supply had to be incorporated. This is mounted along with the Teensy in a very well-made enclosure, and the whole is mounted on what looks like a surplus monitor stand for a very professional finish.

To take us through the terminal’s features he’s posted a YouTube video that we’ve placed below the break. It comes across as a surprisingly usable machine, as he logs into a Raspberry Pi and edits a file, and takes us through some features of the BASIC interpreter.
Continue reading “When A CRT Isn’t Retro Enough: LEDs”

Hollow State Receiver

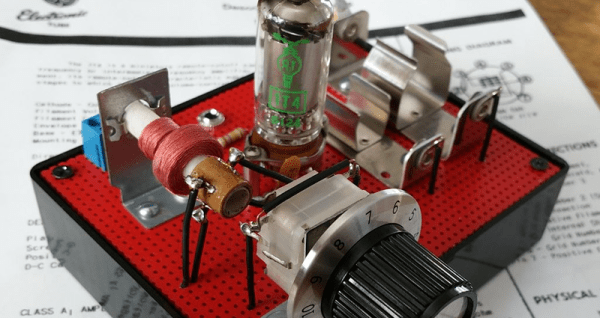
[Netzener] received a Radio Shack P-Box one tube receiver as a gift. However, at the time, his construction skills were not up to the task and he never completed the project. Years later, he did complete a version of it with a few modern parts substitutions. The radio worked, but he was disappointed in its performance. Turns out, the original Radio Shack kit didn’t work so well, either. So [Netzener] did a redesign using some some old books from the 1920’s. The resulting radio — using parts you can easily buy today — works much better than the original design.

The most expensive part of the build was a 22.5 V battery, which cost about $25. However, you can get away with using three 9 V batteries in series if you want to save some money. The battery provides the plate voltage for the 1T4 vacuum tube. A more conventional AA battery drives the tube’s filament. The original Radio Shack design relied on a variable inductor for tuning. These are difficult to find now, so [Netzener] uses a more conventional adjustable coil and a common tuning capacitor.

As an extra touch, [Netzener] painted the perf board to look as much like the original Radio Shack kit as possible. You can see from the pictures, it came out looking very good. If this isn’t challenging enough for you, maybe you want to roll your own tube. Or maybe you should just settle for the socket.

Continue reading “Hollow State Receiver”

A Vintage Interface For A Modern Radio

The arrival of affordable software defined radio technologies over the last couple of decades has completely changed the way that radio amateurs and other radio enthusiasts approach the airwaves. There’s a minor problem with most software defined receivers though, being by their nature software driven they will usually rely on a host computer for their interface. Thus the experience is one of clicking mouse buttons or using keyboard shortcuts rather than the mechanical analogue dial interfaces that provided easy control of older radios.

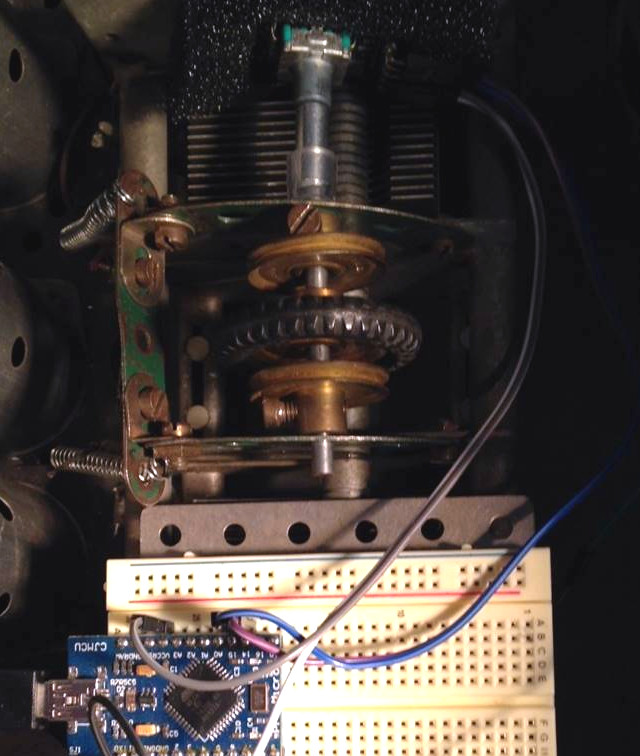
Meccano encoder mounts for the win!

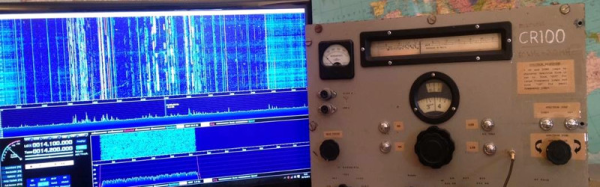
This is a problem that has been addressed by [Jon Hudson, G4ABQ], with one of his SDRplay receivers. He’s mounted it and its control PC in the chassis of a very aged and non-functional Marconi CR100 communication receiver, and given it a control interface that only uses the Marconi’s front panel controls (YouTube link). A rotary encoder has been grafted onto the Marconi tuning capacitor with what looks like some Meccano, and in turn that feeds an Arduino which behaves as a keyboard for the benefit of the PC. Some extra buttons have been added for mode selection, spectrum zoom and shift, and care appears to have been taken to give their labels a period feel. Arduino code came courtesy of [Mike Ladd, KD2KOG]. The result is a very controllable SDR receiver, albeit one in a rather large case.

If you are interested in the project then we are told that it will be on the RS stand at Electronica in Munich next week, meanwhile we’ve put the video below the break.

Continue reading “A Vintage Interface For A Modern Radio”

Rotary Cell Phone: Blast From A Past That Never Was

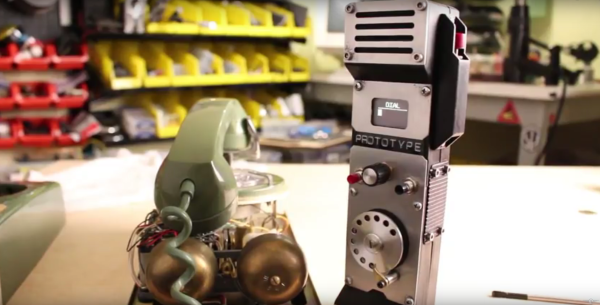
The 1970s called and they want their rotary dial cell phone back.

Looking for all the world like something assembled from the Radio Shack parts department – remember when Radio Shack sold parts? – [Mr_Volt]’s build is a celebration of the look and feel of a hobbyist build from way back when. Looking a little like a homebrew DynaTAC 8000X, the brushed aluminum and 3D-printed ABS case sports an unusual front panel feature – a working rotary dial. Smaller than even the Trimline phone’s rotating finger stop dial and best operated with a stylus, the dial translates rotary action to DTMF tones for the Feather FONA board inside. Far from a one-trick pony, the phone sports memory dialing, SMS messaging, and even an FM receiver. But most impressive and mysterious is the dial mechanism, visible through a window in the wood-grain back. Did [Mr_Volt] fabricate those gears and the governor? We’d love to hear the backstory on that.

This isn’t the first rotary cell phone hybrid we’ve featured, of course. There was this GSM addition to an old rotary phone and this cell phone that lets you slam the receiver down. But for our money a rotary dial cell phone built from the ground up wins the retro cool prize of the bunch.

Continue reading “Rotary Cell Phone: Blast From A Past That Never Was”

Primer On Servos Hits All The Basics

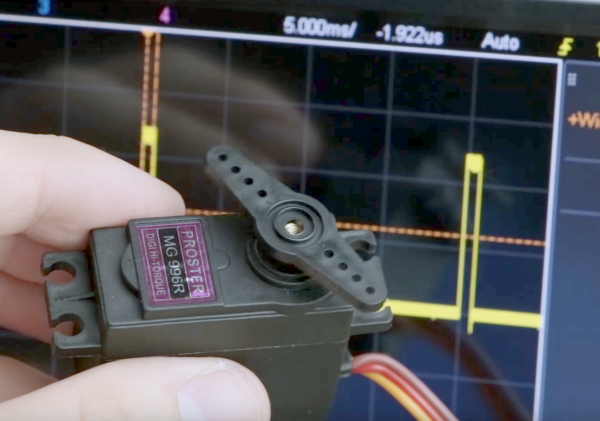
Servos are pretty basic fare for the seasoned hacker. But everyone has to start somewhere, and there’s sure to be someone who’ll benefit from this primer on servo internals. Who knows – maybe even the old hands will pick up something from a fresh perspective.

[GreatScott!] has been building a comprehensive library of basic electronics videos over the last few years that covers everything from using a multimeter to programming an Arduino. The last two installments delve into the electromechanical realm with a treatment of stepper motors along with the servo video below. He covers the essentials of the modern RC-type servo in a clear and engaging style that makes it easy for the newbie to understand how a PWM signal can translate into positional changes over a 180° sweep. He shows how to control a servo directly with an Arduino, with bonus points for including a simple 555-based controller circuit too. A quick look at the mods needed to convert any servo to continuous rotation wraps up the video.

If [GreatScott!]’s video whets your appetite for more, be sure to check out [Richard Baguley]’s deeper dive into servos. And when you’re ready to put your new-found knowledge into practice, maybe a nice project would be to convert a hobby servo into a linear actuator.

Continue reading “Primer On Servos Hits All The Basics”

Vintage Radio Transformed Into Custom PC Case

We see a lot of old radio restoration projects around here, and we have to admit to having mixed emotions about some of them. It seems a shame to go through the effort to lovingly restore a vintage Art Deco case only to stuff it with a Raspberry Pi and Bluetooth. Seems like if you’re going to restore a radio, go all the way and bring the original electronics back to life. But this radio “restoration” avoids that issue altogether by cleverly concealing a full PC build in a vintage radio case.

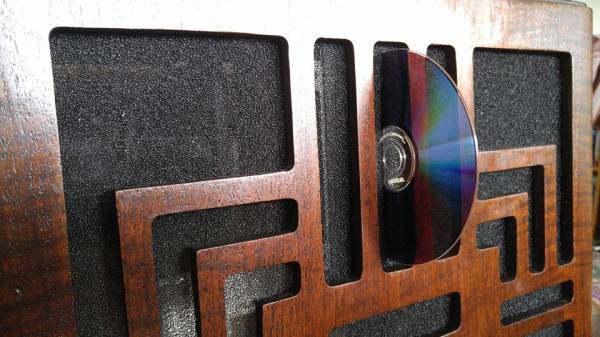
u3nwbpdClearly a labor of love, [SolomonZaraa]’s two-year effort guts the radio but still manages to pay homage to the original beauty of the 1939 vintage Philco 39-80 “tombstone” portable AM radio. The first design decision was to retask the original tuning dial as an analog thermometer using an Arduino and a servo. Then a new back was added with an extension for the motherboard and PSU, a drive cage was added, and a surprise slot for the DVD drive was built into the speaker grille. Nice brass trim and a good refinishing of the case resulted in an impressive and unexpected presentation.
You don’t have to go far in the Hackaday Wayback machine to find an antique radio with updated audio, but we’re pretty sure this is the first antique radio PC case mod we’ve seen. Nicely done, [Solomon]!

[via r/DIY]

Sometimes Square Is Square: Basic Machinist Skills

Is it possible to make an entertaining video about turning a cube of aluminum into a slightly cubier cube? As it turns out, yes it is, and you might even learn something along with the sight gags and inside jokes if you watch [This Old Tony] cover the basics of squaring up stock.

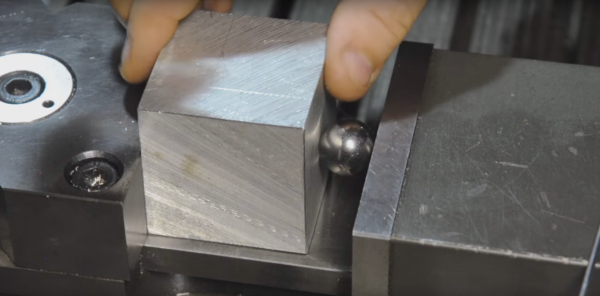
Whether you’re working in wood or metal, starting with faces that are flat, smooth and perpendicular is the key to quality results. [Tony] is primarily a machinist, so he works with a nice billet of aluminum and goes through some of the fundamental skills every metalworker needs to know. When you’re working down to the thousandths of an inch it’s easy to foul up, and tricks such as using a ball bearing between the vise jaws and the stock to prevent canting are critical skills. He covers tramming the mill, selecting which faces to cut and in which order, and ways to check your work on the surface plate and make any corrections if and when things go wrong. Look for cameos by fellow machinist [Abom79] and [Stefan Gotteswinter], including one with [Stefan] in a very compromising position. But a ball in a vise and no [AvE] reference? C’mon!

[Tony] makes a potentially tedious subject pretty entertaining by keeping things light, and we appreciate both the humor and attention to detail. He’s turned out some great videos that we’ve covered before, like making your own springs or a shop-built boring head, and his stuff is really worth checking out.

Continue reading “Sometimes Square Is Square: Basic Machinist Skills”