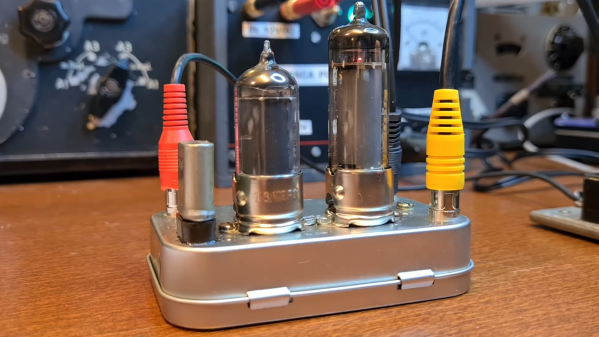
Much like vinyl records, tube amplifiers are still prized for their perceived sound qualities, even though both technologies have been largely replaced otherwise. The major drawback to designing around vacuum tubes, if you can find them at all, is often driving them with the large voltages they often require to heat them to the proper temperatures. There are a small handful of old tubes that need an impressively low voltage to work, though, and [J.G.] has put a few of them to work in this battery-powered audio tube amplifier.
The key to the build is the Russian-made 2SH27L battery tubes which are originally designed in Germany for high-frequency applications but can be made to work for audio amplification in a pinch. The power amplifier section also makes use of 2P29L tubes, which have similar characteristics as far as power draw is concerned. Normally, vacuum tubes rely on a resistive heater to eject electrons from a conductive surface, which can involve large amounts of power, but both of these types of tubes are designed to achieve this effect with only 2.2 volts provided to the heaters.
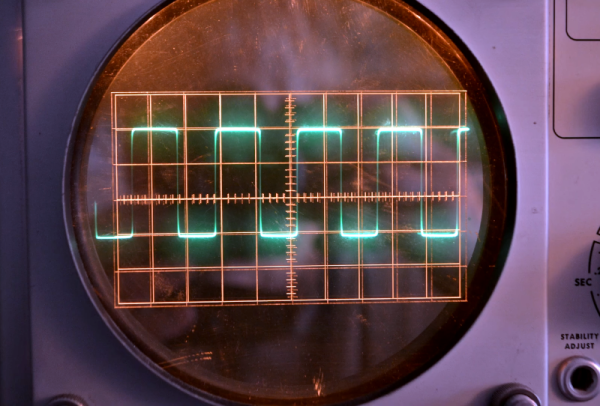
[J.G.] is powering this amplifier with a battery outputting 5V via a USB connection, and driving a fairly standard set of speakers borrowed from a computer. While there aren’t any audio files for us to hear, it certainly looks impressive. And, as it is getting harder and harder to find vacuum tubes nowadays, if you’re determined to build your own amplifier anyway take a look at this one which uses vacuum tubes built from scratch.