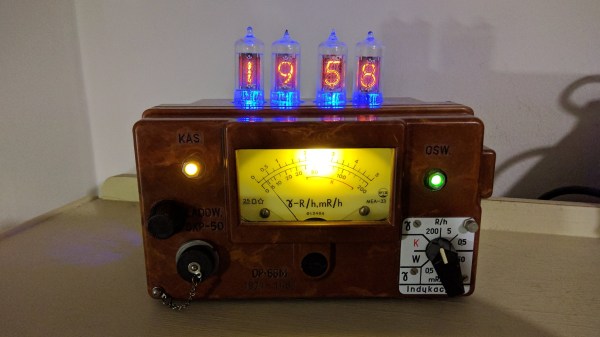
Say what you will about the centrally planned economies of the Soviet bloc during the Cold War, but their designs had a brutal style all their own. When one comes across an artifact from that time, like a defunct Polish Geiger counter from 1971, one celebrates that style the only way possible: by sticking Nixies tubes on it and making it into a Geiger clock.
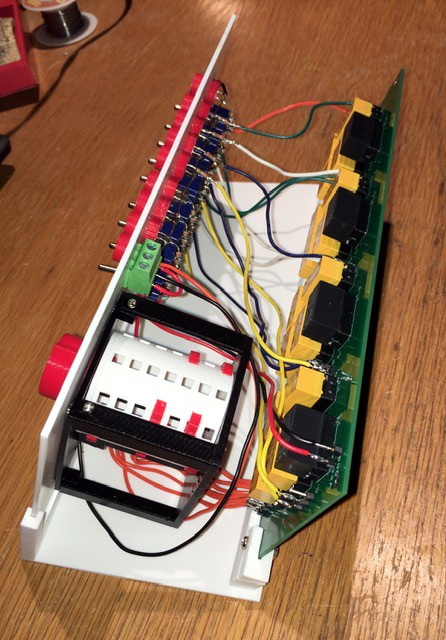
Right off the hop, we’ve got to say that we’re in love with the look of [Tom Sparrow]’s build. And we’ll further stipulate that most of the charm comes from the attractive Bakelite case of the original Geiger counter. This looks like the real deal, with the marbleized look presumably caused by different color resins mixing in the mold. [Tom] did an admirable job bringing back the original shine with some polish and elbow grease; no doubt the decades had taken their toll on the original shine. The meter was gutted to make room for the clockworks, which is an off-the-shelf Nixie module. The tubes stick through holes drilled in the top; a pair of LEDs adorn the front panel and an incandescent bulb provides a warm glow behind the original meter. Combined with the original rotary switch and labels, the whole thing has a great look that’s perfect for a desk.
We’ve featured a lot of retro-classic Nixie builds, from digitizing a 1940s radio to a 1970s multimeter turned into a dice-roller. As for Nixie clocks, we’re just glad to take a break from the Nixie steampunk trend for a bit.
[via Dangerous Prototypes]