Astrophotography is one of those things you naturally assume must be pretty difficult; surely something so awesome requires years of practice and specialized equipment which costs as much as your car. You shake your fist at the sky (since you have given up on taking pictures of it), and move on with your life. Another experience you’ll miss out on.
But in reality, dramatic results don’t necessarily require sticker shock. We’ve covered cheap DIY star trackers before on Hackaday, but this design posted on Thingiverse by [Tinfoil_Haberdashery] is perhaps the easiest we’ve ever seen. It keeps things simple by using a cheap 24 hour clock movement to rotate a GoPro as the Earth spins. The result is a time-lapse where the stars appear to be stationary while the horizon rotates.
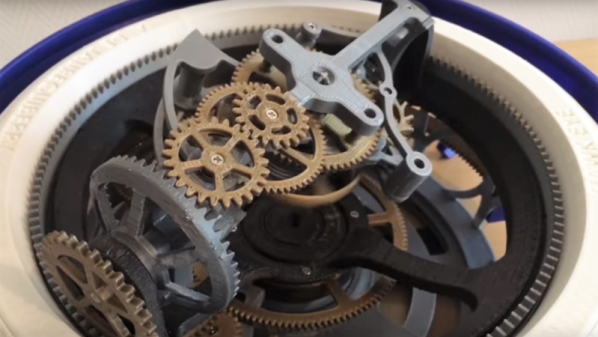
Using a 24 hour clock movement is an absolutely brilliant way to synchronize the camera with the Earth’s rotation without the hoops one usually has to jump through. Sure you could do with a microcontroller, a stepper motor, and some math. But a clock is a device that’s essentially been designed from the ground up for keeping track of the planet’s rotation, so why not use it?
If there’s a downside to the clock movement, it’s the fact that it doesn’t have much torque. It was intended to move an hour hand, not your camera, so it doesn’t take much to stall out. The GoPro (and other “action” cameras) should be light enough that it’s not a big deal; but don’t expect to mount your DSLR up to one. Even in the video after the break, it looks like the clock may skip a few steps on the way down as the weight of the camera starts pushing on the gears.
If you want something with a bit more muscle, we’ve recently covered a very slick Arduino powered “barn door” star tracker. But there’re simpler options if you’re looking to get some shots tonight.