If you’re going to do it yourself, you might as well outdo yourself. That seems to be the thinking behind this scratch-built CNC mill, and it’s only just getting started.
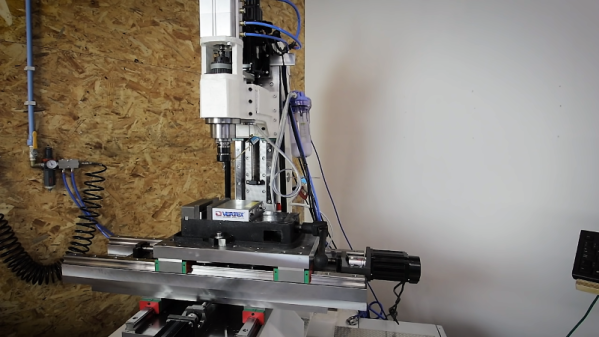
According to [Kris Temmerman], the build will cost about $10,000 by the time he’s done. So it’s not cheap, and a personal CNC from Tormach can be had for less, but that’s missing the point entirely. [Kris] built most of the structural elements for the vertical mill from cheap, readily available steel tubing, of the kind used for support columns in commercial buildings. Mounted to those are thick, precision-ground steel plates, which eat up a fair fraction of the budget. Those in turn hold 35 mm linear bearings and ball screws for the three axes, each powered by a beefy servo. The spindle is a BT30 with a power drawbar, belt-driven by an external motor that [Kris] doesn’t share the specs on, but judging from the way it flings chips during the test cut in the video below, we’d say it’s pretty powerful.
There’s still plenty to do, not least of which is stiffening the column; perhaps filling it with epoxy granite would do the trick? But it sure looks like [Kris] is building a winner here, and if he keeps the level of craftsmanship up going forward, he’ll have a top-quality machine on his hands.
Continue reading “Steel Tubes And Ground Plates Form The Skeleton Of This DIY Vertical CNC Mill”