Incremental Sheet Forming With A CNC Machine

If you want to form a piece of sheet metal into a shape, you’ll probably think about using a die. That’s certainly a great way to do it, but it presupposes you can create or purchase the die, which may be a showstopper for small projects. [Dardy-7] has worked out how to use a lesser-used technique — incremental sheet forming — to get similar results with a CNC machine. The idea is to trace out the form on the sheet metal with a round blunt tool.

He got good results using an inexpensive dapping tool, although he’s seen other use heated titanium ball bearings. In addition, he’s worked out how to adapt existing tool paths, like the ones you might download from the Internet, to use with this technique. You can see a video of the workflow below.

Continue reading “Incremental Sheet Forming With A CNC Machine”

AT-ST High Chair Elevates Lucky Jedi Youngling

As a new parent, there’s lots you have to do. You have to buy a car seat, get the baby’s room ready, figure out daycare; all the boring but unavoidable minutiae of shepherding a tiny human. But for the more creative types, that list might include warming up the 3D printer or putting a fresh bit in the CNC, as there’s no better way to welcome a little one into the world than giving them some custom gear to get started with.

That’s certainly been the plan for [Matthew Regonini], who’s been showering his son with DIY playthings. He recently wrote in to tell us about his awesome AT-ST high chair build that manages to turn the drudgery of getting a baby to eat into an epic worthy of a John Williams score.

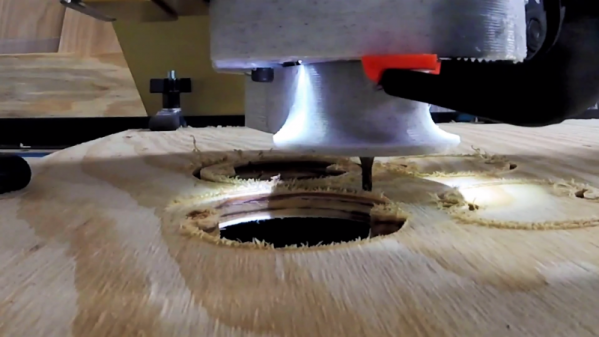
This isn’t the first time [Matthew] has turned dead trees into Imperial hardware. Last year we covered his fantastic AT-AT rocker which utilized the same construction techniques. The parts are cut out of plywood with his CNC, separated, cleaned up on a spindle sander, and finally assembled with wood glue and a few strategic fasteners. The depth and level of detail he’s able to achieve when the individual pieces are stacked up is exceptionally impressive. If builds like these don’t get you thinking about adding a CNC to your workshop, nothing will.

As with the AT-AT, the finish on the high chair is simply a healthy application of polyurethane. This keeps the wood from being porous (important as this build will be seeing its fair share of food and liquids) while retaining a natural look. Some might be tempted to paint it up in appropriate Imperial colors, but that might be a bit imposing considering its intended occupant.

Really, the only downside with this build is how quickly his son will outgrow it. The obvious solution to the problem is a constant supply of fresh babies to pilot it, but that’s one type of creation that we don’t generally detail here on Hackaday. If you have questions, ask your parents.

Incidentally, it’s starting to look like we’ve got a plywood arms-race going on. We’re excited to see somebody take it to the next level. A little scared, but mainly excited.

Continue reading “AT-ST High Chair Elevates Lucky Jedi Youngling”

Optical Tach Addresses The Need For Spindle Speed Control

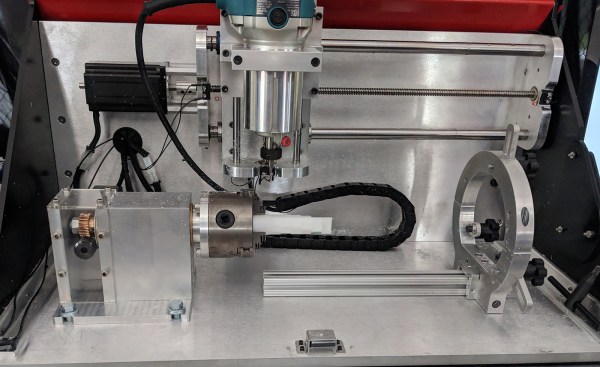
With CNC machines, getting the best results depends on knowing how fast your tool is moving relative to the workpiece. But entry-level CNC routers don’t often include a spindle tachometer, forcing the operator to basically guess at the speed. This DIY optical spindle tach aims to fix that, and has a few nice construction tips to boot.

The CNC router in question is the popular Sienci, and the 3D-printed brackets for the photodiode and LED are somewhat specific for that machine. But [tmbarbour] has included STL files in his exhaustively detailed write-up, so modifying them to fit another machine should be easy. The sensor hangs down just far enough to watch a reflector on one of the flats of the collet nut; we’d worry about the reflector surviving tool changes, but it’s just a piece of shiny tape that’s easily replaced.  The sensor feeds into a DIO pin on a Nano, and a small OLED display shows a digital readout along with an analog gauge. The display update speed is decent — not too laggy. Impressive build overall, and we like the idea of using a piece of PLA filament as a rivet to hold the diodes into the sensor arm.

Want to measure machine speed but don’t have a 3D printer? No worries — a 2D-printed color-shifting tach can work too.

Continue reading “Optical Tach Addresses The Need For Spindle Speed Control”

Review: LinkSprite Mini CNC

It’s a great time to be a hobbyist. No matter how you feel about the Arduino/Raspberry Pi effect, the influx of general enthusiasm and demand it has created translates to better availability of components, a broader community, and loads of freely available knowledge. When people have access to knowledge and ideas, great things can happen. Tools that were once restricted to industrial use become open source, and the price of entry-level versions goes into a nosedive.

As we’ve seen over the last several years, the price of cheap 3D printers keeps falling while the bar of quality keeps rising. It’s happening with laser cutters and carving tools, too. Strolling through Microcenter a few weeks ago, I spotted a new toy on the back wall next to the 3D printers. It was LinkSprite’s desktop mini CNC. They didn’t have one out on display, but there were two of them in boxes on the shelf. And boy, those boxes were small. Laughably small. I wondered, could this adorable machine really be any good? To some, the $200 price tag suggests otherwise. To me, the price tag made it justifiable, especially considering that the next price point for a hobby CNC mill is at least twice as much. I took my phone out and stood there frantically looking for reviews, documentation, anything that was available. It seemed that the general, if sparse consensus is that this thing isn’t a total waste of money. Oh, and there’s a wiki.

According to LinkSprite’s wiki, this little machine will engrave wood, plastic, acrylic, PVC, and PCBs. It will specifically not engrave metal (PCB copper notwithstanding). I’m a bit leery of the chemicals used in the PCB etching process, so the idea of engraving them instead was especially tempting. I pulled the trigger.

Continue reading “Review: LinkSprite Mini CNC”

Man-in-the-Middle Jog Pendant: Two Parts Make Easier Dev Work

In a project, repetitive tasks that break the flow of development work are incredibly tiresome and even simple automation can make a world of difference. [Simon Merrett] ran into exactly this while testing different stepper motors in a strain-wave gear project. The system that drives the motor accepts G-Code, but he got fed up with the overhead needed just to make a stepper rotate for a bit on demand. His solution? A grbl man-in-the-middle jog pendant that consists of not much more than a rotary encoder and an Arduino Nano. The unit dutifully passes through any commands received from a host controller, but if the encoder knob is turned it sends custom G-Code allowing [Simon] to dial in a bit acceleration-controlled motor rotation on demand. A brief demo video is below, which gives an idea of how much easier it is to focus on the nuts-and-bolts end of hardware when some simple motor movement is just a knob twist away.

Continue reading “Man-in-the-Middle Jog Pendant: Two Parts Make Easier Dev Work”

PCB Production On The Sienci Mill One

A complete start to finish electronics prototyping workshop is nirvana for many of us: being able to go from design on the computer to real hardware without having to get up from your rolling chair. The falling prices of 3D printers have helped make at least part of this a reality: $200 USD is enough to get you a printer that can churn out decent looking enclosures. But there’s more to producing your own hardware than creating slick looking project boxes; at some point you’ll need to put some electronics in there.

For [Chuck Hellebuyck] at least, the last piece of the puzzle has just fallen into place. He’s recently put up a YouTube video describing how he converted his $399 Sienci Mill One into a capable PCB mill. With a 3D printer and this new PCB mill, he’s happy to say he can now go from concept to production all on the same workbench.

The Sienci Mill One is a solid enough mill in its own right but did need some modification to attain the accuracy necessary for cutting at a depth of only .9 mm. First, a block of wood was cut to the same size as the original plastic bed of the Sienci, and then the mill itself was used to drill holes through the wood block and plastic bed. The wood was attached to the bed using a nut and bolt in each corner, being sure to torque it down enough that the head of the bolt is pulled down flush with the surface of the wood.

Pulling the head of the bolts flush wasn’t just to keep the surface free of any snags, [Chuck] uses them in conjunction with a probe in the mill’s chuck as a simple way of adjusting the Z height. With a continuity meter attached between the two, he could lower the probe down until they were touching just enough to make a circuit.

Click through the break for the rest of the story!

Continue reading “PCB Production On The Sienci Mill One”

Improving Cheap Laser Engravers For PCB Fabrication

A few months ago, [Marco] picked up a cheap, cheap, cheap laser engraver from one of the familiar Chinese resellers. It’s a simple affair with aluminum extrusions, a diode laser, and a control board that seems like it was taken from a 3D printer controller designed five years ago. Now, [Marko] is building some upgrades for this engraver and his PCB production skills have gone through the roof.

The laser engraver [Marko] picked up is called the EleksMaker, and lucky for him there are quite a few upgrades available on Thingiverse. He found two 3D printable parts, one that keeps the belt parallel to the aluminum extrusion, and another that provides adjustable x-axis tightness on the belt. With these two mods combined, [Marko] actually has a nice, smooth motion platform that’s more precise and makes better engravings.

These upgrades weren’t all 3D-printable; [Marko] also got his hands on a few Trinamic TMC2130 stepper motor drivers. These stepper drivers are the new hotness in 3D printing and other desktop CNC machines, and looking at the waveform in an oscilloscope, it’s easy to see why. These drivers produce a perfectly smooth waveform via interpreted microstepping, and they’re almost silent in operation. That’s terrible if you want to build a CNC chiptune player, but great if you want smooth engraving on a piece of copper clad board.

This project has come a long way since the last time we took a look at it a few months ago, and the results just keep getting better. [Marko] is making real PCBs with a laser engraver that cost less than $200, and the upgrades he’s already put into it don’t add up to much, either. You can take a look at [Marko]’s progress in the video below.

Thanks [dechemist] for the tip.

Continue reading “Improving Cheap Laser Engravers For PCB Fabrication”