Back of the dock shown. You can see that the dock is milled out of a massive chunk of aluminium, and you can see the charging, HDMI and Ethernet ports being accessible on the back.

Nintendo Switch Stock Dock Imperfect? Mill Your Own!

Despite the seat of honor it enjoys in literally millions of households, the official Nintendo Switch Dock is certainly far from perfect. For one, it’s not milled out of a hefty block of aluminum. A less apparent but no less important issue is that the ports are positioned kind of awkward – [Kevin] from Modified believes that the USB ports should be facing the front side, while the HDMI, Ethernet, and charging inputs should be on the backside — a reasonable position. He set out to fix both of these problems at the same time, and tells us the CNC-heavy rebuild story in a short but captivating video.

The original dock consists of two PCBs, and these two boards are the only thing [Kevin] didn’t redesign from scratch. As they’re connected with a flexible cable, he could freely rotate and thus completely reposition the ports-equipped board without soldering. He added some standoffs to secure this board to the case, and after 3D printing a few iterations for test-fitting, the milling went on for all of us to marvel at.

The resulting dock is pretty, functional, and even has some extra features — for instance, the “i” in the embossed Nintendo logo lights up when the dock is in use. In no small part due to the Nintendo logo, we don’t expect this one to grace store shelves, but we hope that it provides inspiration to other makers to do their builds. If you like this rebuild and crave more, whether you’re looking for inspiration, CNC work insights, or pretty milling videos, [Kevin]’s milled Xbox case project is an excellent “Watch next” choice.

Continue reading “Nintendo Switch Stock Dock Imperfect? Mill Your Own!”

Billet Machining A Special Xbox

The world of console modding has delivered us some amazing projects over the years, usually rendering an original into a completely different form factor. [Modified] has done a special bit of console modding on an Xbox Series X, with the unusual result of keeping exactly the same form factor. What makes it special? His Series X has been given a new case, almost identical to the original, but instead of molded plastic it’s machined entirely from a single billet of aluminium stock.

From one perspective it’s a slightly crazy endeavor — pushing the limits of his mill to remove 90% of the stock. But from another it’s an interesting tale of how to approach such a project, of the challenges in reaching further into a workpiece than the tooling is designed for, and also of the cooling for the Xbox itself. Sure he could have made it from aluminium plate and screwed it together, but in doing so he’d have denied us the chance to follow a machining adventure.

The result is an Xbox that’s nominally the same as when it left the factory, but which looks so much cooler. Oddly the aluminum doesn’t act as a heatsink because the console is air-cooled, but particularly on the bottom there are more holes than were found in the original. On the front is an engraving of Master Chief from Halo 2‘s cover art which really puts the finishing touch on the build — though we wonder whether it might benefit from a little resin to make it stand out a bit.

Hungry for more Series X case mods? They don’t come bigger than this one!

Continue reading “Billet Machining A Special Xbox”

Testing An Inexpensive CNC Spindle

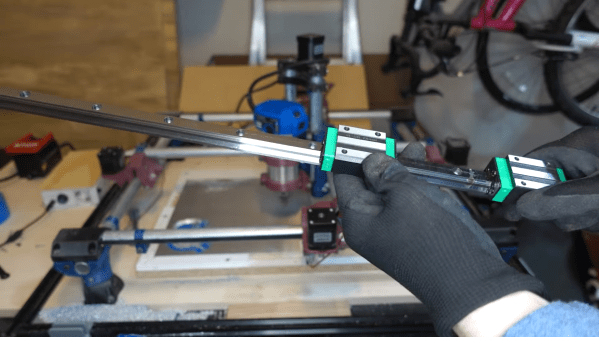
The old saying “you get what you pay for” is a cautionary cliché, but is directly contrary to several other common sayings. In the case of [Spikee]’s planned CNC machine build, he took the more adventurous idiom of “no risk, no reward” to heart when he purchased these spindles for the machine from AliExpress. While the delivered product seemed fine, there were some problems that needed investigations.

Upon delivery of the spindle, everything seemed to work correctly out-of-the-box. Even the variable frequency drive, which was programmed at the factory, was working properly. But at around 8000 rpm the machine would begin shaking. The suspected part causing the vibration was the tool holder, so after checking the machine’s runout and also using a specialized vibration sensor this was confirmed to be the case.

Luckily [Spikee] was able to get a refund on the tool holders since they were out of spec, but still has a quite capable spindle on his hands for an excellent price. Without some skills in troubleshooting he might have returned the entire machine unnecessarily. If you are looking for some other ideas in setting up an inexpensive CNC machine, you might also like to look at BLDC motors from a remote control vehicle.

Engraving A Puzzle Box? Here’s A Collection Of Single-Line Cryptex Fonts

Here’s a neat resource from [MSRaynsford] that is worth bookmarking for anyone who gets creative with laser engravers, CNC routers, or drawing robots: SVGFonts are single-line symbol fonts that [MSRaynsford] created for his laser-cut and engraved cryptex puzzle boxes. They provide an easy way to engrave text as symbols.

Single-line fonts for engraving that include a runic-looking alphabet, a Greek-inspired set, and two symbol sets based on Flag Semaphore.

CNC engraving of letters and symbols is one of those things that seems simple, but is actually more complex than it may appear. It is often desirable to use a tool to engrave symbols with a single line, in much the same way a person would write them if using a pen. But fonts and art for letters and numbers aren’t normally a single line. Thankfully there is a solution in the form of Hershey text, an extension for which is included in Inkscape. It turns out that Hershey Fonts have their origin back in the 1960s, when the changing landscape of electronics and industry opened new opportunities and demanded new solutions.

That’s why, when [MSRaynsford] needed fonts in different styles and symbols for creating his puzzle boxes, he had to design them himself and they had to be single-line vector art, just like Hershey Text. The small collection includes English letters designed to resemble a runic alphabet, a Greek-inspired series, and two coded alphabets based on flag semaphore.

Grab ’em on GitHub, because you never know when you’ll need to make a quick cryptex.

Upcycling Flat Scraps With Open Source Tools

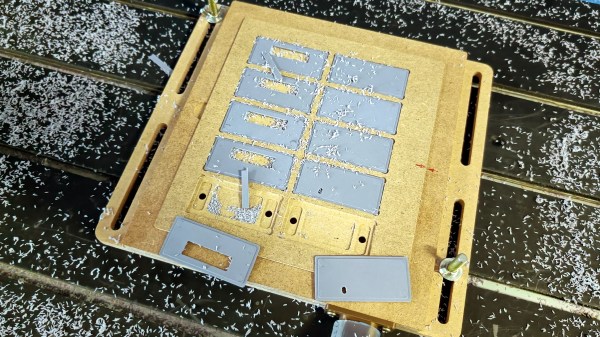
If you have any sort of device that cuts like a CNC mill or a laser cutter, you probably generate a lot of strange-looking scrap material. Most of us hate to throw anything away, but how do you plan to use all these odd shapes? [Caddzeus] has an answer.  Using a camera and some software he digitizes the shapes accurately into a form usable in his CAD package of choice.

The process involves setting up some targets with known dimensions that will appear in the photograph. This allows the picture to be taken without being overly concerned about the distance to the camera or the angle.

Using GIMP, he adjusts the images to remove the perspective. He then brings the image into Inkscape where he can accurately scale and trace the shape.

There are detailed instructions — including videos — but if you know how to use these tools, you can probably figure it out for yourself. This technique would be useful, too, if you wanted to get an outline of something you intend to mill or cut into your CAD program as a reference. We like to do this with a laser cutter so you can burn the outline of something you are engraving or cutting on a piece of paper before you start and easily align the workpiece to the laser.

Of course, a small part could surrender its image to a conventional scanner and you can use a similar technique to adjust the scale. If you start using Inkscape a lot, you’ll want more plugins. You never know what you might build from some scrap odds and ends.

Continue reading “Upcycling Flat Scraps With Open Source Tools”

Tracing In 2D And 3D With Hall Effect Sensors

Pantographs were once used as simple mechanical devices for a range of tasks, including duplicating simple line drawings. [Tim] decided to make a modern electronic version that spits out G-Code instead.

The design relies on a 3D-printed pantograph assembly, mounted upon a board as a base. A pair of Hall effect sensors are mounted in the pantograph, which, along with a series of neodymium magnets, can be used to measure the angles of the pantograph’s joints. The Hall sensors are read by an Arduino Nano, which computes the angles into movement of the pantograph head and records it as G-Code. This can simply be displayed on the attached LCD display, or offloaded to a computer for storage.

[Tim] explains the basic theory behind the work in an earlier piece, where he built a set of electronic dividers using the same techniques. He didn’t stop there, either. He also built a more complex version that works in 3D that he calls it the Electronic Point Mapper, which can be used to generate point clouds with a 3D-capable pantograph mechanism.

It’s a neat way to learn about geometry, and could even be useful if you’re doing some work in tracing 2D drawings or measuring 3D objects.

Continue reading “Tracing In 2D And 3D With Hall Effect Sensors”

Testing A Laser Cut Wrench VS A Forged Wrench

It is easy to not think much about common tools like screwdrivers and wrenches. But not for [Torque Test Channel]. The channel does a lot of testing of tools and in the video, below, they test a new wrench that is, oddly enough, laser cut instead of forged like the usual wrench.

You would expect a machined wrench to be weaker than a forged wrench. We were impressed, though, that there is so much difference between wrenches when you start making measurements.

Speaking of measurements, we would like to see more details of the test setups shown both in the video and in some of the video clips included. We did enjoy seeing the examination of the internal grain structure of both wrenches.

Be forewarned. Watching this video is likely going to send you to the computer to buy some new wrenches, especially if you don’t have 30/60 head wrenches.

The real question is why laser cut a wrench? It doesn’t seem like it is actually better than the forged variant. It is more expensive, but the setup costs for forging are higher. Particularly for a tool made in the United States, forging is both expensive and it is difficult to find time on the limited number of large-scale forges left in the country.

Continue reading “Testing A Laser Cut Wrench VS A Forged Wrench”