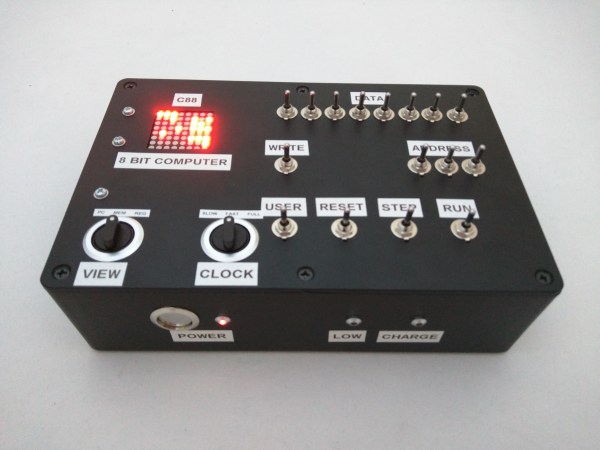
Chromebook Hack Controls Your Television

chromebook_remote_control1

[Michael Kohn] only accomplished about half of what he set out to, but we still think his TV channel switcher from a Chromebook turned out nicely. When starting the project he wanted to include a grid of listing so that he could choose a specific program, but decided that scraping the data was too much work for this go-round.

The Chromebook doesn’t include an IR transmitter so he built one using an MSP430 chip. He had previously built a little transmitter around an AVR chip and was surprised to find that the internal oscillator on that was quite a bit more accurate than on the MSP430. Timing is everything with the Manchester encoded signals used for IR remote controls so he used his oscilloscope to tune the DCO as accurately as possible.

The app shown on the screen was written in Javascript. Google published some example code on using RS232 with the computer; [Michael] used this resource to provide communications between the computer and the microcontroller.

Continue reading “Chromebook Hack Controls Your Television”

Building RAM Into Veronica – The 6502 Computer

ram-for-veronica

It seems strange that RAM is being added to a computer so late in the build, but [Quinn Dunki] must have had it in the back of her mind the whole time because it turns out to be a rather painless experience. For those of you keeping score, this makes her Veronica project Turing complete.

The brightly colored rats nest pictured above connects the new components to the 6502 computer backplane seen in the upper left. [Quinn] decided to go with two 32K SRAM modules which need very little in the way of drive hardware (it’s hanging out on the breadboard to the left). The RAM module will simply listen for its address and react accordingly. There is one hitch regarding a two-phase clock and the need to protect the RAM from erroneous data during the first of those phases.

Getting this all to work actually pointed out a bug in the ROM module she had long ago completed. After picking up on the problem she was able to correct it simply by cutting traces and soldering in jumper wires.

Used Hard Drive Repurposed As A Cotton Candy Machine

hard-drive-cotton-candy-machine

If you’re reading this website, you’re probably someone who likes to take things apart. As such, you probably also have one or more old computer hard drives just sitting around in a parts bin.  Of all the projects you could have for an old drive, here’s an interesting one – A Chinese engineer who operates a hard drive repair and data recovery center decided to turn a used drive into a cotton candy machine.

Possible sanitary concerns set aside, his creation is very cheap and easy to build. Most hackers probably have all the necessary gear just sitting around already. The only parts he used were: a hard drive that still powered up, a generic plastic basin, an aluminum can, a flat round metal tin, and six bicycle spokes.

It might not be pretty, but it works. If you want to create your own, be sure to check out the above link. There’s a full DIY guide complete with step-by-step photos.

[Thanks Fabien]

DIY PC To Telescope Interface Cable

diy.pc.to.telescope.interface.cable

If you’re serious about astronomy these days, you want to have a computer controlled telescope. Although you can easily purchase a pre-made cable that connects the two devices, where’s the fun in that? [Charles], being an avid Maker, has created a nice step by step guide so you can build your own.

This is a great weekend project, and one that even a novice electronics hobbyist should be able to tackle. It’s straight forward, rather quick, and very easy. Strip some insulation off both ends of the cable, then cut off the unneeded wires. (You’ll only be working with three of them.) Prep everything with heat shrink tubing. Crimp one end of the wires into an RJ10 plug, then solder the other end of the wires into a DB9 connector. Secure the heat shrink tubing in place, attach the housings, and you can call it finished!

[Charles] said the whole procedure only took him around 15 minutes. Total cost? Less than $17 in parts.

NANDputer Is Mostly Wiring

We would wager that by weight this project is mostly wiring. We might go as far as betting that the wire outweighs the rest of the components 2 to 1. We’ll keep our fingers crossed that there’s never a loose connection, but for now it seems that [Kevin Horton’s] NAND-based computer project is up and running. Very nearly ever part of the build is based on NAND gates, which is why the point-to-point wiring is so crazy. There is one peripheral board which uses some non-NAND components, but he eventually plans on replacing that to make the system…. pure?

Now get ready for the crazy part. This is just one half of the program counter! There’s another board that looks just like it. The two join at least a half-dozen other boards of similar size and complexity to make a functioning computer. Crazy! The post shares a ton of details, but you can also just skip down after the break to see a video of it running a program.

If you’re wondering how a NAND-based computer works you should make your way through this online course.

Continue reading “NANDputer Is Mostly Wiring”

Workshop Computer Floats Above Bench And Is Nearly Wireless

all-in-one-workshop-computer

[Ezra] used the parts he had lying around to build a self-contained dual screen shop computer. What might one name such a project? Obviously you’d call it the Dr. FrankenComputer.

The lower monitor is a dell desktop flat screen. During prototyping [Ezra] used the stand to support everything. But to keep his work space clear the final version has been mounted to the wall in the corner of his lab. The upper display is the LCD from a Compaq laptop which he wasn’t using. The laptop still works and we believe that’s what is driving the Fedora system. A bracket mounted to the desktop screen’s inner skeleton supports the laptop screen and motherboard. One power supply feeds everything and connects to an outlet in the wall behind the monitors. The keyboard and mouse are wireless, as is the computer’s connection to the network.

The only thing we would worry about in our own shop is sawdust filling the heat sinks and other components of the motherboard. Perhaps his lab is electronic projects only or he has a dust cover that he uses when the system isn’t in use.

Retrotechtacular: Mechanical Targeting Computers

retrotechtacular-mechanical-computer

The device that these seamen are standing around is a US Navy targeting computer. It doesn’t use electricity, but relies on mechanical computing to adjust trajectories of the ship’s guns. Setting up to twenty-five different attributes by turning cranks and other input mechanisms lets the computer automatically calculate the gun settings necessary to hit a target. These parameters include speed and heading of both the ship and it’s target, wind speed and bearing, and the location of the target in relation to this ship. It boggles the mind to think of the complexity that went into this computer.

The first of this seven part series can be seen after the break. The collection covers shafts,  gears, cams, and differentials. Sounds like it would be quite boring to sit through, huh? But as we’ve come to expect from this style and vintage of training film it packs a remarkable number of simple demonstrations into the footage.

Continue reading “Retrotechtacular: Mechanical Targeting Computers”